Creating and Publishing High Quality Screencasts
What is a screencast?
Screencasts are digital recordings of a computer screen, and can include elements such as audio narration, slide presentations or other media. Screencasts are a cost-effective way of providing engaging videos to train end users and customers. When creating a screencast, these five steps are usually followed:
- Plan - what does audience need?, what do you want to cover?
- Organize Content - what systems will be used? Is there any existing content that can be used?
- Record - record the screencast
- Edit - edit the screencast, add titles, transitions, etc.
- Publish - make screencast available to viewers
Screen capture software
There are a variety of screen capturing tools available for both Windows and Mac platforms. Some of the more popular titles are:
- Camtasia (Windows and Mac)
- ScreenFlow (Mac)
- Captivate (Windows and Mac)
There are many websites that offer reviews of these products. Also, most vendors offer trial versions so you can download their software and see which one best meets your needs. We are often asked which software was used for our training videos. These were created using Camtasia and are hosted on our Brightcove Gallery site.
Before you get started
Before you get started with your screencasts, here are a few things to consider.
- Review video analytics - If you have existing videos, reviewing the analytics on those videos may be helpful in setting priorities (i.e. which videos need to be updated first). Video analytics may also help you gauge the viewing habits of your viewers. In general, a series of videos that are one to three minutes long will be better than one longer video.
- Locate any existing content - Check to see if there is any existing content that can be used in your screencast. For example, look for stock video that you might be able to use, code samples, logos, graphics, etc. Being able to reuse content will save you the trouble of having to develop new content just for your screencast.
- Become familiar with your screencasting software - Spend some time with the screencasting software you will be using. Make sure you understand how to set a recording region, recording quality and audio input. You should have a basic understanding of how your software works so you can avoid retakes due to a software setting being configured incorrectly.
- Write a script or have some notes - Think about writing a script for your screencast. This will allow you to put your thoughts on paper so you can send them to others for review. Having all of your thoughts down on paper should help reduce the need to edit your screencast. Keep in mind, when using a script, try to read the script in a casual manner so you don't sound like you are reading one. Even a set of notes with a list of high level topics will help ensure that you cover all of the important points.
- Create a screencast template - When you have decided on the screencasting software you will be using, create a template that includes a standard title, intro and closing and make it available to other team members. This will help ensure that all of your screencasts are consistent and adhere to any corporate branding requirements that you may have.
Useful tools
Below is a set of useful tools and utilities that you may find useful as you edit and publish your screencasts:
- MediaInfo (Mac) and Bitrate Viewer (Windows) - These tools provide detailed audio and video properties for a file.
- VLC - Useful for viewing the bit rate for a video while it is playing. We have used this to diagnose issues with videos pausing during playback. To view bit rate information:
- Mac: Window > Media Information... > Statistics
- Windows: Tools > Media Information > Statistics
- androidscreencast (Mac & Windows) - Allows you to display an Android device display on your Mac or PC. This is useful when you want to capture the display of a device in your screencast.
Tips when recording
Below are some tips that may save you time when recording a screencast:
- Close Email and any type of IM clients
- Mute your office and cell phones
- Turn off tablets, etc. anything that makes noise
- In your browser, make sure you hide any unneeded toolbars or browser extensions
- Check to see if the date/time is being displayed on the screen
- Do a short test recording to check the mic volume
- Avoid showing a browser page that may be outdated quickly
- If you are using screen recording software that lets you record a region, find a utility to size your browser window to whatever your recording size is
- If you are using a script, it may be easier to record the audio first, and then go back and record the screen while the audio is playing
Export settings
After you have recorded and edited your screencast, you need to export it. Most screencasting software offers a host of both predefined and custom settings that can be used for exporting your screencast. Export settings will vary depending on the complexity of the screencast content and the expected connection speeds of the audience. We have found that the following export settings provide a quality screencast:
- Size - We recommend you export your screencast at the same settings you used when recording. For example, if your project was sized and recorded at a resolution of 1920 x 1080, export at that size to avoid having the screencast resized which can result in a loss of quality.
- Bit rate or Data rate - We have seen good quality exports when using settings between 300 kbps and 1200 kbps. A higher bit rate (1200 kbps) is recommended when your screencast includes a talking head and/or more complex animations. Keep in mind that this setting is usually a target bit rate and your bitrate will vary depending on content. Typically, the bitrate when showing just the screen will be a lot lower than when there is a talking head.
- Export Profile - For video settings, we recommend H.264 video encoding using the MAIN profile. Audio should use the AAC profile with a data rate of 96 kbps (128 if your audio track is more complicated than just voices).
Again, the above settings are recommendations and you may need to alter your settings to provide a quality viewing experience to your viewers. If your video is pausing, or if you want to keep the bandwidth requirements lower, you can export at 15fps as this will help keep the bit rate low. The one exception to this is if your video also includes live action video.
We recommend that after exporting your video you use one of the useful tools to check the video bit rate. Remember that the number of renditions created is based on the bit rate of your source file.
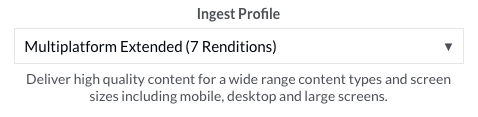
Ingest profile
The ingest profile you select in Beacon will have an effect on the quality of your published screencast. Keep in mind that creating more renditions is not always a good thing. Having multiple renditions with different sizes and bit rates may cause the end user to see a version of your screencast that is pixelated or has blurry text due to the video being resized. Preserving the resolution is key to delivering a legible and clear screencast.
The Dynamic Delivery profiles provided by default in the Upload module provide the option of creating an MP4 rendition. You should create MP4 renditions if you want viewers to be able to download videos or if you will be sharing videos using Brightcove Social. MP4 renditions may also be required to generate video captions. For example, our partner 3Play Media requires that videos have an MP4 rendition in order for captions to be generated.
Depending on your Beacon subscription, you may choose to create a custom ingest profile to remove some of the lower quality video renditions. For specifics on the standard ingest profiles, see the Standard Ingest Profiles for Dynamic Delivery and Context Aware Encoding topic. For information on creating customized ingest profiles, see Creating Ingest Profiles for Dynamic Delivery.