Overview
To stream a set of VODs as a live stream to a channel in Brightcove Beacon, you must follow a series of steps to create the video feed and send it to your third-party Cloud streaming partner.
A high-level view of the process is:
- Tag the videos you wish to use in your stream.
- Create the XML video feed of your desired videos with the Social Syndication API.
- Send your XML video feed URL to your third party Cloud Streaming partner.
- Create a remote video in the Media module with the URL provided by your Cloud Streaming partner.
- Connect the remote video with Brightcove Beacon via the video ID.
- Upload the XML file provided by your Cloud Streaming provider to your Amazon S3 bucket to generate the Electronic Programming Guide (EPG)
The rest of this document will provide details for each of the steps above.
Tag the videos that will be in the stream
You will use tags (metadata) to mark the videos you want to be in your stream.
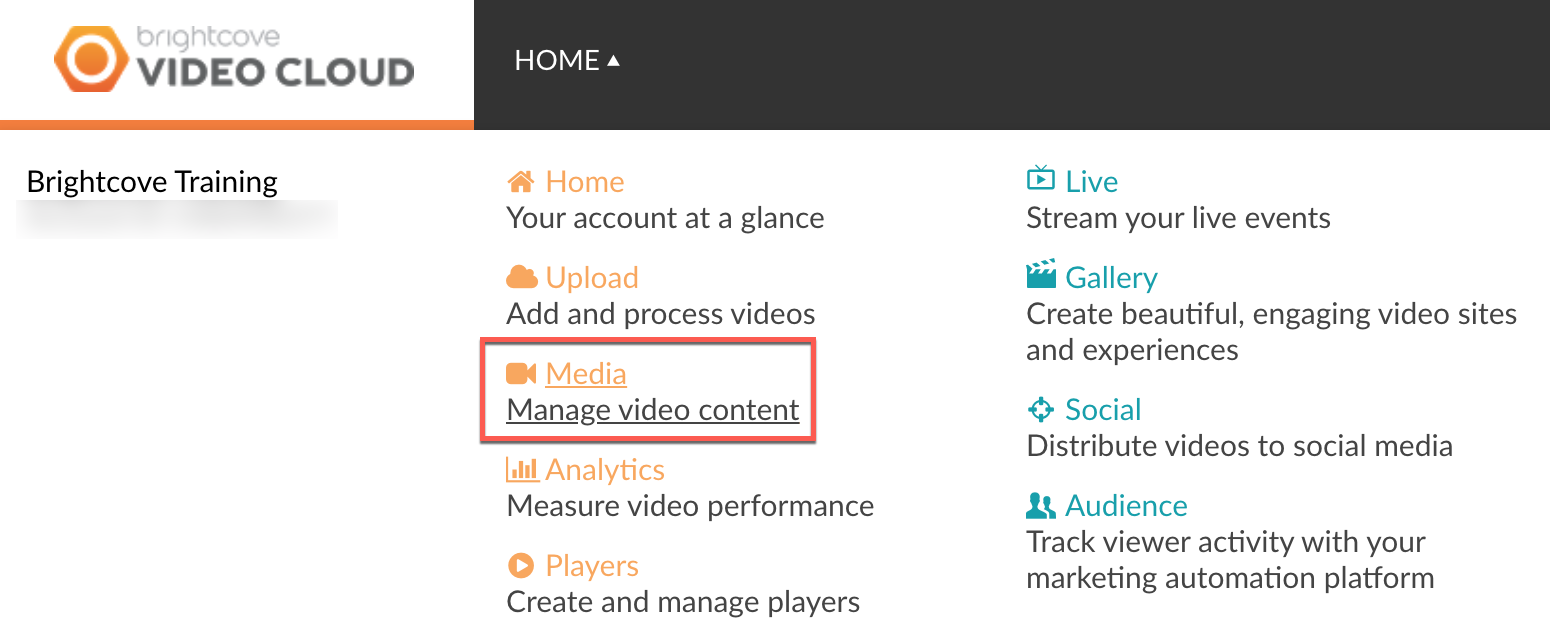
- In Video Cloud Studio open the Media module. (The numbers in the screenshot refer to later steps.)
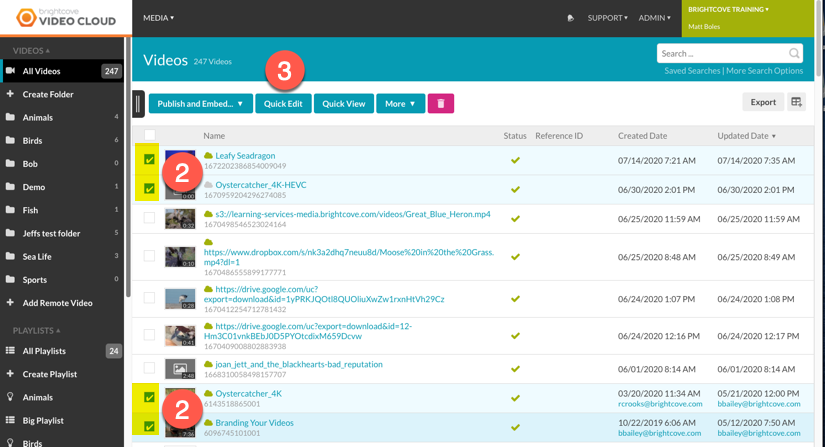
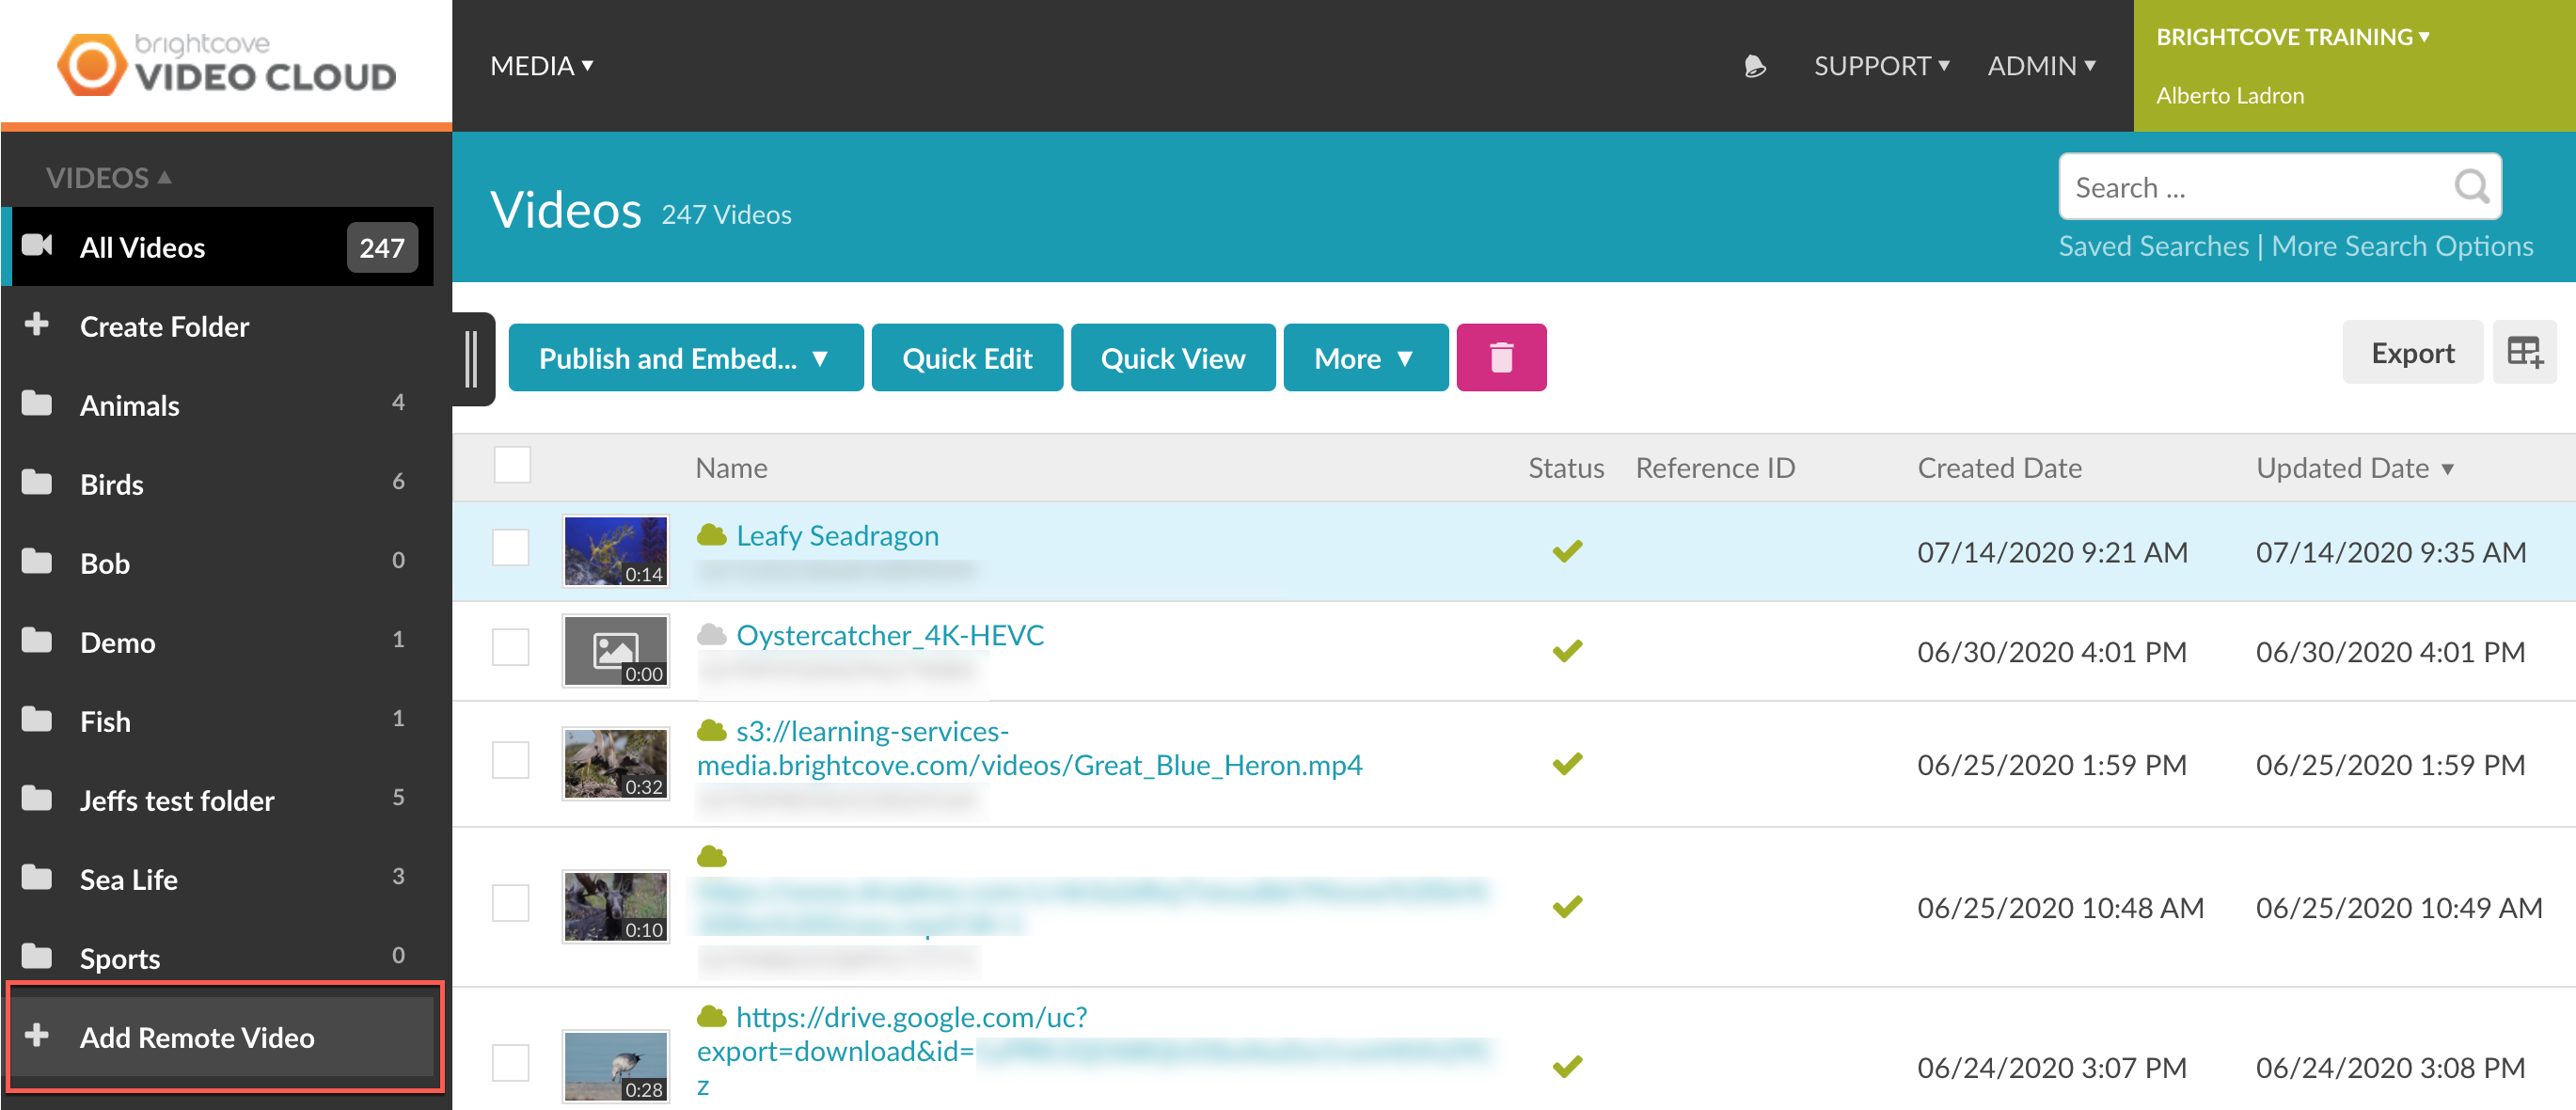
- Check all the checkboxes in front of the videos you wish to use in your stream.
- Click the Quick Edit button located above your list of videos.
-
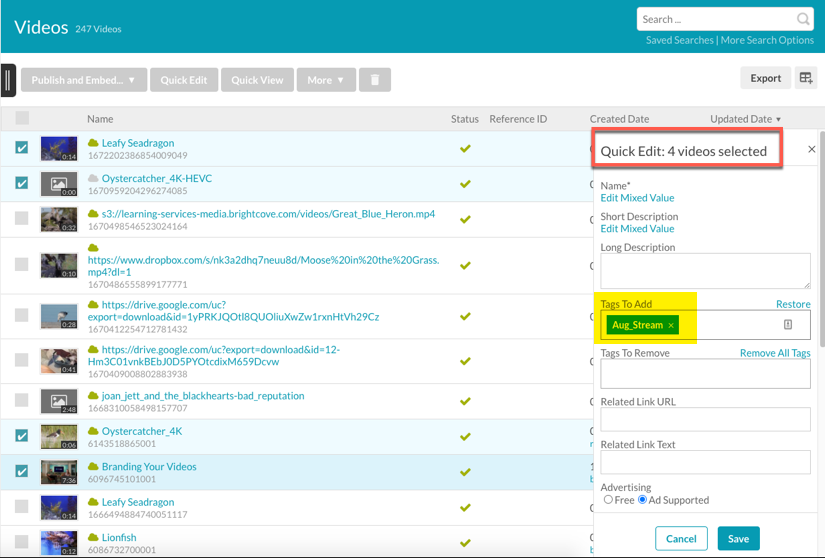
In the Quick Edit panel that appears to the right of your video titles, in the Tags to Add input box, enter the tag you choose to use to group all the videos you want in your stream. In this example the tag Aug_Stream is used.
Creating the XML Video Feed with the Social Syndication API
To stream your marked set of VODs as a live stream you need to create a Video Feed XML file. This file will contain all the information of the videos you wish stream. This file is a requirement for any third party Cloud Streaming partner such as Frequency, Veset, or Amagi. The following provides details of this process:
- You will need an API Development tool as Postman or Insomnia. In this example Postman will be used.
- To create the Video Feed XML file, you will need to use the Brightcove Social Syndication API, for information on how to use the API to obtain the XML URL please visit the Social Syndication API documentation.
- Authentication for most platform APIs is via a temporary OAuth2 access token. A few APIs use a permanent API key or policy key instead. See the documentation on the individual APIs for details.
- Open your API client tool, in this example Postman is used.
- Select POST from the API call type dropmenu.

- Copy the Social Syndication API call:
https://social.api.brightcove.com/v1/accounts/your-account-id/mrss/syndications - Paste the Social Syndication API call in the URL field and change the URL data with your own account ID information.
- Select the Body tab in your API client.
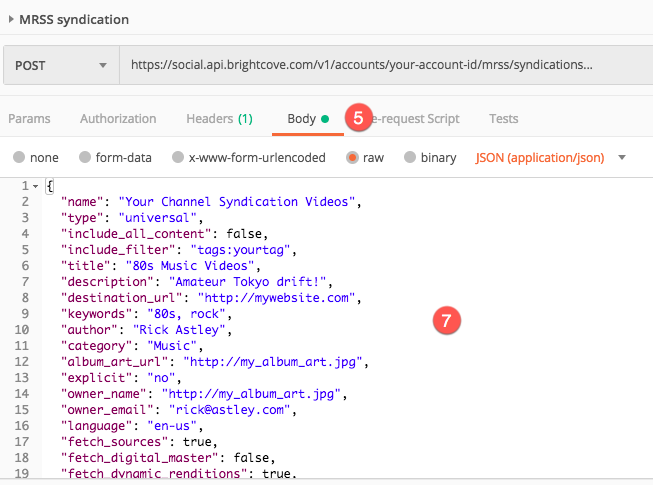
- Copy the following Social Syndication Resource template:
{ "name": "Your Channel Syndication Videos", "type": "universal", "include_all_content": false, "include_filter": "tags:yourtag", "title": "80s Music Videos", "description": "Amateur Tokyo drift!", "destination_url": "http://mywebsite.com", "keywords": "80s, rock", "author": "Rick Astley", "category": "Music", "album_art_url": "http://my_album_art.jpg", "explicit": "no", "owner_name": "http://my_album_art.jpg", "owner_email": "rick@astley.com", "language": "en-us", "fetch_sources": true, "fetch_digital_master": false, "fetch_dynamic_renditions": true, "sort": "-created_at" } - Paste the Social Syndication Resource template in the Body text field.
- Edit the Social Syndication Resource template data with your own information.
- Remember to add the Tag you created previously in Video Cloud, in the "include_filter": "tags: YourTag" field.
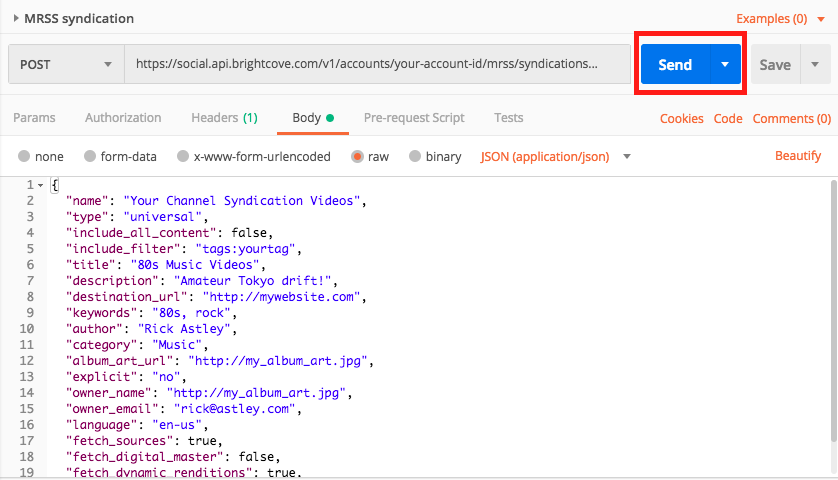
- Click the Send button in your API client to make the POST call.
- Note that the Social Syndication API response adds some read-only fields:
{ "id": "7f594cd3-4853-4174-aff3-203c3e99e9c2", "name": "Your Channel Syndication Videos", "type": "universal", "include_all_content": false, "include_filter": "tags:yourtag", "title": "80s Music Videos", "description": "Amateur Tokyo drift!", "syndication_url": "https://social.feeds.brightcove.com/v1/accounts/9999999999999/mrss/accounts/{account_id}/mrss/syndications/7f594cd3-4853-4174-aff3-203c3e99e9c2/feed", "destination_url": "http://mywebsite.com", "keywords": "80s, rock", "author": "Rick Astley", "category": "Music", "album_art_url": "http://my_album_art.jpg", "explicit": "no", "owner_name": "http://my_album_art.jpg", "owner_email": "rick@astley.com", "language": "en-us", "fetch_sources": true, "fetch_digital_master": false, "fetch_dynamic_renditions": true, "sort": "-created_at" } - After the Video Feed creation, note that the API response includes the id and the syndication_url. The syndication_url is the one that you should provide to your Cloud Streaming partner, but there are still some steps to do before the Video Feed is ready.
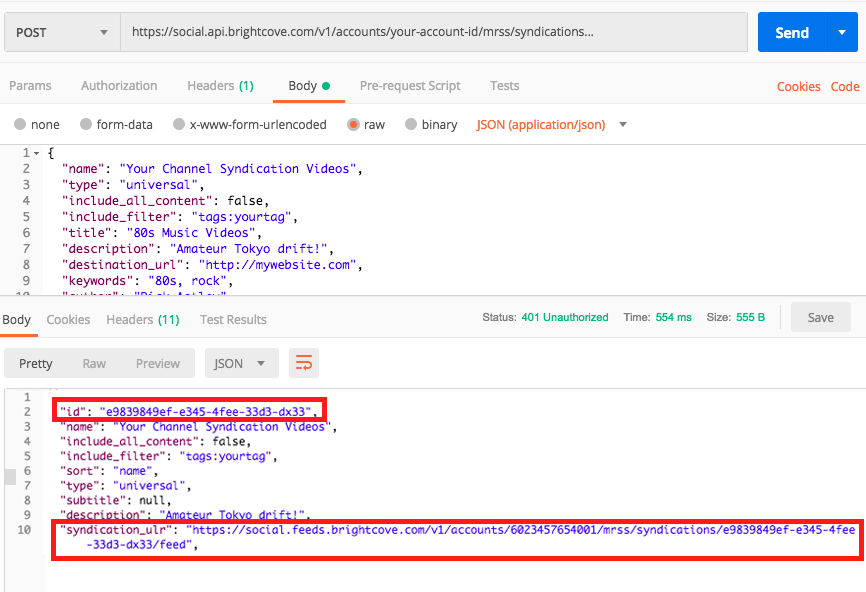
- Copy the API response id.
- The next step is to add a template for the data. From the dropdown menu select PUT.

- Add the id response from the last API call in the URL petition.
- Click the Body tab.
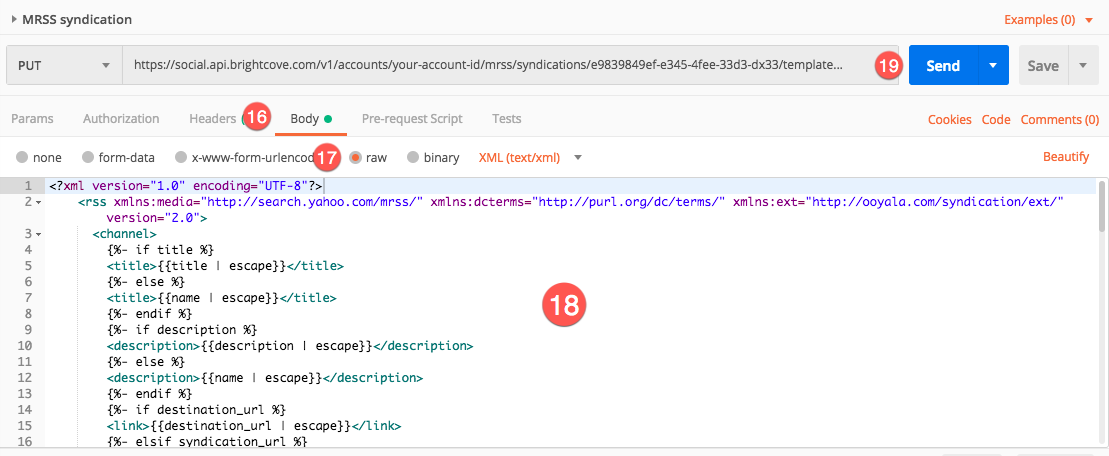
- Select the raw option.
- Copy and Paste one of the XML templates provided for Universal Syndication in the text section.
- Click Send to make the PUT API call.
- After making the PUT call, the API response will contain the template with your videos' information and the syndication_url will be updated and ready to deliver to your Cloud Streaming partner.
Delivering the XML feed to your Cloud Streaming Partner
Once that you have the syndication_url updated with your Video Feed, you need to deliver it to your Cloud Streaming partner (Frequency, Veset, Amagi), as the URL contains the XML file.
After receiving it, your Cloud Streaming partner should provide you with a streaming URL and a new XML file that contains the Electronic Programming Guide for Brightcove Beacon.
Adding a Remote Video in Studio
Once you have received the streaming URL for your Channel, you need to send the Live stream as a Remote Video in Video Cloud to Brightcove Beacon.
- Open the Media module in your Video Cloud account.
- In the left panel click the + Add Remote Video button.
- In the Video Name field, name your stream video.

- In the Video Type menu, select the Live option.
- In the Format field, select the HLS option.
- In the URL field, paste the stream URL provided by your Cloud Streaming partner.
- Click the Save button.
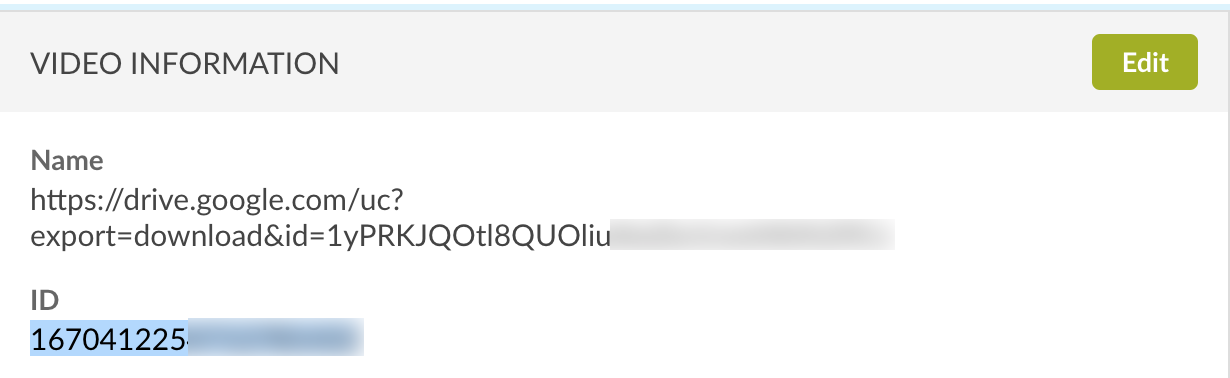
- Once the remote video has been created, click on it in the Media module.
- Open the VIDEO INFORMATION section, and copy the ID.
Connecting the Remote Video to Brightcove Beacon
The last step is to connect the Remote Video stream you just created in Video Cloud to a Brightcove Beacon Channel.
- Open Beacon Classic.
- In the upper menu, click the Channels tab.
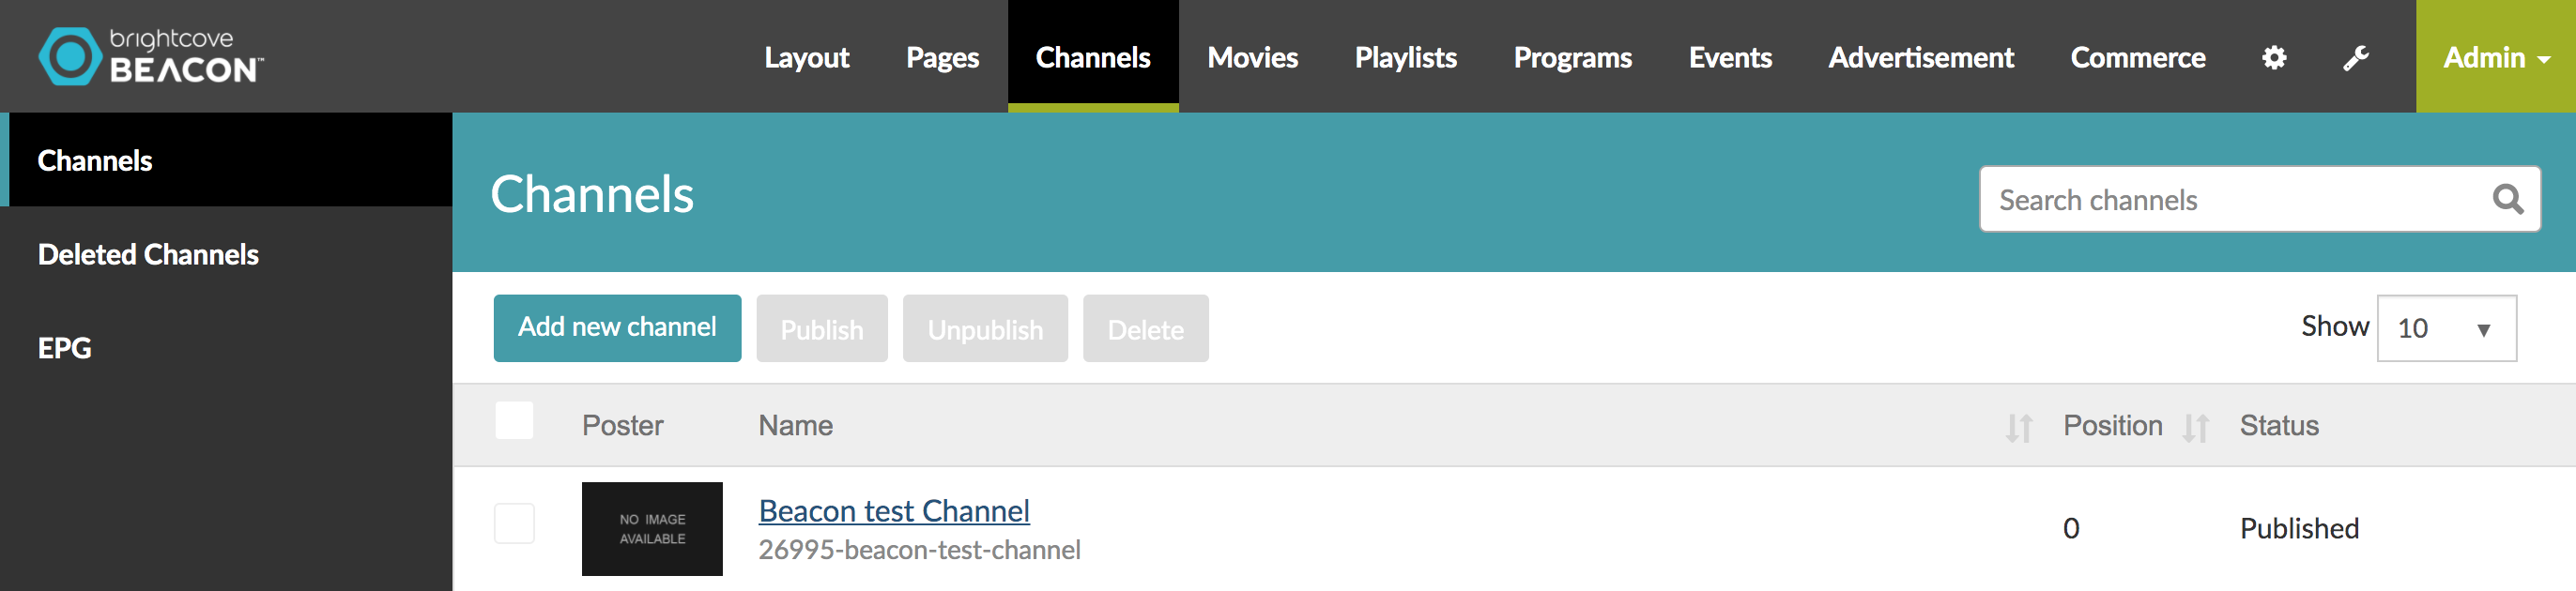
- Click your desired Channel. For more information on how to create a channel, please visit the Channels documentation.
- In the Channel settings, click the Streams tab.
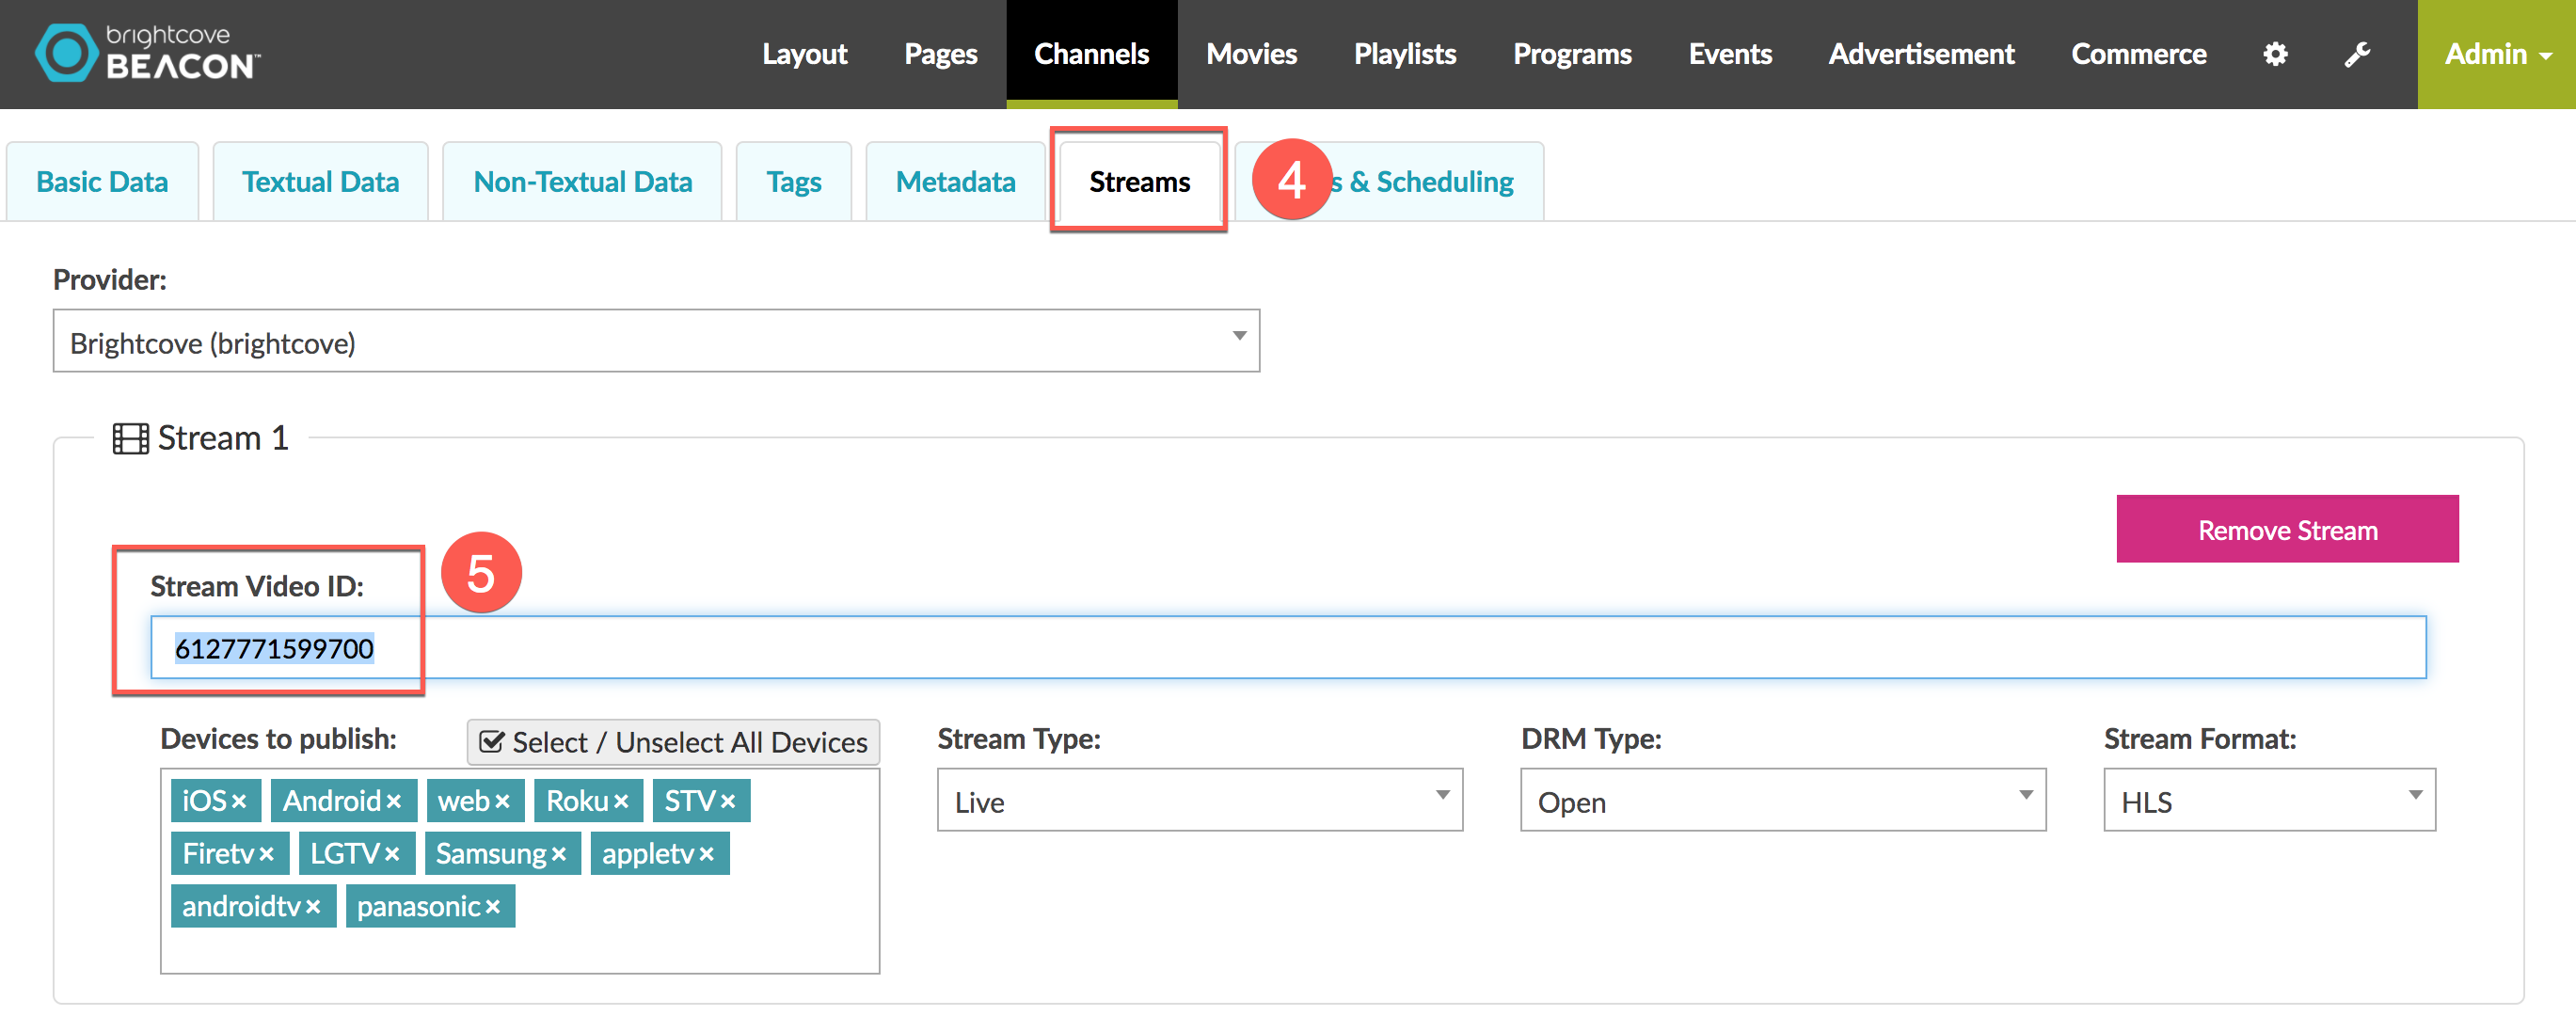
- In the Stream Video ID field, paste the video ID from your Video Cloud Remote Video.
- Click Update Channel.

- Open the Brightcove Beacon web app for testing and you should see your VOD stream on your desired Channel.
- The last step is to upload the XML file provided by your third-party Cloud Streaming partner into your Amazon S3 bucket. This creates the EPG for the Channel. For more information on how to upload and fetch the XML file, please visit the EPG documentation.