Creating a Campaign Lead Form
Lead forms can be used to capture viewer information during video playback. There are two types of lead forms:
- Campaign lead forms - Allow you to select from a set of fields and the form data is saved locally in Video Cloud. These forms are used with players that are configured with Campaign Tracking.
- Custom lead forms - Allow you to enter custom form HTML generated from a marketing automation platform. These forms are used with players that are configured with a connection to a marketing automation platform.
For more information on creating custom lead forms with a marketing automation platform, see the document for your platform:
Creating a lead form
To create a lead form, follow these steps.
Configure the form contents
-
Open the Campaign module.
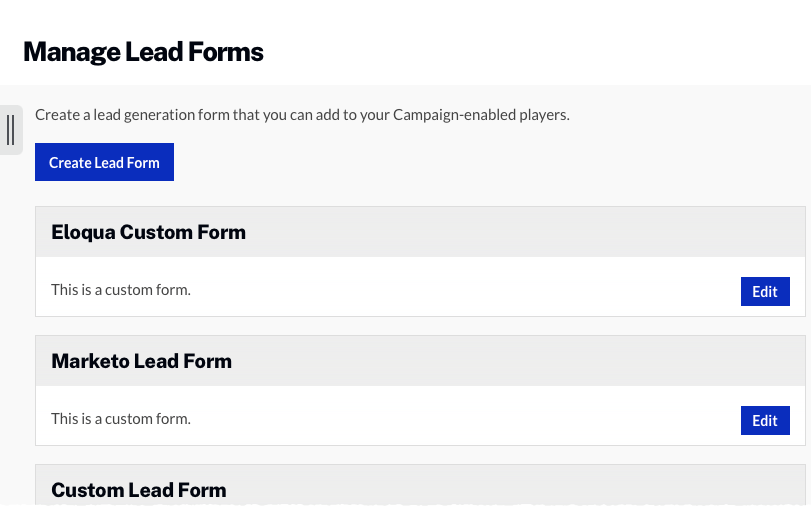
- In the left navigation, click Lead Forms. If any lead forms have been created, they will be displayed.

- Click .
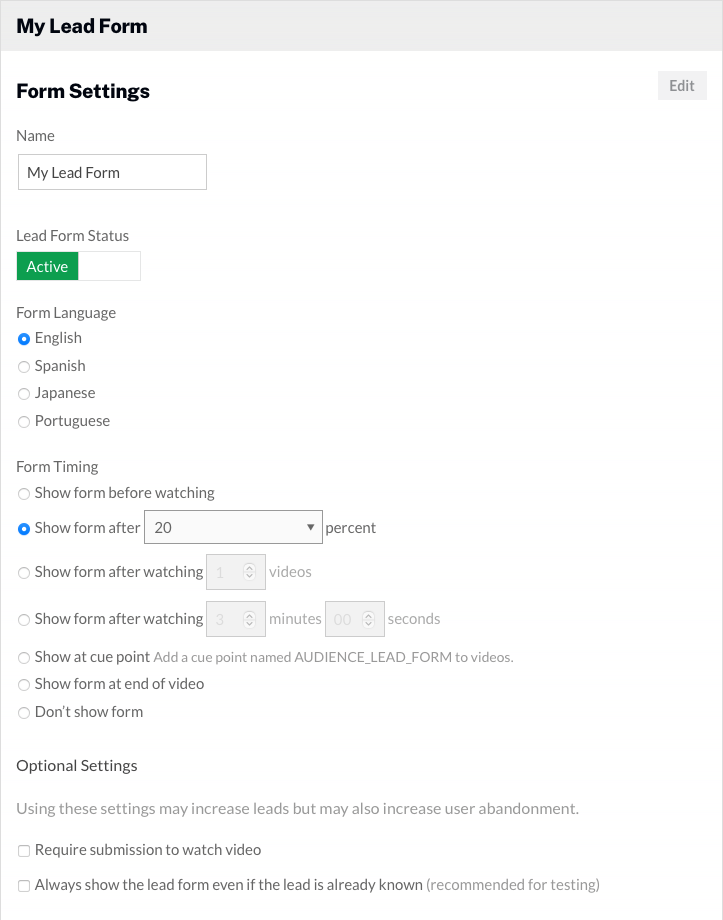
- Give the lead form a descriptive Name.
- Select a Lead Form Status.
- Active
- Inactive
- Select a Form Language.
- Select the Form Timing. The form timing determines when the lead form will be displayed.
- Check Require submission to watch video to require that the lead form be submitted to watch a video.
- Checking Always show the lead form even if the lead is already known will always show the lead form even if the lead is already known. If not checked, the lead form is not displayed if the lead is known.

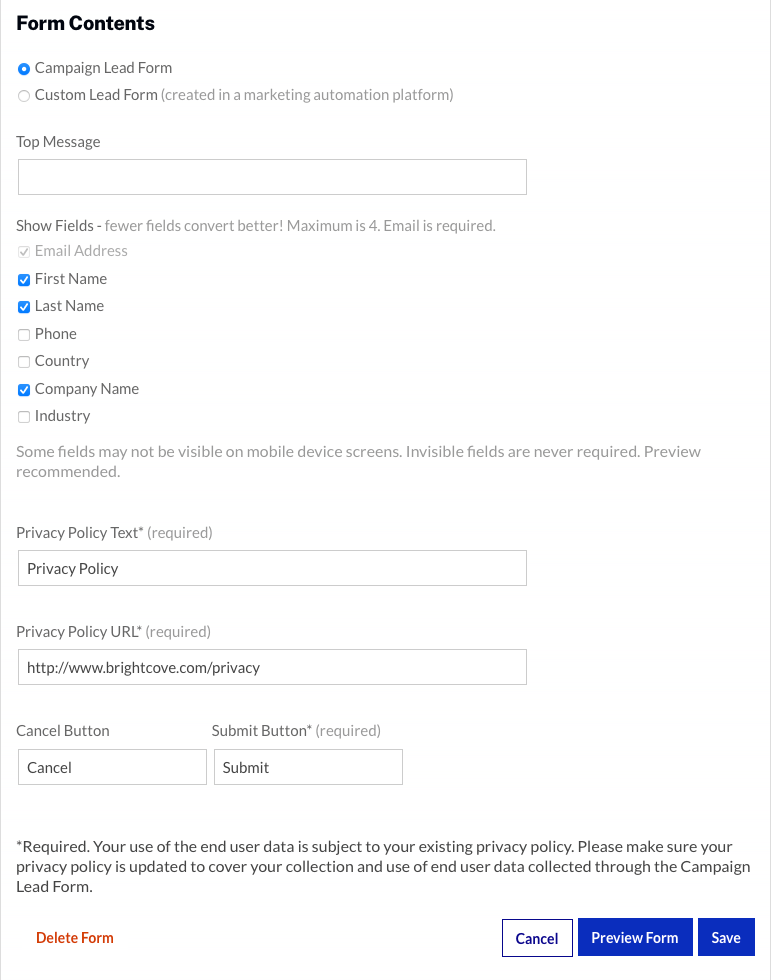
- Select the form type.
- Campaign Lead Form - Form is built using a default layout and set of fields, data is saved locally in Video Cloud
- Custom Lead Form - Provides the ability to enter custom HTML (typically from a marketing automation platform), data is saved in the marketing automation platform
- Enter a Top Message. The top message is what will be displayed at the top of the lead form.
- Select the fields to display on the lead form. A maximum of 4 fields can be selected.
- Enter the Privacy Policy Text and Privacy Policy URL. These fields are required to save the lead form.
- Enter the button text to be used for the Cancel and Submit Button.

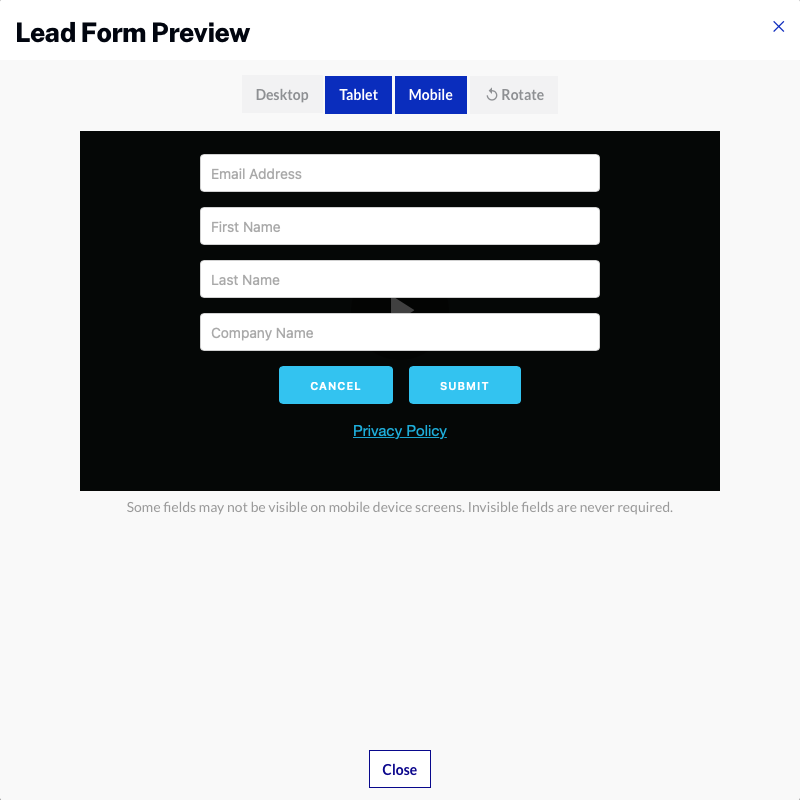
- (Optional) Click to open a preview of the form. The preview dialog can be used to preview the form on mobile, tablet or desktop devices. Click when done.

- Click to save the lead form.
The lead form can be edited by clicking button.
Assigning a lead form to a player
To assign a lead form to a player, follow these steps:
- In the left navigation, click Campaign Players.
- Locate your player and use the Lead Form dropdown list to select the lead form. Players configured to use a MAP connection can only use custom lead forms. Players configured to use Campaign tracking can only use Campaign lead forms.
The setup is now complete and you are ready to capture lead information. When a video is published using a Campaign-enabled player, the lead form will appear according to the form timing settings.
Exporting lead form data
There are two options for exporting lead data both accessed from the left navigation menu:
- Export Campaign Data - Used to export lead data collected from Campaign-enabled Brightcove Players. For information, see Exporting Campaign Data from the Campaign Module.
- Export Gallery Leads - Used to export lead data collected from Gallery experiences. For information, see Exporting Gallery Lead Data.
