Managing Users
The User Management page lets you manage who is authorized to use Studio. To open it, you must be a user with the Admin role.
To open the User Management page:
- Sign in to Studio.
- Open Admin and click User Management.
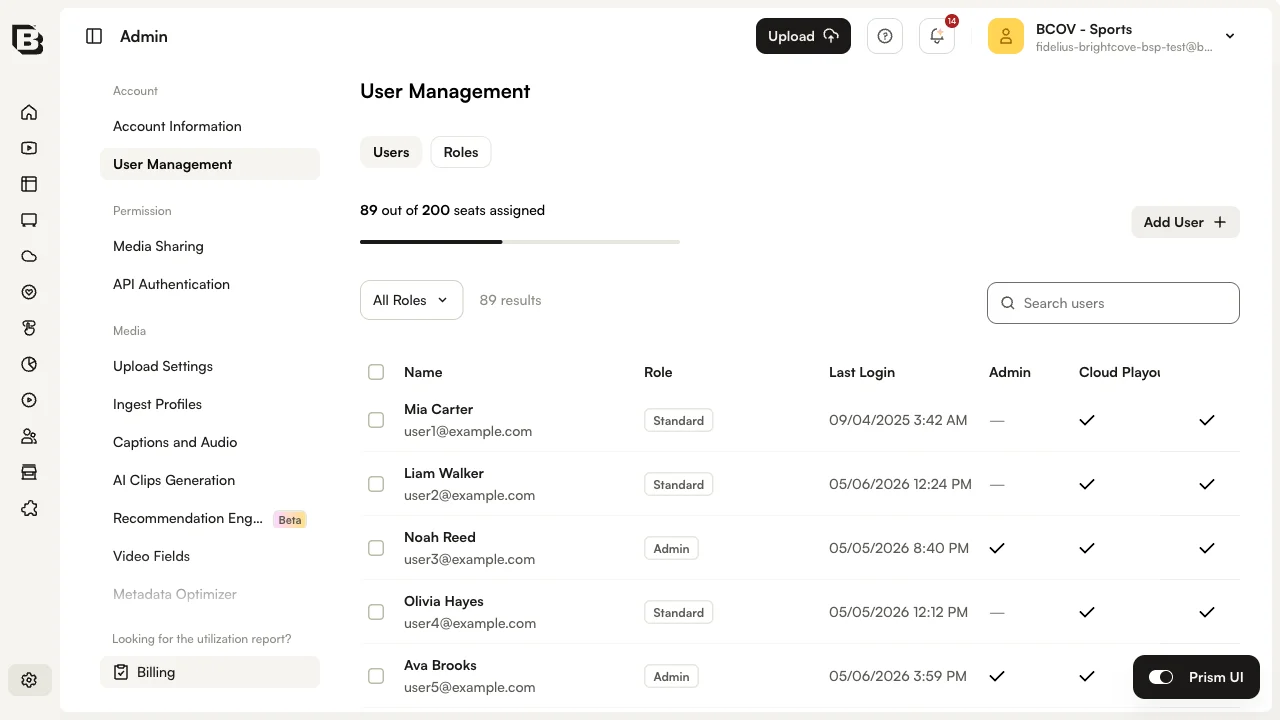
The Users tab shows, for each user:
- Name and email address.
- Role - Standard, Admin, or a custom role.
- Last Login - The last date and time the user signed in to Brightcove Beacon. This is the last login across all Brightcove Beacon accounts, not just the current account.
- A check mark for each module the user has access to.
The User Management page can be used to:
How many users can I have?
The number of users you can create depends on your plan. If you need more users, you can upgrade your plan to one that offers a higher seat count. The limit applies only to the total number of users that exist at any time; if you create 10 users, delete 5 of them, and create 3 more, you are considered to have 8 users. The Users tab shows how many seats are assigned out of your total entitlement.
Purchasing additional users
If you need more users, you can upgrade your plan to one that offers a larger seat count. Pro and Enterprise accounts should contact their Customer Success Manager for information on adding additional users.
Creating new users
To create a new user:
- On the Users tab, click Add User.
- Enter the user's Email, First Name, and Last Name.
- Select one or more Role entries for the user:
- Admin - The user has access to the Admin module (creating users, custom ingest profiles, custom fields, media sharing, and so on).
- Standard - The user does not have access to the Admin module.
- Custom role - The user has access to specific modules and capabilities defined by the role.
- Optionally, expand Module access and Video capabilities to review what the selected role(s) grant.
- Click Add User.
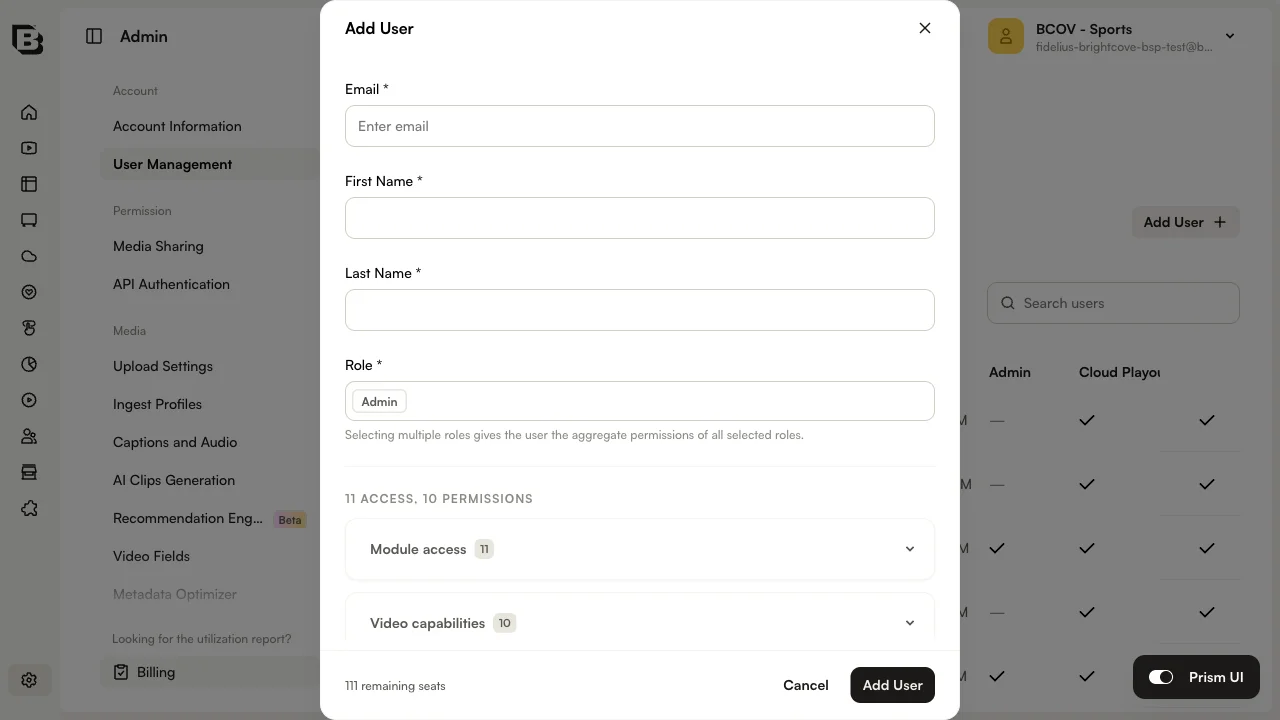
The user receives an email message stating that they have been added to the account.
Editing existing users
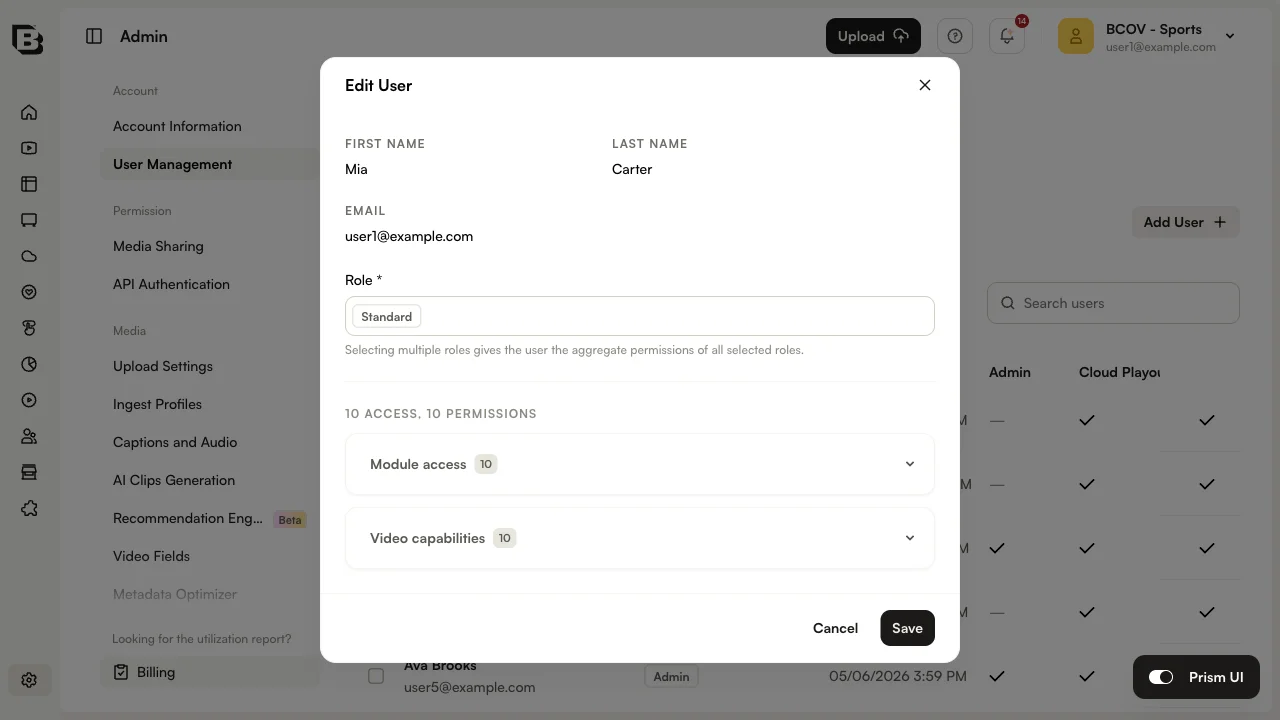
To edit a user:
- On the Users tab, open the row's overflow menu and click Edit User.
- Update the user's First Name, Last Name, or Role selection.
- Click Save to apply the changes.
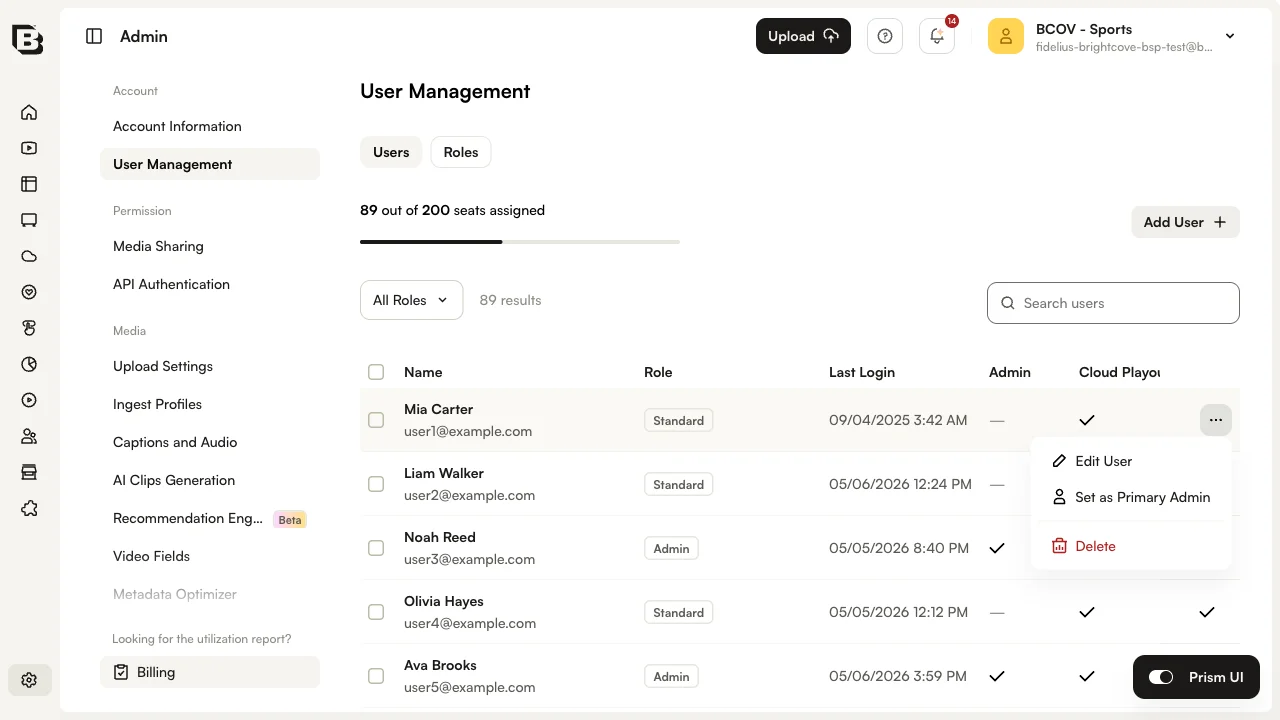
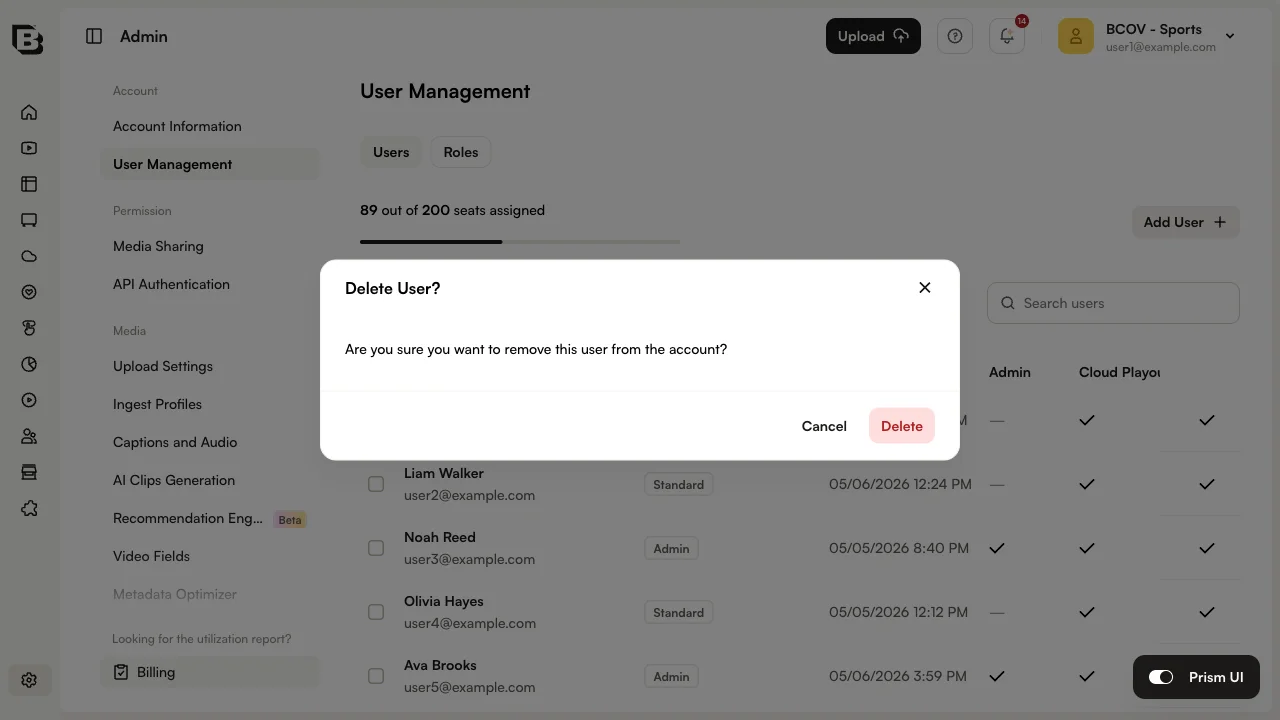
Deleting a user
To delete a user, open the row's overflow menu and click Delete. Confirm the deletion when prompted.
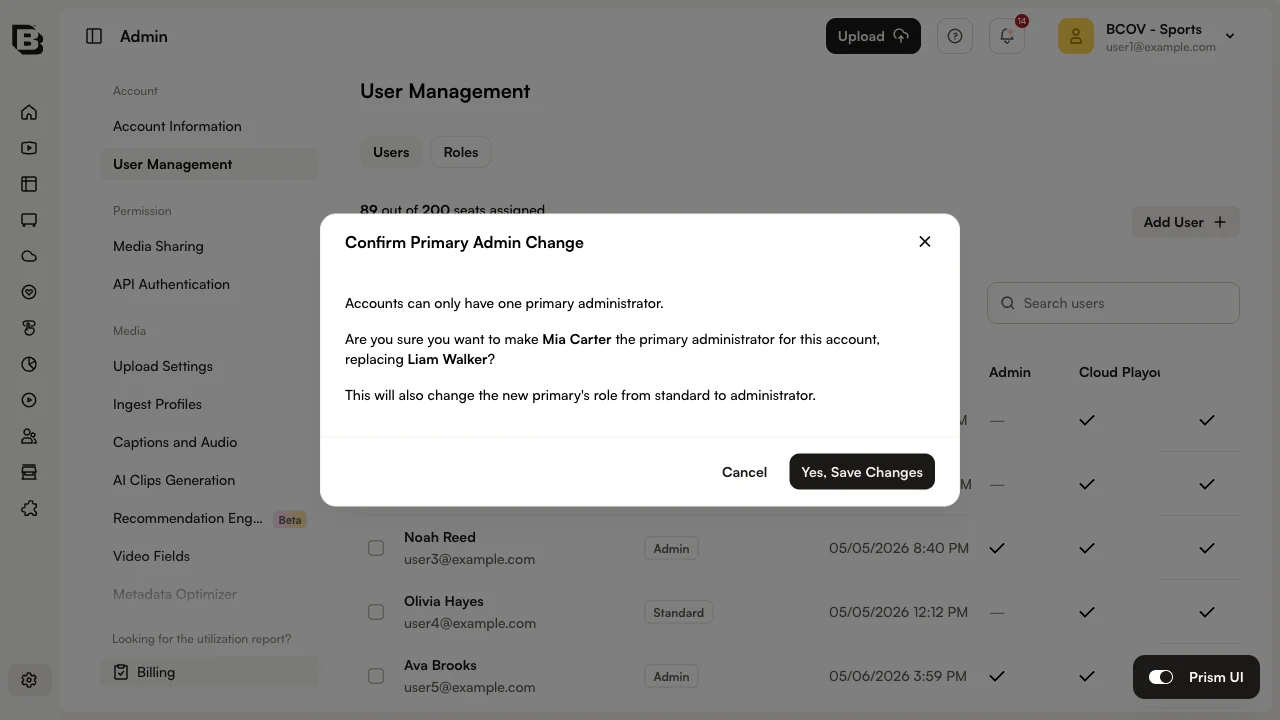
Changing the primary user
One user in each account is designated the primary user. The primary user always has the Admin role and can only be deleted by Brightcove Support.
To change the primary user, open the row's overflow menu for the user you want to promote and click Set as Primary Admin. You will be prompted to confirm the change.
User Management API
Overview
The User Management API lets you programmatically manage users and their role assignments within a Brightcove account. Use it to retrieve available roles, list users, create users, update role assignments, and remove users.
Base URL
https://accounts.api.brightcove.com/v1Authentication
The User Management API uses OAuth 2.0 (Client Credentials Grant). Obtain an access token and send it in the Authorization header as a Bearer token.
Required permissions
Your client credentials must include these permissions:
- User management: Create - Create new users or add existing users to an account
- User management: Delete - Remove users from an account
- User management: Read - Retrieve user and role information
- User management: Update - Update users and role assignments
Important prerequisites
Role validation required
When creating or updating users, you must assign roles that already exist in the account.
User limit enforced
Each account has a maximum number of users (maxUsers). If the account is at its limit, create requests fail with:
[
        {
          "error_code": "REQUEST_MALFORMED",
          "message": "Maximum number of users reached for this account"
        }
]Common workflow
- Get an OAuth access token.
https://oauth.brightcove.com/v4/access_token - Fetch available roles for the account (
GET /v1/accounts/{account_id}/roles). - Create a user with valid role names (
POST /v1/accounts/{account_id}/users) or update role assignments (PATCH/PUT). - Verify results by listing users (
GET /v1/accounts/{account_id}/users) or retrieving a single user (GET /v1/accounts/{account_id}/users/{user_id}).
Endpoints
| Use case | Method and endpoint | Notes |
|---|---|---|
| Get account roles | GET /v1/accounts/{account_id}/roles |
Use returned name values for role assignments |
| List users | GET /v1/accounts/{account_id}/users |
Returns users for the specified account |
| Get user details | GET /v1/accounts/{account_id}/users/{user_id} |
Returns a single user by user_id |
| Create user | POST /v1/accounts/{account_id}/users |
Creates a new user or adds an existing user to the account |
| Update user (partial) | PATCH /v1/accounts/{account_id}/users/{user_id} |
Updates only provided fields (commonly roles) |
| Replace user roles | PUT /v1/accounts/{account_id}/users/{user_id}/roles |
Replaces all role assignments for the user |
| Delete user | DELETE /v1/accounts/{account_id}/users/{user_id} |
Removes the user from the account |
Example requests
Get account roles
curl --location 'https://accounts.api.brightcove.com/v1/accounts/{account_id}/roles' \
        --header 'Authorization: Bearer {access_token}'
List users
curl --location 'https://accounts.api.brightcove.com/v1/accounts/{account_id}/users' \
        --header 'Authorization: Bearer {access_token}'
Create user
In the request body, roles must contain role name values.
curl --location 'https://accounts.api.brightcove.com/v1/accounts/{account_id}/users' \
        --header 'Content-Type: application/json' \
        --header 'Authorization: Bearer {access_token}' \
        --data-raw '{
          "email_address": "newuser@example.com",
          "first_name": "Jane",
          "last_name": "Smith",
          "roles": ["Standard"],
          "skipWelcomeEmail": true
}'Update user (partial) - replace roles
curl --location --request PATCH 'https://accounts.api.brightcove.com/v1/accounts/{account_id}/users/{user_id}' \
        --header 'Content-Type: application/json' \
        --header 'Authorization: Bearer {access_token}' \
        --data '{
          "roles": ["Admin"]
        }'
Replace user roles
curl --location --request PUT 'https://accounts.api.brightcove.com/v1/accounts/{account_id}/users/{user_id}/roles' \
        --header 'Content-Type: application/json' \
        --header 'Authorization: Bearer {access_token}' \
        --data '["Standard", "Custom Role"]'
Delete user
curl --location --request DELETE 'https://accounts.api.brightcove.com/v1/accounts/{account_id}/users/{user_id}' \
        --header 'Authorization: Bearer {access_token}'
Error handling
The API uses standard HTTP status codes and returns JSON error bodies.
Standard error formats
Some errors return a single object:
{
        "error_code": "ERROR_CODE_NAME",
        "message": "Human-readable error message"
      }
Validation errors may return an array of objects:
[
        {
          "error_code": "REQUEST_MALFORMED",
          "message": "Validation message"
        }
      ]
Common errors
- Maximum users reached:
REQUEST_MALFORMED(contact Brightcove Support to add seats) - User already exists:
CONFLICT - Invalid/non-existent role:
REQUEST_MALFORMED(fetch roles and use existing rolenamevalues) - User not found:
NOT_FOUND - Invalid access token:
UNAUTHORIZED - Insufficient permissions:
FORBIDDEN