Managing Videos
Accessing the Media module
To access the Media module, login to Studio and click Media in the primary navigation. By default, a list of videos in the account will appear.
The body of the page will display the following:
- Video thumbnail and duration
- Dynamic Delivery indicator - Will only appear if the account has been enabled for Dynamic Delivery
 - Indicates that the video is enabled for Dynamic Delivery and was ingested using a Dynamic Delivery ingest profile
 - Indicates that the video was ingested using a Legacy ingest profile
- Video name
- Video ID - System assigned video ID (unique across all Brightcove accounts)
- Reference Id
- Status
 - Indicates the video is active
 - Indicates the video is inactive (can't be played)
- Created date and time and user ID
- Updated date and time and user ID
The video thumbnail will indicate whether a video is shared into the account, or shared out to another account. In the example below, the first video is shared into this account and the second video was shared out to another account.

Video thumbnails also indicate videos that are marked as 360 degree videos by adding a 360 badge. For more information on working with 360 degree videos, see Working with 360° Videos.

Multiple videos can be selected by clicking on a checkbox and then shift-clicking on another checkbox. The list of videos can be sorted by clicking on a column header. The Media module uses a "sticky" sort and will remember the sort selection. When you navigate away and come back or login again, the Media module will default to the sort that was last selected.
Created and updated date and time information
The user ID of the user who created and/or updated the video will be displayed in the Created Date/Updated Date columns. If the action was taken via the CMS API, Updated by API will be displayed. Note that if a user who performed an action is removed from an account, their ID will still appear.
There are cases where changes made to a video will not record a user ID and cases where a user ID may not be displayed:
- When a video is retranscoded or if the video source is replaced, the updated date for the video will be updated but the user who initiated the action will not be recorded
- When the images (poster/thumbnail) and/or text tracks are updated, the updated date for the video will be updated but the user who initiated the action will not be recorded
- When a video is shared to an affiliate account, the created date will not display an associated user ID
- When a video clip is created using the Live module, the created date will not display an associated user ID
This feature was enabled on December 7, 2018. Any videos uploaded or edited after this date will display user information.
Uploading videos
To upload videos, click Upload or click Upload Videos in the left navigation. For more information, see Uploading Videos.
Publishing a video to the web
Publishing a video will generate a URL to the video or generate the publishing code that can be added to a web page or application. For more information on publishing, see Publishing Videos and Playlists.
Editing video details
To edit the video details, click on the video name to open the video details page. See Editing Video Details for more information. To edit video details for multiple videos at the same time, use the Quick Edit feature.
Using Quick View
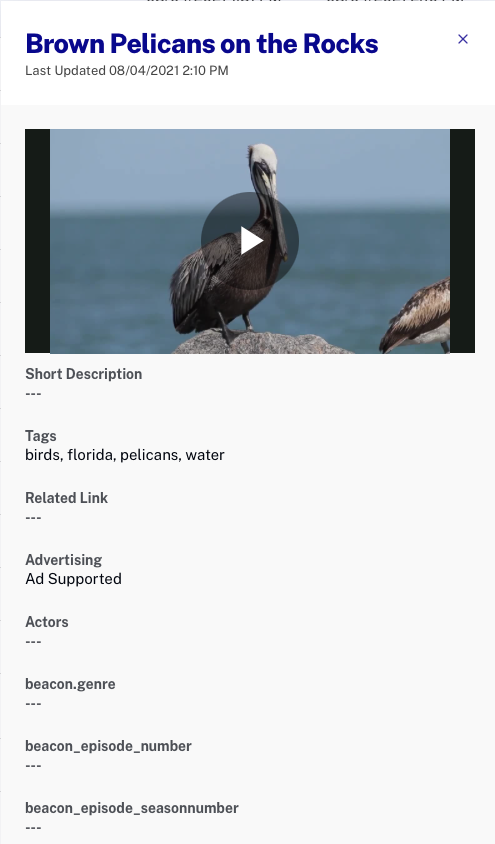
The Quick View panel can be used to quickly view video details. To open and close the Quick View panel, click Quick View. The panel will display a subset of the video details for the selected video.

Note that the Quick View panel is read-only. If multiple videos are selected, Quick View will display the properties for the last video selected.
Adding videos to folders
Videos can be added to folders to help organize content. For more information on working with folders, see Organizing Videos Using Folders.
Adding videos to playlists
Playlists can be created to group related video content. For more information on working with playlists, see Creating and Managing Playlists.
Activating and deactivating videos
The Status column in the video list indicates if a video is activated or deactivated:
 - Video is activated
 - Videos is deactivated
To activate a video, select the checkbox next to the video name and then click More > Activate. To deactivate, select the checkbox next to the video name and then click More > Deactivate. Videos that are deactivated will not appear in apps.
Deleting videos
To delete videos, click the checkboxes next to the video thumbnails of the videos to delete and then click the delete button (![]() ). Confirm the delete by clicking the Delete button.
). Confirm the delete by clicking the Delete button.

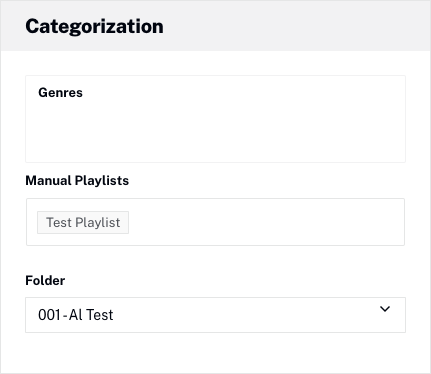
If the video has been added to any manual playlists, that will be indicated.

To see which manual playlists the videos is in, click the video title to open the video properties. The Categorization properties will display the manual playlists that the video has been added to.

Accessing the side navigation panel
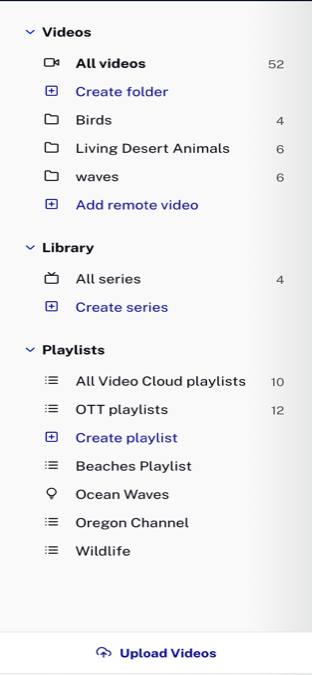
The side navigation panel displays series, video, folder and playlist information. Remote videos can also be added. The side navigation panel is displayed by default.

The side navigation button ![]() can be used to hide and show the side navigation panel. The size of the side navigation panel can be changed by clicking on the black border and dragging.
can be used to hide and show the side navigation panel. The size of the side navigation panel can be changed by clicking on the black border and dragging.
Managing series
Clicking All series in the left navigation will display a list of all series in the account. For more information on working with series, see Managing Series.
Creating series
Series can be created by clicking Create series. For more information, see Creating Series, Seasons & Episodes.
Adding remote videos
With remote videos, you maintain your video files on your own or a third-party system and then provide Video Cloud with the URL of the video files. For more information on adding remote videos, see Working with Remote Asset Videos.
Exporting video data
The Media module provides the ability to export video metadata for all of your videos or a subset of videos to a .csv file. For more information, see Exporting Video Data.
Searching for videos
The Search field can be used to search the videos and playlists in your account. For more information, see Searching for Videos and Playlists.
Customizing the column display
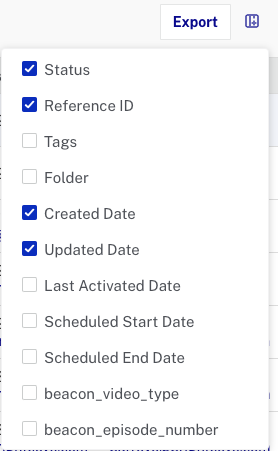
The columns that appear in the body of the page when viewing videos can be customized by clicking on the columns button (![]() ) and then selecting the columns that should be displayed.
) and then selecting the columns that should be displayed.

Note that the list of columns will also include any custom fields that have been created for the account. As more columns are selected, it is possible to horizontally scroll to see all of the columns.
