Automatically creating a Brightcove Interactivity project
Video Cloud videos that are played using a HapYak-enabled player will automatically create Brightcove Interactivity projects. This is the preferred method to create a project.
When a video is played inside of a HapYak-enabled Brightcove Player, the following things happen:
- The Brightcove video ID, title, tags and custom fields are passed to Brightcove Interactivity
- Brightcove Interactivity attempts to look up the video ID within your group
- If no matching record is found, then Brightcove Interactivity creates a project with the data that was sent
- Brightcove Interactivity will also set the project properties to indicate that it was "auto created":
- The
is_publishedvalue will be set to TRUE - A tag with the value
livewill be added
- The
The following steps will automatically create a Brightcove Interactivity project. Make sure you have a HapYak-enabled player before continuing:
- Login to Video Cloud Studio.
- Open the Media module.
- Select a video to publish by checking the box next to the video thumbnail.
- Click > Publish to web.
- Select the player with the HapYak plugin.
- Click the preview link to open a preview in a new browser tab.
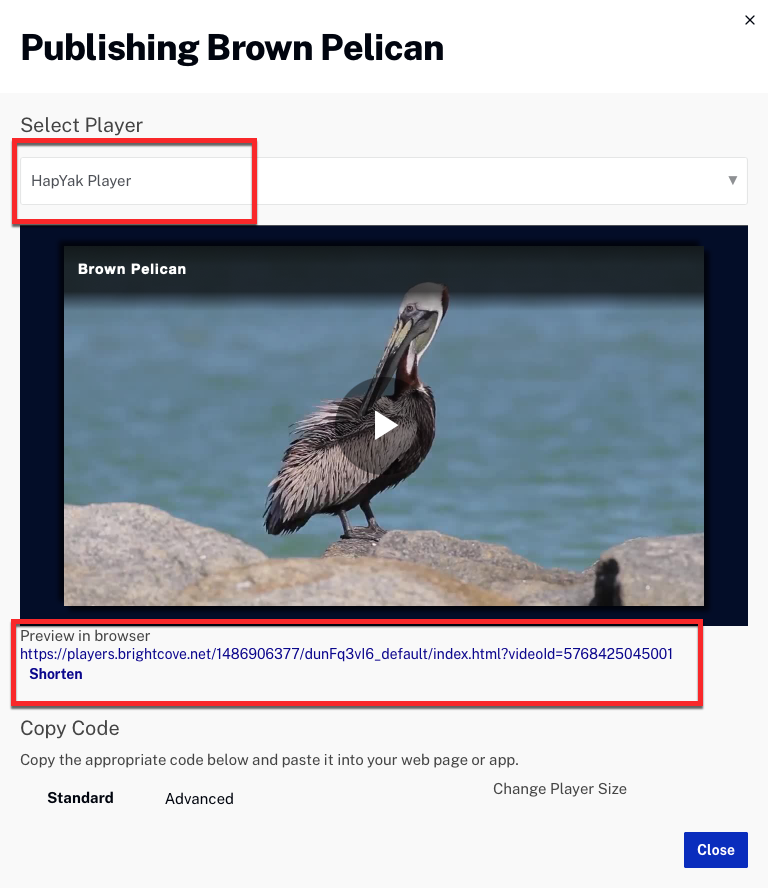
- Play the preview video (the video only needs to be played for a few seconds). This will auto-create a project in Brightcove Interactivity.
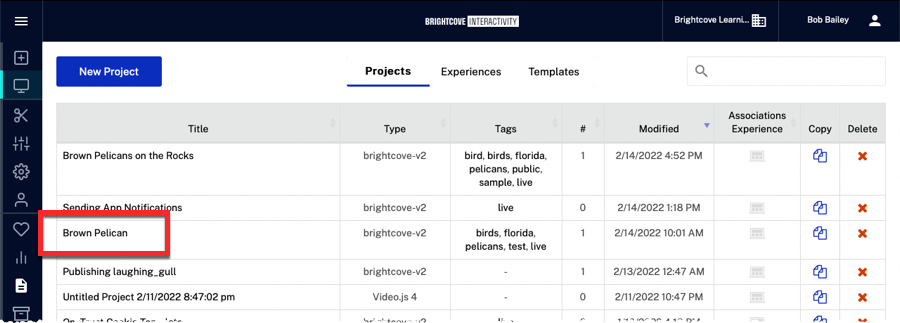
- Login to Brightcove Interactivity Studio.
- In the left navigation, click Manage.
- A list of projects will appear. Confirm the video you just published appears in the project list.
Manually creating a new project
If needed, you can manually create projects using Brightcove Interactivity Studio. Follow these steps to manually create a project.
- Login to Brightcove Interactivity Studio.
- In the primary navigation, click Create and then or click Manage, click the Projects tab and then click .
- There are three ways users can upload video content to a project.
- Copy the URL or Embed Code of your video and paste into Brightcove Interactivity Studio
- Upload a video file by dragging it from your desktop or browsing your computer
- Browse My Videos and select previously uploaded video files
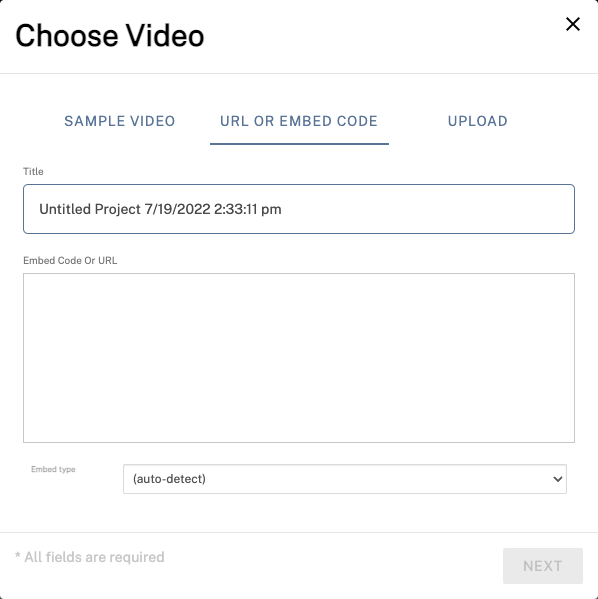
- Select an Embed type. This is usually where the video is hosted. If your URL is directly to a video file (ending in ".mp4" for example) select an open source player (like Video.js).
- Enter a title and click .
You should see the project load. If you get an error, click again. Ensure that the URL, embed code, or file type of the video is a supported format. If you continue to have trouble, or if your video player is not listed, send an email to Brightcove Support and we'll add it to the list.
Copying projects
On the list of projects, hover over the right side of the project and click the copy icon (![]() ).
).
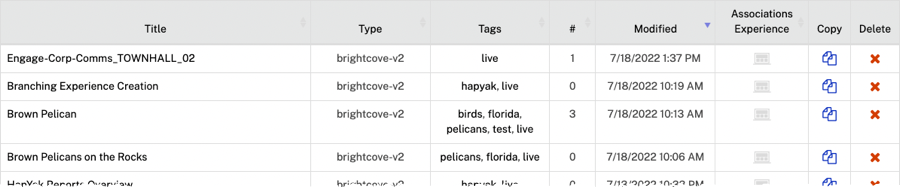
This will create an exact clone of the project including all annotations, tags, and custom CSS, titled "Copy of {project_name}".
This is a great way to save time when creating new projects that are similar to ones already created. Simply change the video source of the new cloned project and adjust the annotations as needed.
Copying a project into different group
Fill out this form. Brightcove Support will copy the project in our back end and email you back confirmation when it's complete.
Deleting projects
To delete a project, find the project on the project list, click the delete icon (
![]()