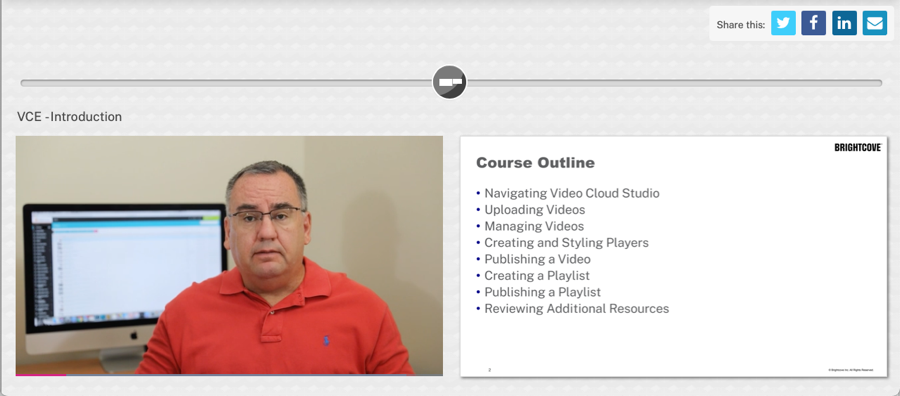
The Slide Sync Experience displays a video and related PDF in a side by side view. As the video plays, the pages in the PDF will change to correspond to what is being presented in the video. All video interactivity will also display.
Creating a new experience
Follow these steps to create a new Slide Sync Experience:
- Login to Brightcove Interactivity Studio.
- In the left navigation, click Manage.
- At the top of the page click Experiences.
- Click .
- Enter a name for the experience.
- In the list of experience types, click Slide Sync.
- Choose a layout.
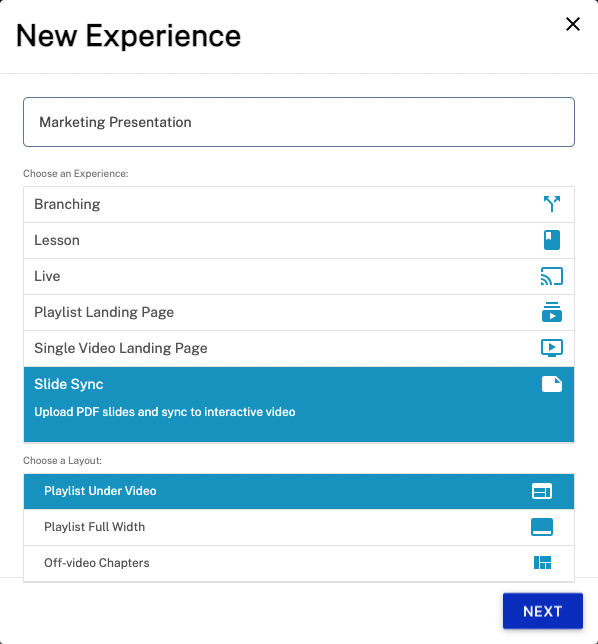
- Click .
- Enter a Title for the video.
- Choose a video, there are 4 options:
- Sample Video - Use a sample video
- URL or Embed Code - Enter the embed code or URL for a video
- Upload - Drag and drop or select a new video (must be an .mp4 file)
- Choose existing - Choose an existing project
- Click . The New Experience confirmation dialog will display.
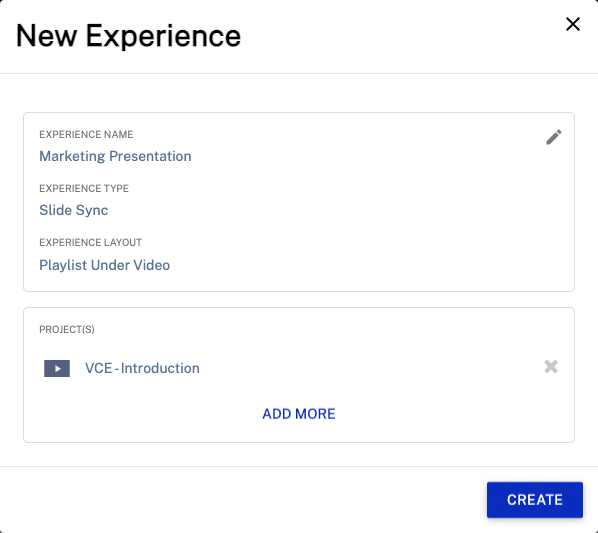
- Click . The Interactivity Editor will open with the selected video(s) loaded.
- Add PDF slides to the experience by dragging a file into the drop zone or by clicking anywhere in drop zone and browsing to select a file.
- The slides must be in PDF format
- The first page in the PDF will appear and sync to the 0 second point in the video
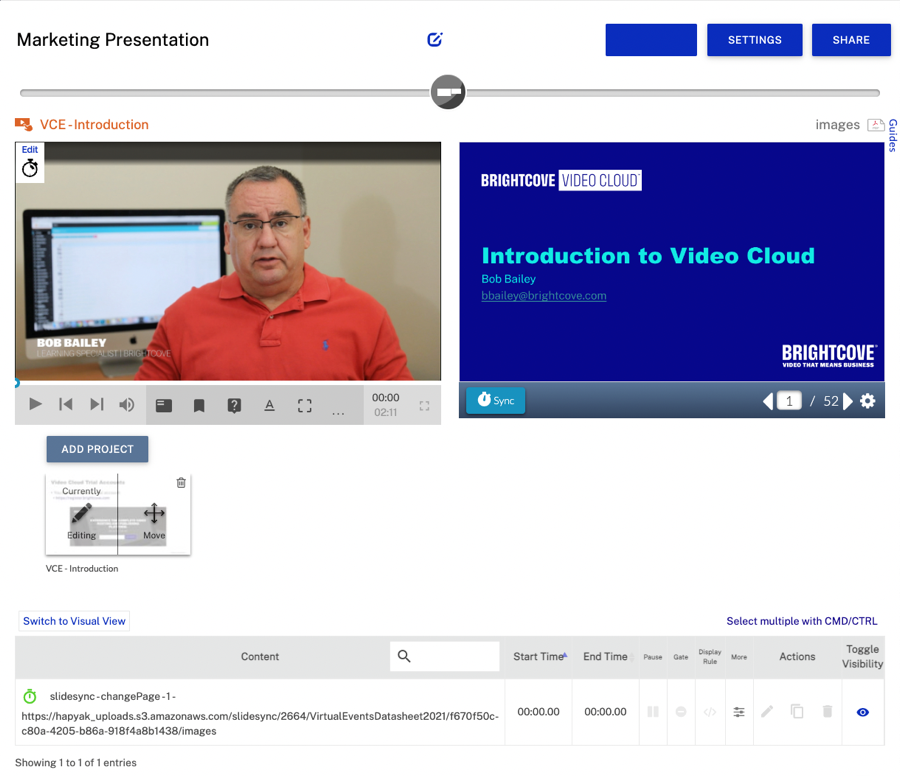
Syncing slides
To sync the slides with the video, follow these steps:
- Play video to the point where the slide should change.
- Use the arrow icons below the PDF preview to navigate to the page to display for the corresponding place in the video.
- Click the Sync button below the PDF preview to sync the PDF with the current place in the video. The time adjuster next to the sync button can b used to adjust the time if necessary.
- (Optional) To add a chapter marker at the same time as the slide change, click the chapter marker icon after syncing a slide, add the chapter title and then click Done.
- Repeat these steps until all slides are synced for the video.
Changing the size ratio of the video and slides
To change the size ratio of the video and the slides, follow these steps:
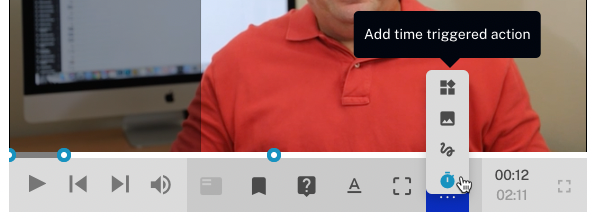
- Add a time triggered action to the video.
- For the Addon Type, enter
slider. - For the Command, enter
change. - Click ADD NEW next to Command Data.
- For the Key, enter
newValueand for the Value, enter the percent of the width that the video should consume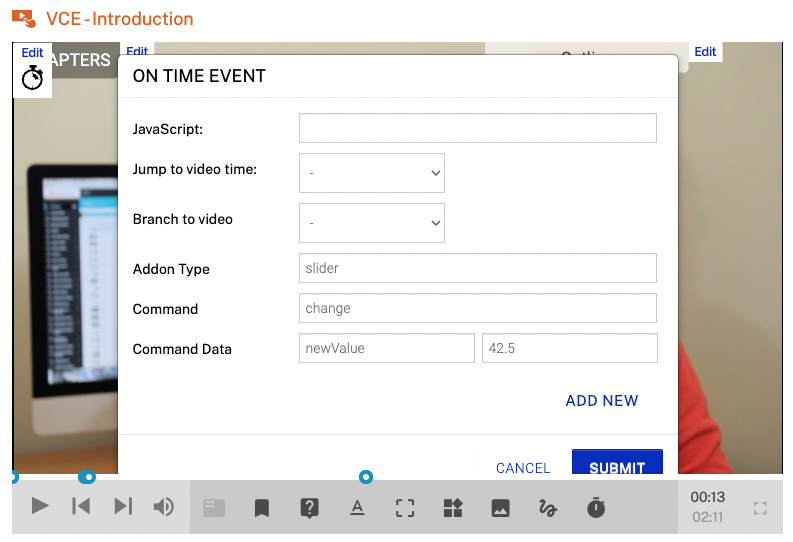
- Click .
Adding other annotations
Other annotations can be added to the video the same way you would add them to any other interactive video project.
Adding more videos and slides
- To add another video, click on the ADD PROJECT button in the playlist beneath the video and slide area.
- Enter a Title for the video.
- Select a video.
- Repeat these steps until the experience is complete.
Configuring experience settings
To configure the experience settings, click at the top right of the page. The following settings are available:
Experience settings
- Auto Progress - Plays the next video in the playlist after the previous video finishes
- Auto Play - Will automatically play the video on landing page load
- Default Zoom - Sets the initial zoom level of the experience on the landing page (viewers will be able to adjust the zoom level when viewing the experience)
- Custom CSS (URL) - Custom CSS file for the experience
- Tags - Tags for the experience
Social Sharing settings
- Social Sharing checkboxes - Used to toggle which buttons will be shown on the landing page.
- Message - Configurable message that will show up as the default text in the share dialogs
Branding settings
- Landing Page Header and Footer - Add custom HTML for the header and footer used on the landing page
- Background Image - Background image used on the landing page
Sample header tag
<img src="//solutions.brightcove.com/bcls/assets/images/platform/brightcove-logo-bl.png" />Sample footer tag
<div style="width: 100%; padding-left: 30px; padding-right: 30px;"><div style="min-height: 70px; position: relative; font-family: 'Helvetica Neue', Helvetica, Arial, sans-serif; color:#3e4459; text-align: left;"><a href="https://www.brightcove.com/en/legal/privacy/" target="_blank" style="text-decoration:none;"> Privacy Policy.</a><br>Copyright ©2022 Brightcove Inc. All rights reserved.</div></div>Access gate settings
- Add an Access Gate.
- Add the redirect URL for the registration form.
- Ensure your registration form or other validation form redirects the user back to the experience after completing registration/login.
Generating links to the Slide Sync Experience (optional/extra)
- Click on the Link Button
- Permalink to the experience is at the top.
- Create a custom link with attributes by filling out these custom fields:
- Video to start on (required)
- Time in video to seek to (optional)
- Downloadable/Viewable asset URL (optional)
- Modal Title (optional)
- Linked Text (optional)
- Button Text (defaults to “View”) (required)
- Modal Text (non-linked) (optional)
- Click Generate to create link with custom parameters.
Sharing the experience
To view the landing page, follow these steps:
- Click at the top right of the page.
- Select a Share Type.
- Embed Only - Generate embed code to place in an existing web page
- Landing Page - Create a landing page to host the experience
- Select the option to Use Native Controls? Selecting No will display the HapYak controls in the player. Selecting Yes will display the native controls based upon the type of video that is being published. For example, if you are using Brightcove videos, the player will display Brightcove Player native controls (the player will look like a regular Brightcove Player).
- Select to copy the embed code or link or click to open a preview of the experience in another browser tab.