In this topic, you will learn how to configure the integration of Brightcove Beacon with an OIDC provider. Auth0 is used as an example OIDC provider.
Introduction
OAuth (Open Authorization) is an open standard for access delegation, commonly used as a way for Internet users to grant websites or applications access to their information on other websites, but without using passwords. For instance, consider when you are using a bank application. OAuth provides you a way to get an authorization token to access protected/privileged bank information. A Brightcove Beacon example is when authenticating to one of the Beacon apps, OAuth will provide the UI and validate the credentials of a potential viewer.
Process overview
A high-level look at the process of using OAuth with Brightcove Beacon is:
Create an Auth0 API.
If using a web application, create an Auth0 single page application. Once created, you will need to send the associated Client ID to the Beacon web app team to get the corresponding Allowed Callback URLs.
Create an Auth0 native application for all other application platforms you are using with Beacon. For each platform, once the applications are created you will need to send the associated Client IDs to the specific Beacon platform team to get the corresponding Allowed Callback URLs.
Enter the returned URLs from each platform team into the corresponding Allowed Callback URLs form field for each platform application.
From one of the applications, copy the OpenID Configuration URL and browse it.
Use information from the browsed OpenID Configuration web page as values for the Auth Providers form in Beacon Classic.
Creating the OAuth API
You must create an OAuth API for you authentication to function properly. The following steps lead you through this process:
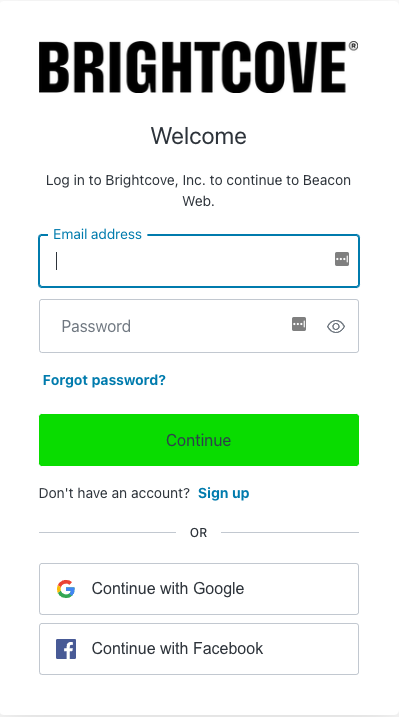
Browse to https://auth0.com/ and either login or create an account and then login.
assets/images/s-general-img/authentication-using-oauth/login-screen.png
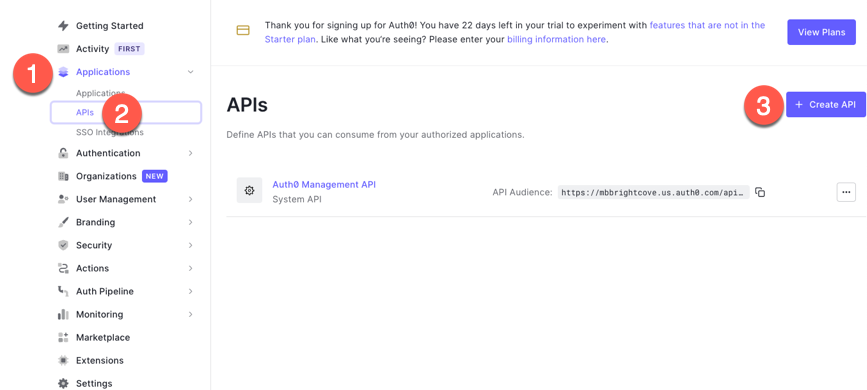
From the Dashboard, click Applications > APIs > Create API.
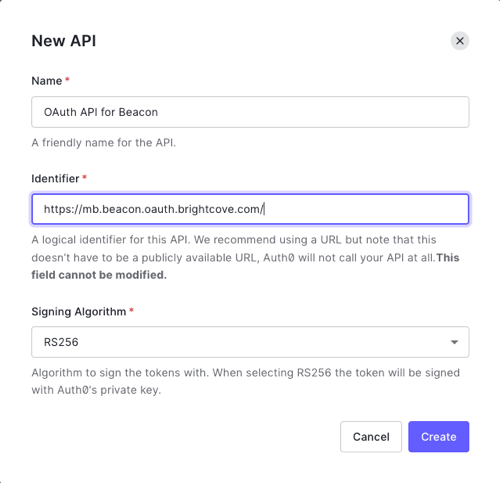
In the New API form, enter the following:
A Name to identify this API
The Identifier is a logical name for the API. A URL is recommended, but it need not be Internet accessible.
Leave the Signing Algorithm the default of RS256.
Click Create.
From the API details page, click Settings, then scroll down to the Access Settings and enable Allow Offline Access.
If you choose, you can change the Token Expiration to meet your business requirements.
Click Save.
In the left navigation, click Applications > APIs and be sure your API has been created.
Creating the single page application
You create a single page application ONLY for your Beacon web app. If you are not going to have a web app, you do not have to perform these steps.
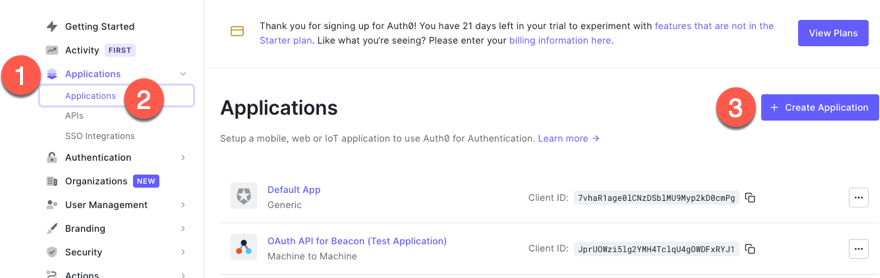
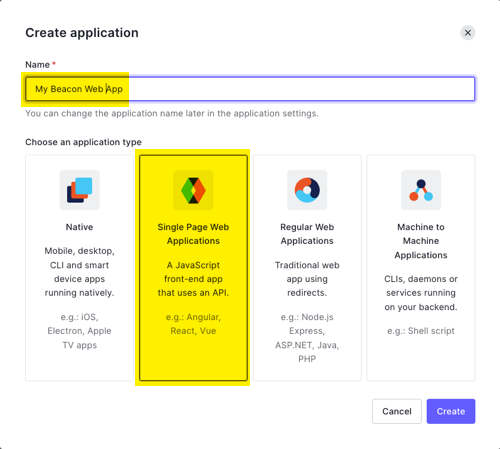
From the Dashboard, click Applications > Applications > Create Application.
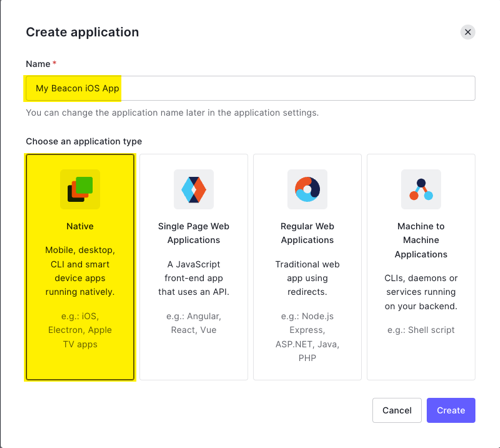
In the Create application dialog, enter a name for your web application and select the Single Page Web Applications option.
Click Create.
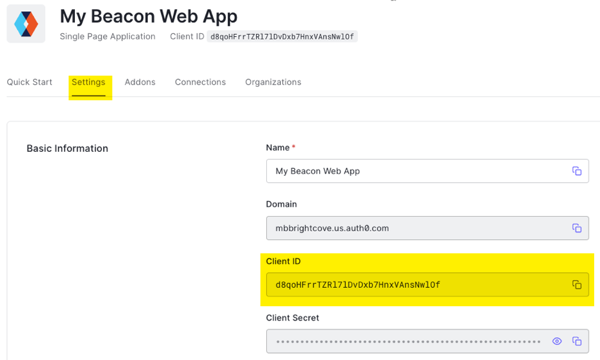
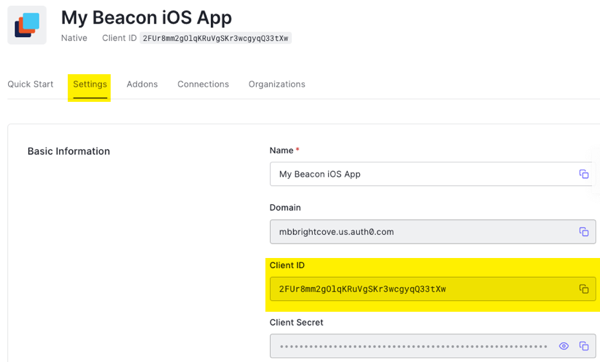
From the application details page, click Settings and locate the Client ID value.
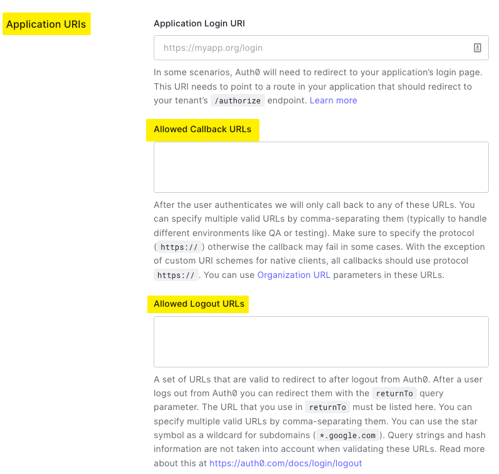
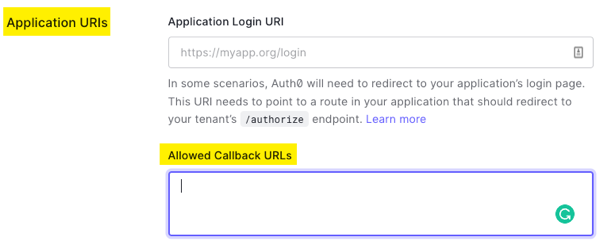
You now need to copy the Client ID, be sure you record that it is from your web application, and send the ID to the Beacon web application team. The Beacon team will then send back to you the value you will enter in Application URIs > Allowed Callback URLs AND Application URIs > Allowed Logout URLs.
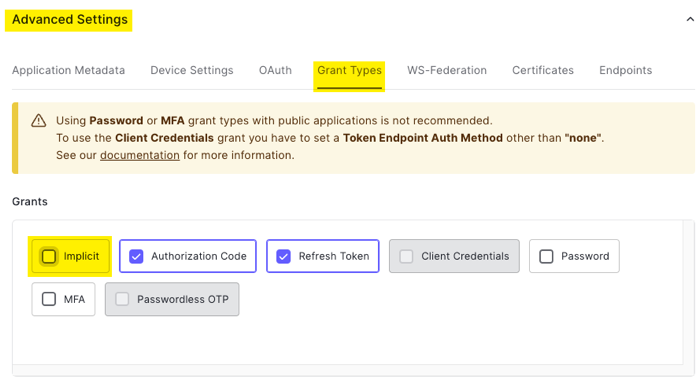
Near the bottom of the application details page, open the Advanced Settings and click on Grant Types.
In the Grants section, uncheck/disable the Implicit grant.
Click Save Changes. Even though you have not yet entered Allowed Callback URLs you can save your current data.
Creating a native application
You must create a native application for each platform for which you have a Beacon application. This includes:
iOS/Apple TV (one application needed for both)
Android Mobile/Android TV (one application needed for both)
Roku
From the Dashboard, click Applications > Applications > Create Application.
In the Create application dialog, enter a name for your web application and select the Native option.
Click Create.
From the application details page, click Settings and locate the Client ID value.
You now need to copy the Client ID, be sure you record to which platform this application corresponds. You then need to send the ID to the correct platform team. The Beacon team will then send back to you the value you will enter in Application URIs > Allowed Callback URLs.
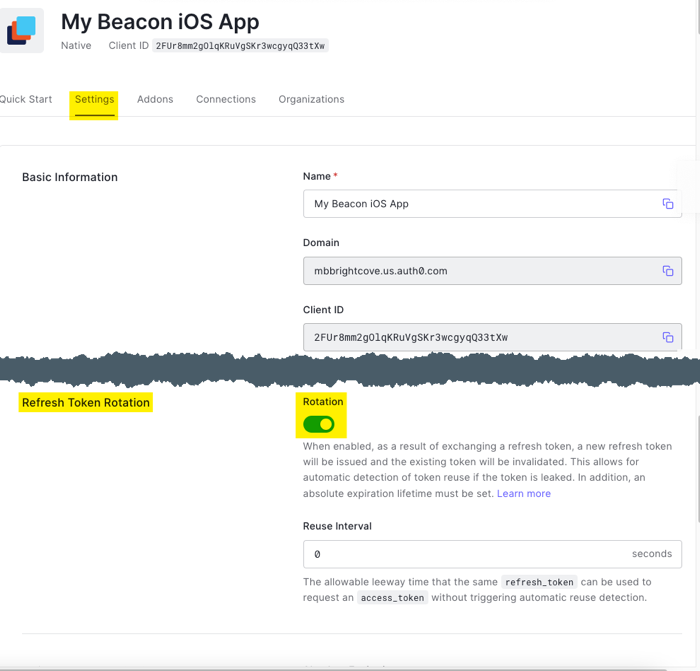
Still in Settings, locate the Refresh Token Rotation group and enable Rotation.
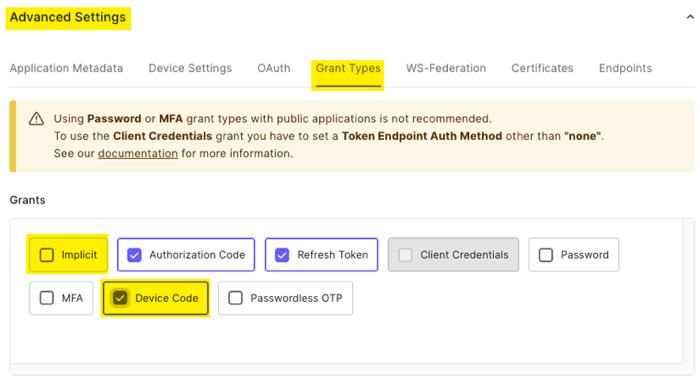
Near the bottom of the application details page, open the Advanced Settings and click on Grant Types.
In the Grants section, perform the following:
Uncheck/disable the Implicit grant.
Check/enable the Device Code grant.
Click Save Changes. Even though you have not yet entered Allowed Callback URLs you will be able to save your current data.
Implementing OAuth in Beacon Classic
In this section of the document, you will learn how to use information from your OAuth applications to fill in the Auth Providers form in the Beacon Classic CMS.
From the dashboard, click on Applications → Applications to see a list of your applications.
Click on any of your applications to view its details page.
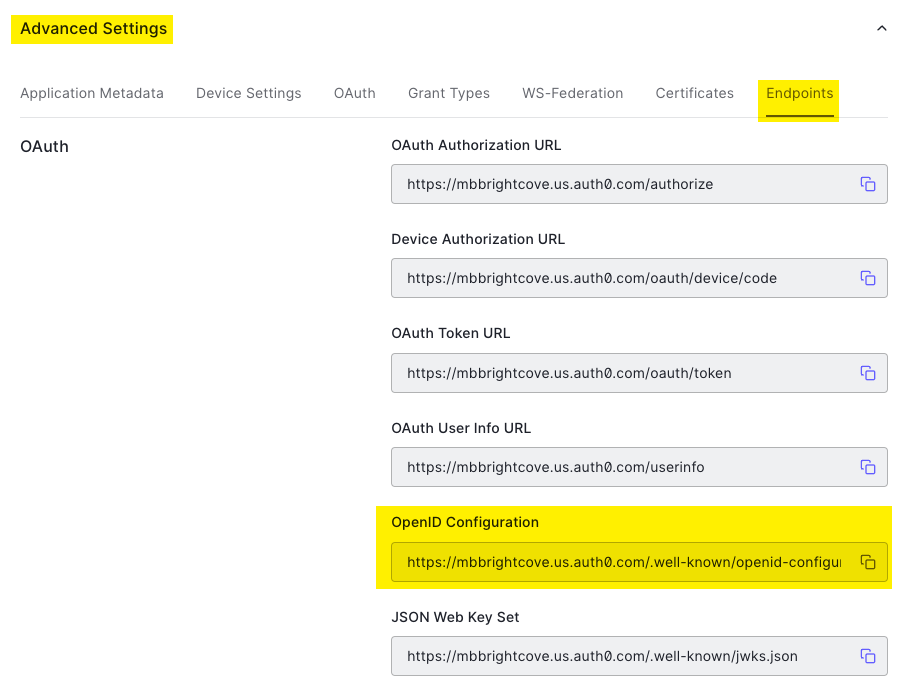
Near the bottom of the page, open the Advanced Settings then click the Endpoints tab.
Locate the OpenID Configuration information and copy the provided URL (note the copy icon at the end of the field).
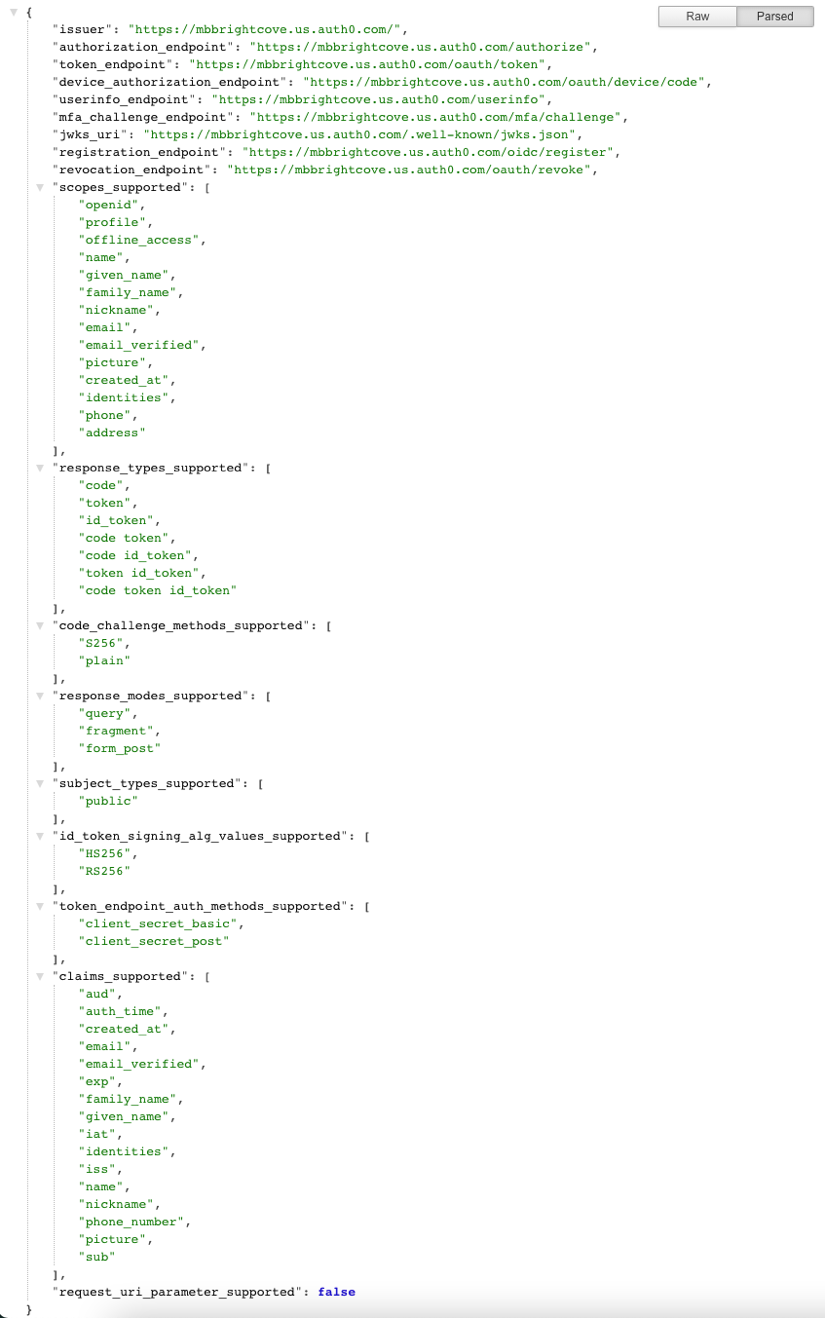
Browse the URL.
Check to be sure you see JSON similar to the following:
In Beacon Classic, click the gear icon in the top navigation.
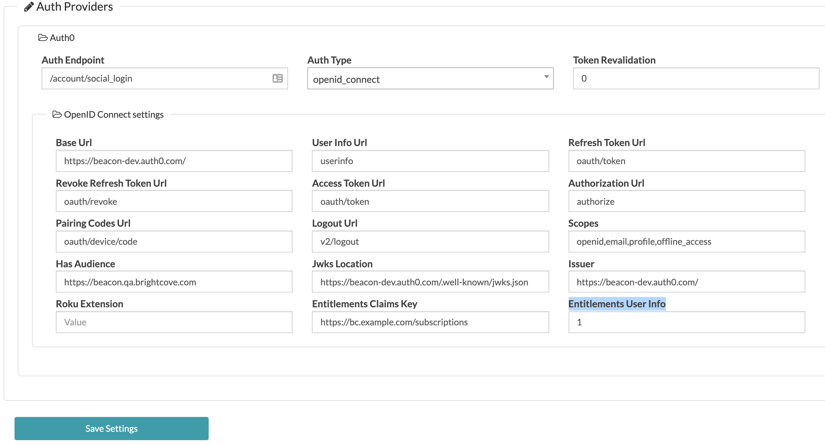
In the left navigation click Auth Providers.
Check to be sure you see a form similar to the following:
Populate each field of the form as instructed in the following table:
Beacon CMS Form Field
Value or location (actual values to enter are in bold)
Auth Endpoint
/account/social_login
Auth Type
openid_connect
Token Revalidation
0
Base URL
From JSON: issuer value, BE SURE to include the trailing slash (/)
User Info Url
From JSON: userinfo_endpoint value
Refresh Token Url
From JSON: token_endpoint value
Revoke Refresh Token Url
From JSON: revocation_endpoint value
Access Token Url
From JSON: token_endpoint value
Authorization Url
From JSON: authorization_endpoint value
Pairing Codes Url
From JSON: device_authorization_endpoint value
Logout Url
v2/logout
Scopes
openid,profile,offline_access
Has Audience
See instructions just below the table
Jwks Location
From JSON: jwks_uri value
Issuer
From JSON: issuer value
Roku Extension
Not needed for this implementation
Entitlements Claims Key
Not needed for this implementation
Entitlements User Info
Not needed for this implementation
Click Save Settings.
Get value for Has Audience
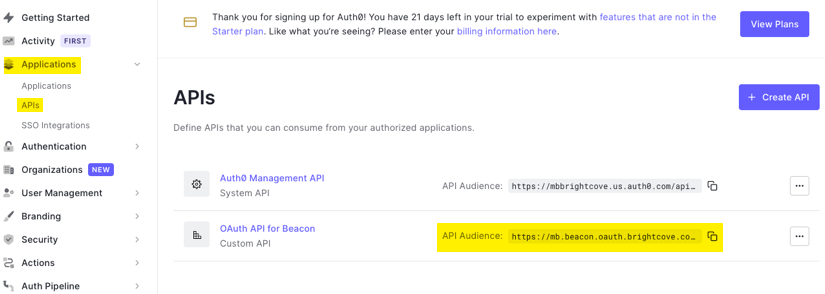
From the dashboard, navigate to Applications > APIs.
Find the API you built earlier and copy the API Audience URL (note the copy icon at the end of the field).
Place this value in the Has Audience form field.
Confirming correct implementation
Once the OIDC provider is integrated correctly with Brightcove Beacon, the OIDC provider's tool will authenticate users to the Beacon apps. For instance, here is the OAuth implementation login screen from a Brightcove testing account:
Note that this login screen looks completely different than the default Beacon login screen.