Editing Video Details
To view and edit the details for a video, open the Media module. In the panel navigation, click All videos and click a video title link. The video details page will open.
Buttons at the top of the video details page provide the ability to:
- Capture new poster and thumbnail images
- Add the video to a folder or add it to a playlist
- Publish a video
- Deactivate/activate videos
- Delete the video
If the video is activated, the Deactivate button can be used to deactivate the video. If the video is deactivated, the Activate button can be used to activate the video. Videos that are deactivated cannot be played in a Brightcove Player.

The preview player at the top of the page can be used to view the video. The cue point timeline will display any cue points that have been added to the video.

Tabs below the cue point timeline organize the video details into sections:
- Overview
- Availability
- Video and Tracks
- Images
To edit the video details, click the Edit button in a section or double-click in a section.
Required fields
Your Brightcove account may be configured with required metadata fields. If a video is inactive, you can freely edit and save its metadata without supplying all required metadata. Also, videos can't be activated until all required metadata has been entered. If a video is already active, you cannot save any edits in the section you are editing unless you supply all required metadata in that section or deactivate the video. For more information on working with required fields, see Setting Required Fields for Videos.
Video Information
The Video Information section can be used to view and edit basic video details.
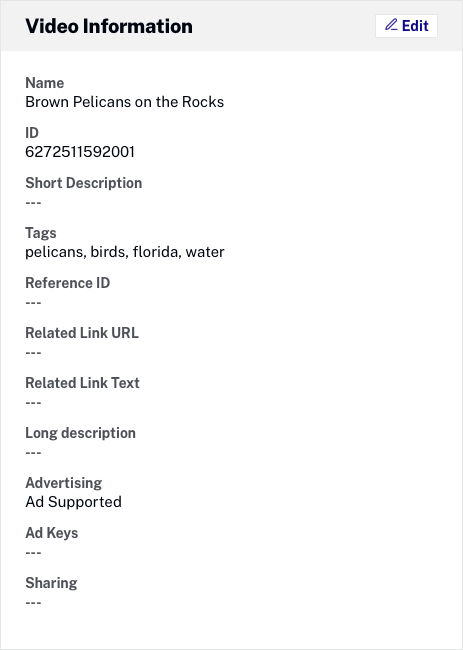
To edit the details, click the Edit button or double-click in the section. The following details can be edited:
- Name - No more than 255 characters
- ID - System assigned video ID (unique across all Brightcove accounts)
- Short description - No more than 250 characters
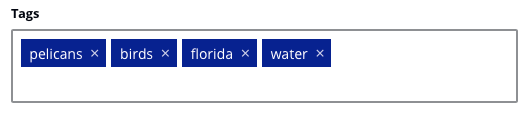
- Tags - One or more tags, separated by commas; used to add videos to smart playlists
- Tags can be up to 128 characters. If any tags have more than 128 characters, an error will be displayed when you attempt to save changes.
- Tags can't contain commas. For example, a tag of "roof, attic + front yard" is not supported.
- A video can have no more than a total of 1200 tags
- A tag differing only in case (lowercase, uppercase) is handled as an identical tag and the case will automatically match those of the original tag
- Issues with case sensitivity need to be handled externally to Brightcove , for example, using JavaScript methods to modify the strings
- After entering a tag, press the comma key or enter. Tags that have been added will display in a colored box.
- Reference ID - A unique ID assigned by a publisher to a video or playlist. Limited to no more than 150 characters. The reference ID is distinct from the video ID or playlist ID which are unique IDs generated by Brightcove. The reference ID enables coordination between Video Cloud and other services such as a publisher's content management system. Note that you can't batch edit the reference ID as two videos can't have the same reference ID. Reference IDs must always be unique. Deleting a video will allow a previously assigned reference ID to be reused.
- Video Projection - Indicates how the video was recorded
- Standard - Default. Regular video recording.
- 360 Degree - Check to indicate the video is a 360 degree video. A 360 badge will appear in the video thumbnail in the Media module. For more information on working with 360 degree videos, see Working with 360° Videos.
- Enable offline playback - When checked, enables the video to be saved locally and viewed offline when using applications created using the device SDKs. This option will only appear if the account is enabled for offline playback.
- Related Link URL - A standard web URL beginning with https:// or https:// limited to 255 characters
- Related Link Text - Related link text limited to 255 characters
- Long Description - No more than 5000 characters
- Advertising
- Free - Ads will not be shown when the video plays
- Ad Supported - Ads may be shown when video plays
- Ad Keys - Passed as part of the ad server URL. For example, to pass
section=blogandanotherKey=value1, you would entersection=blog&anotherKey=value1. See the Google Ad Manager for information on adding key-value pairs. When using ad keys, ad macros should be added to the ad server URL (configured as part of the player advertising properties). Ad macros support variables in the server URL for which the IMA3 plugin will substitute appropriate values. For more information, see the IMA3 developer documentation. - Sharing - Indicates if the video has been shared to another account. For more information, see Sharing Videos to Other Accounts.
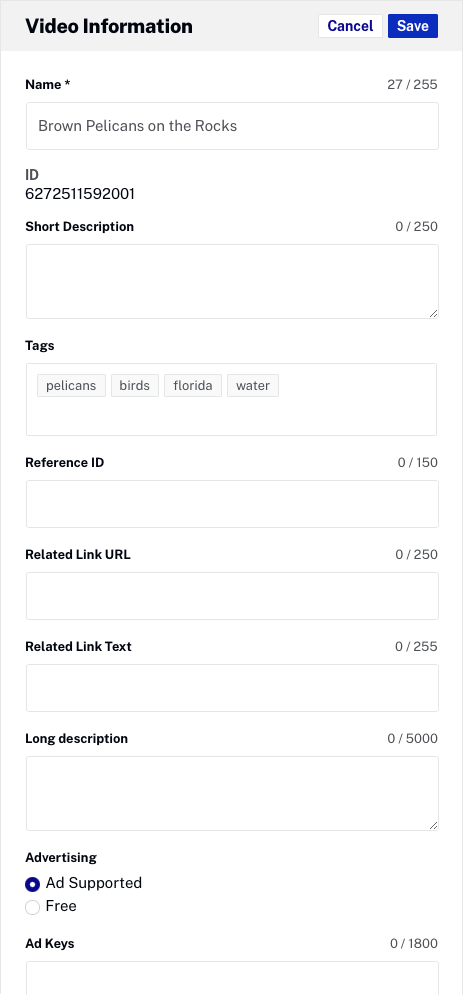
Click Save to save changes.
Video Type Information
The Video Type Information section provides additional video details based upon the Video Type that is selected. The following Video Types are available:
- Movie - Indicates the video is a movie. When a new video is uploaded, the Video Type will be set to Movie.
- Episode - Indicates the video is an episode as part of a season. The Video Type Information panel will display the episode number and the season the video is assigned to.
- Trailer - Indicates the video is used as a trailer. Videos that are added as a trailer for a movie or episode will automatically have their Video Type changed to Trailer.
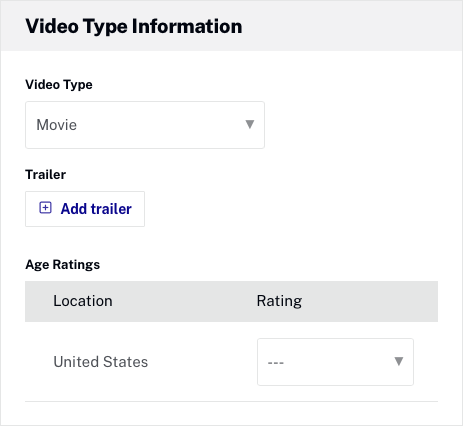
If the Video Type is Movie or Episode, additional video fields may be configured:
- Trailer - Click + Add Trailer to select a trailer for the movie or episode
- Age Ratings - Select age rating(s) for the listed countries
- Episode Number - Enter the episode number (Episodes only)
- Season - Season the episode has been associated with (Episodes only)
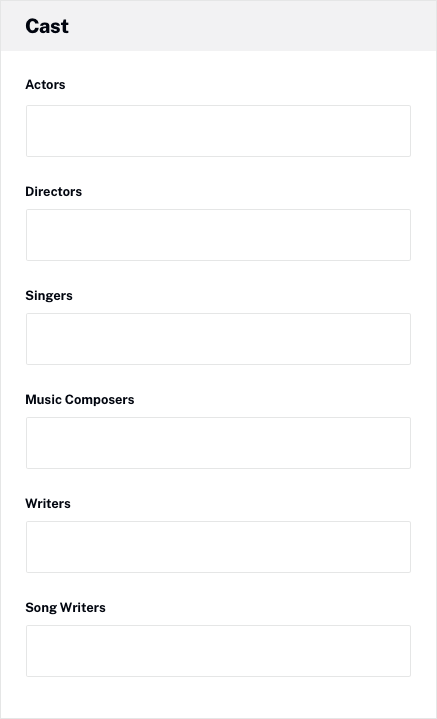
Cast
The Cast section can be used to add cast information for a video. All of the fields in the Cast panel support type-ahead search. As you type, previous matching entries will appear and can be clicked on to add them to the selection.
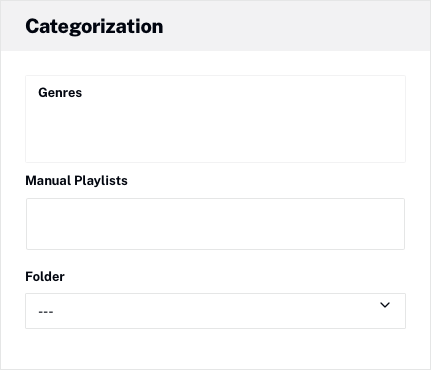
Categorization
The Categorization section can be used to configure the following details:
- Genres - The genres for the video
- Manual Playlists - Playlists that this video belongs to. For more information, see Creating and Managing Playlists.
- Folder - Folder the video is assigned to. See Organizing Videos Using Folders for more information.
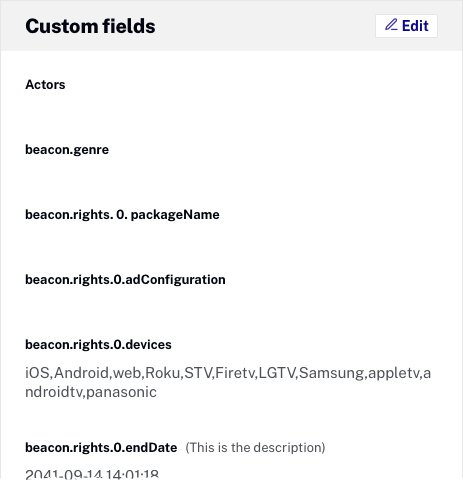
Custom Fields
The Custom Fields section can be used to view and edit the custom field for the video. To edit custom field values, click the Edit button or double-click in the section. An asterisk (*) next to the field name indicates that the field is required.
Availability
The Availability tab displays the video availability settings. The availability settings will differ depending upon the selected Video Type. Availability settings are not available for trailers. For more information on configuring the availability settings, see Configuring Video Availability.
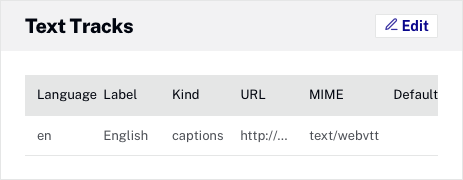
Text Tracks
The Text Tracks section can be used to add text tracks to the video. For more information on configuring text tracks, see Adding Captions to Videos.
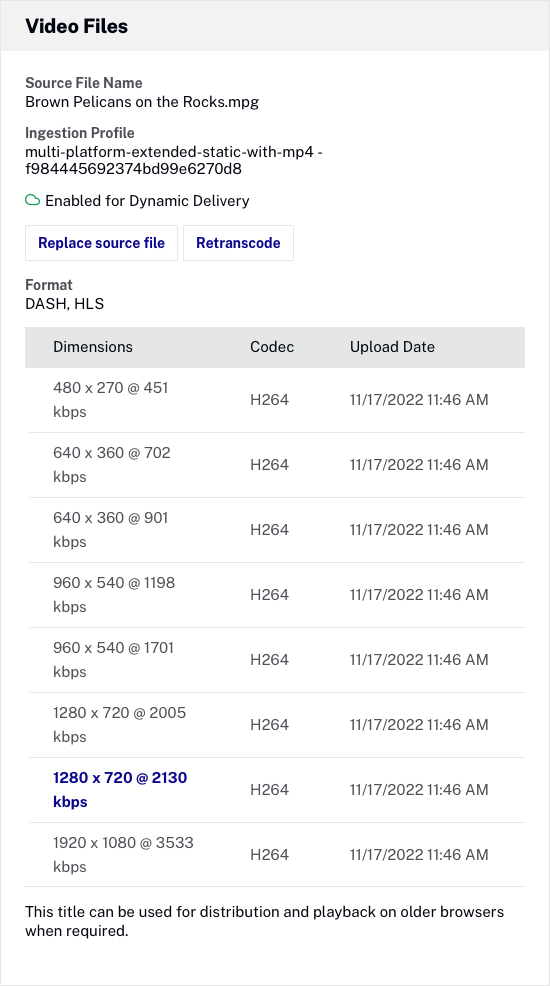
Video Files
The Video Files section displays the:
- Source file name
- Ingest profile that was used (for videos uploaded or retrancoded after Nov. 16, 2022)
- Transcoding technology that was used
- Details on the video renditions that were created.
It also provides the ability to:
To download a rendition, right-click on the format link for the rendition. Note that only MP4 renditions can be downloaded.
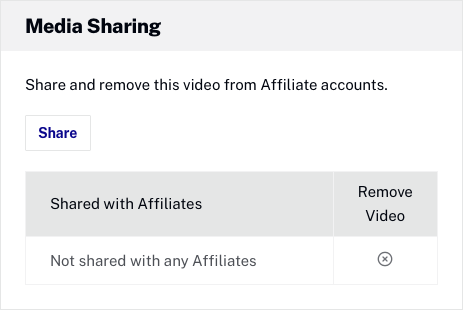
Media Sharing
The Media Sharing section lists the affiliate accounts the video has been shared to (if any). For more information on media sharing, see Sharing Videos to Other Accounts.
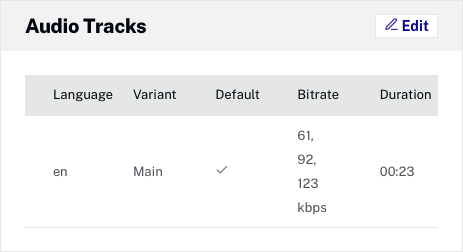
Audio Tracks
The Audio Tracks section displays information on the audio renditions that are available. For information on adding additional audio tracks to a video, see Adding Audio Tracks to Videos.
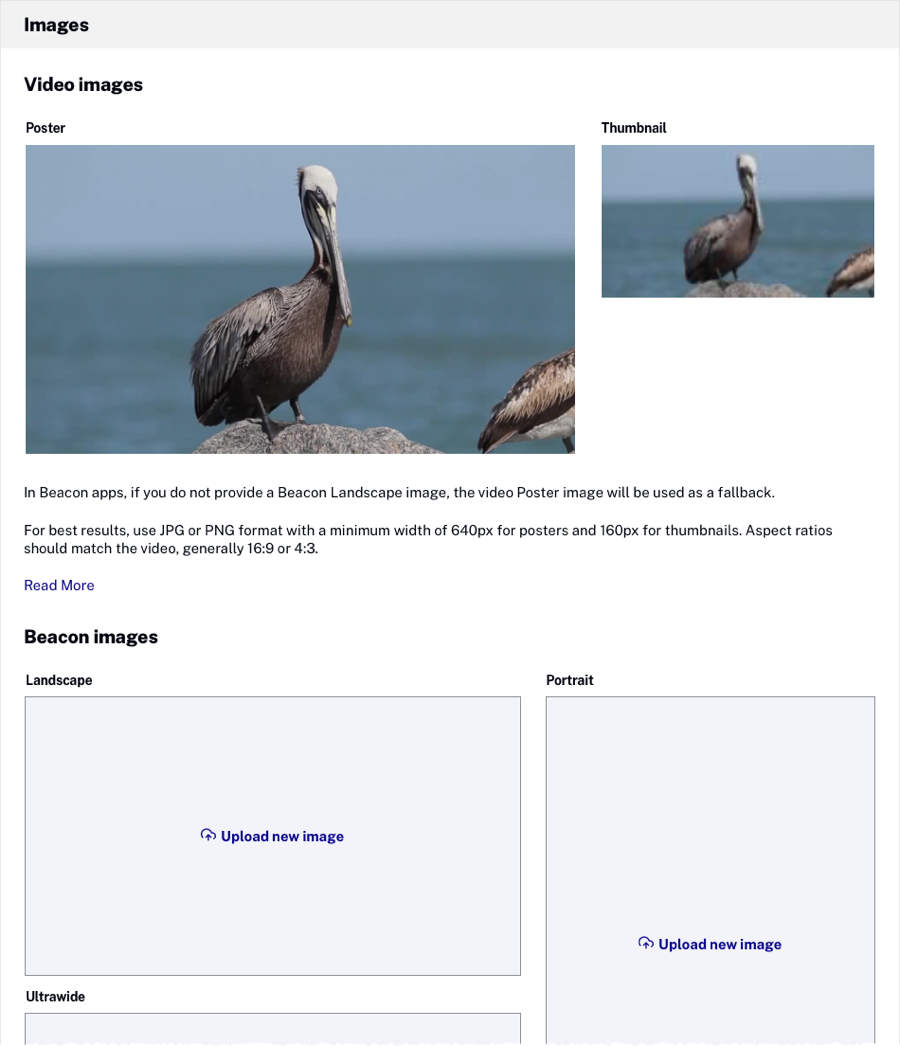
Images
The Images tab displays the images for the video. Poster and thumbnail images are created automatically by taking a snapshot from the source video at the midway point. If you don't like the default images that were captured, you can capture new images or upload other images to use as the poster and thumbnail. Landscape, Portrait and Ultrawide images must be manually uploaded. Hover over any image and click the view icon (![]() ) to view the image in a new browser tab.
) to view the image in a new browser tab.