Integrating Video Cloud with Marketo using Munchkin
The Campaign module integration with Marketo consists of two main components:
- A Brightcove Player plug-in to enable tracking of video views data
- A synchronization process to send tracking data from Video Cloud to Marketo
Requirements
To use the MAPs section with Marketo, you must:
- Have a Marketo account with the Munchkin API enabled - you will need your Munchkin account ID (see Accessing the Marketo munchkin below); users with the Munchkin User role should be able to access these values
- Have your account enabled for the MAPs feature. Contact customer support for enablement
- Use the Advanced Embed (in-page) publishing code when publishing your player; Standard Embed (iframe) publishing code will not work as the plugin will be running inside of an iframe and therefore will be unable to access any parent page URL parameters and may not get the correct cookies
Features
Some of the key features of the Video Cloud - Marketo integration are:
- Lead forms - Create Marketo forms that will appear automatically as viewers watch videos. For information, see Creating Custom Lead Forms for Marketo.
- Data format - Video cloud viewing data is delivered to Marketo as a page view, or a virtual web visit. The web page visit event contains query parameters that indicate the viewer's level of engagement. The data that is replicated to Marketo is as follows:
- Video Name
- Video ID
- Account ID (Video Cloud)
- Page URL (URL of the referring page)
- Player ID (Video Cloud player)
- % Watched (25%, 50%, 75%, 95%)
- Data transfer - Viewing data is sent immediately to Marketo when the Campaign-enabled Brightcove player generates it, however, some reports in the Marketo platform may take some time to refresh. The Marketo Munchkin integration does not send viewing data to Campaign. The viewing data is sent directly to Marketo client-side in the browser.
- Data retention - Data collected can optionally be retained in Video Cloud for up to 1 month
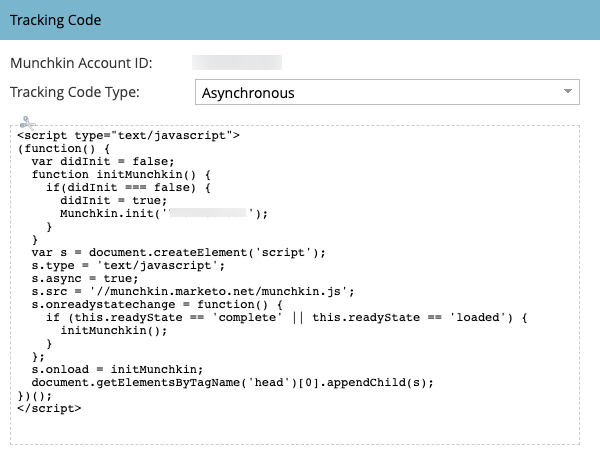
Accessing the Marketo munchkin
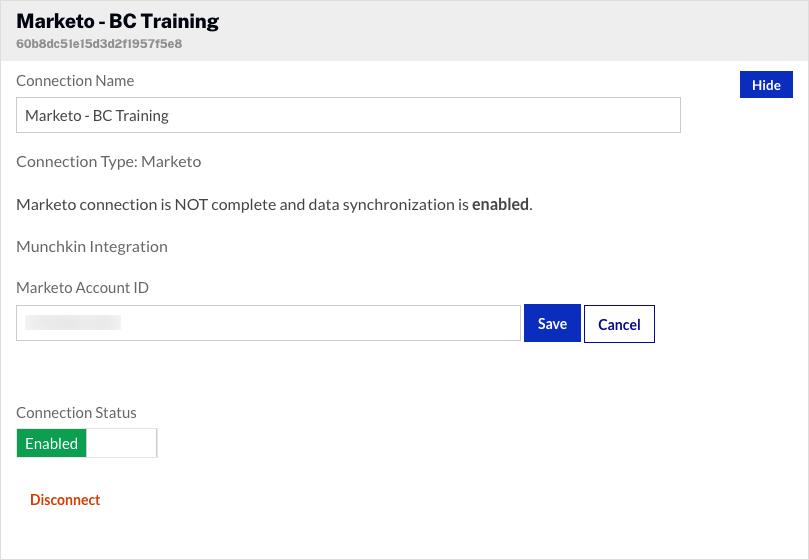
When configuring the integration with Video Cloud, you will be prompted to use your Marketo Munchkin Account ID. Follow the steps below to access this value.
- Login to your Marketo account.
- Click Admin in the top navigation.
- In the left navigation, navigate to Admin > Integration > Munchkin.
- Copy the Munchkin Account ID and save it in a safe place. It will be needed when configuring the MAPs section.
Setting up the connection
Follow these steps to setup the connection between Video Cloud and Marketo.
Establishing the connection between Video Cloud and Marketo
- Open the Campaign module.
- In the left navigation, click Data Connections.
- Click .
- Select Marketo as the integration.
- (Optional) Enter a Connection Name.
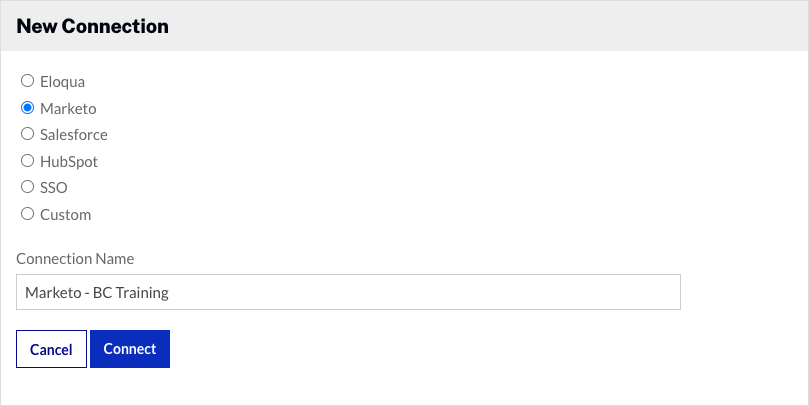
- Click .
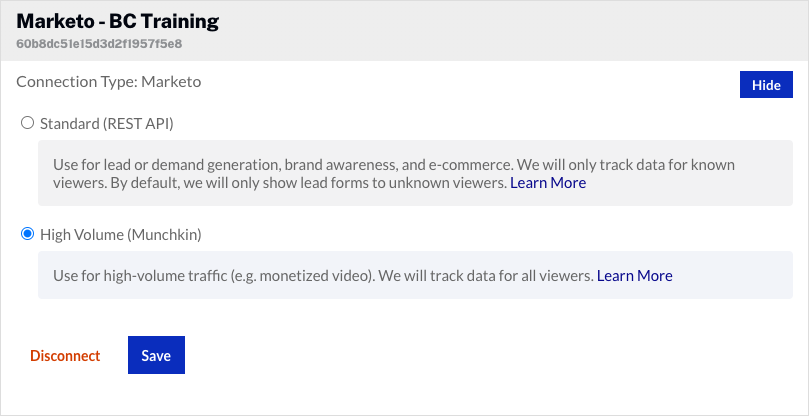
- Select High Volume (Munchkin) and then click .
- Click the empty link in the Marketo Account ID section. Paste in your Munchkin Account ID and click .
The Video Cloud connection to Marketo is now set up and ready to use.
Configuring the integration
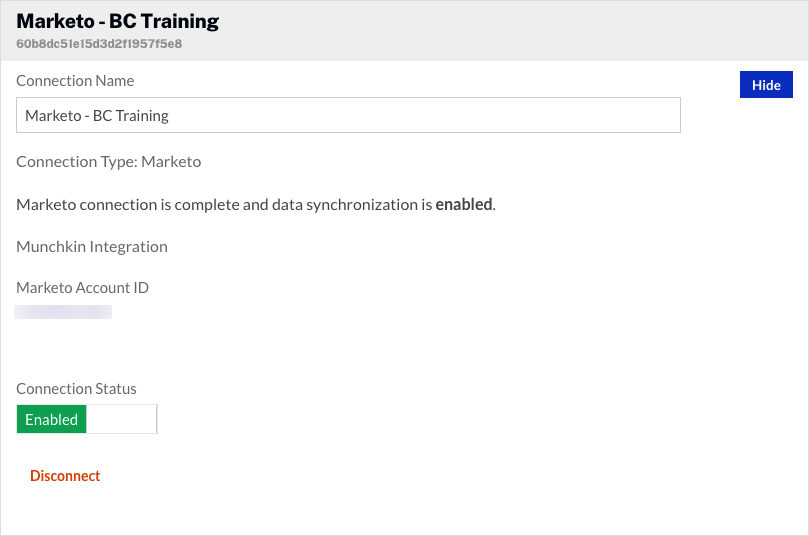
- By default, the Connection Status will be Enabled. The Connection Status determines if Video Cloud video engagement data is sent to Marketo.
- Enabled - Data is collected and will be sent to Marketo
- Disabled - No data is collected (integration is disabled)
To remove the integration with Marketo, click . The Campaign module supports multiple connections to marketing platforms. Click to configure additional integrations.
Creating a Campaign-enabled player
Video engagement data will only be sent to Marketo when you are using a Campaign-enabled video player. For information on creating a Campaign-enabled Brightcove Player, see Creating a Campaign-enabled Player.
Passing a tracking ID
The Campaign module supports the ability to pass a tracking ID value to Marketo. The tracking ID might be used to track a campaign ID for example. The tracking ID can be appended to the URL that displays the Campaign-enabled player or added to the player embed code.
- Example: Appended to URL
http://www.myurl.com/video.html?bctrackingid=12345
- Example: Added to player embed code
    <video data-video-id="6033402539001"
           data-account="1486906377"
           data-player="default"
           data-embed="default"
           data-application-id
           class="video-js"
           data-bc-trackingid="12345"
           controls></video>
    <script src="//players.brightcove.net/1486906377/default_default/index.min.js"></script>
Campaign will then pass the value along to Marketo as another field that is synced.
Identifying viewers
Campaign-enabled players with a Marketo integration will refer to the Munchkin cookie (_mkto_trk) which is created in the user's browser. This value is captured in the Campaign module’s viewing data and is used to synchronize viewing data to Marketo.