Introduction
For iOS and Android apps you can send notifications using Google Firebase. This document will walk you through the process. The configuration of the iOS and/or Android apps to enable this functionality is done by Brightcove.
Sending a notification
The implementation tasks to send a notification are detailed in the remainder of this document. Those steps are:
- Configure the notification
- Define the target
- Schedule when the notification will be sent
- Add options for the video asset to which the notification is linked
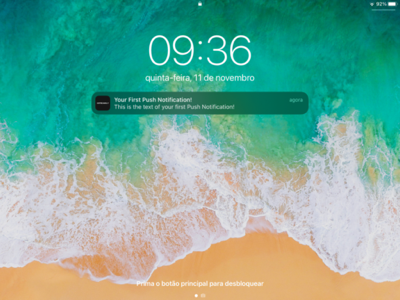
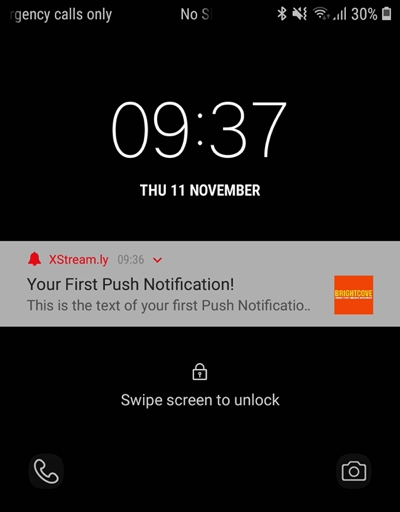
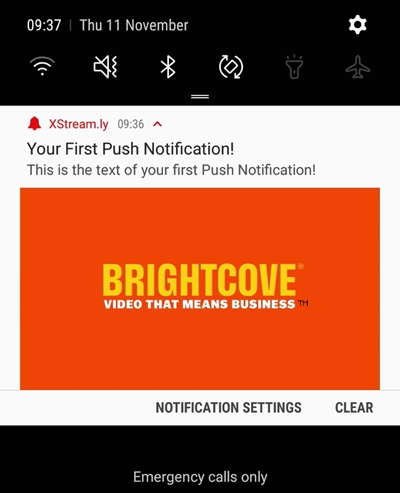
Example notifications follow:
- iOS
- Android Closed
- Android Expanded
Configure the notification
If this section you define the content in the notification.
- Navigate to the Firebase Console and select your project.
- In the left navigation select:
- Engage
- Cloud Messaging
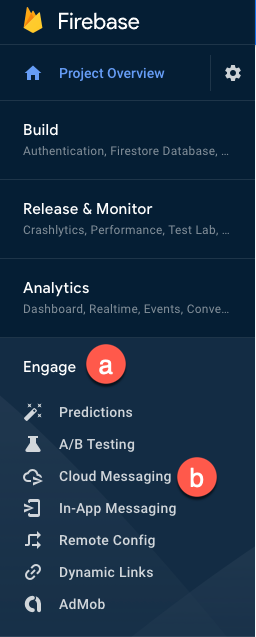
- Click Send your first message.
- Supply the Notification title and Notification text. Note that you can see a preview on the bottom right of the screen.
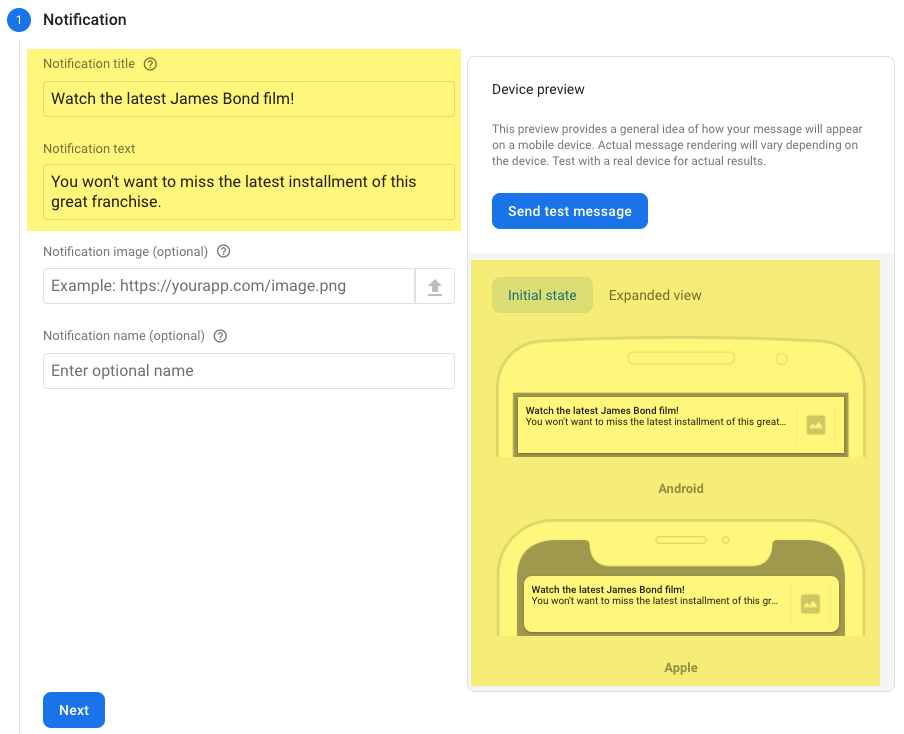
- Add an optional notification image, if desired. Note that this feature is only supported by Android apps.

- Add an optional notification name, if desired.

- Click Next.
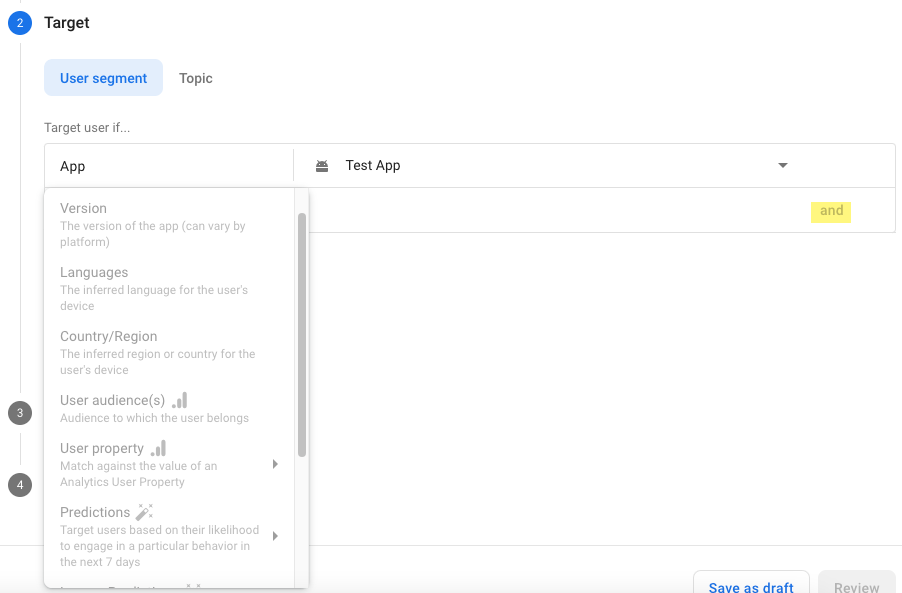
Define the target
When you define the target you configure which app(s) should receive the notification and also define any further restrictions on whom should receive the notification.
- Select the app or apps to which you wish to send the notification. Note that to add another app you need to click the Target another app button, which is disabled currently in the screenshot.
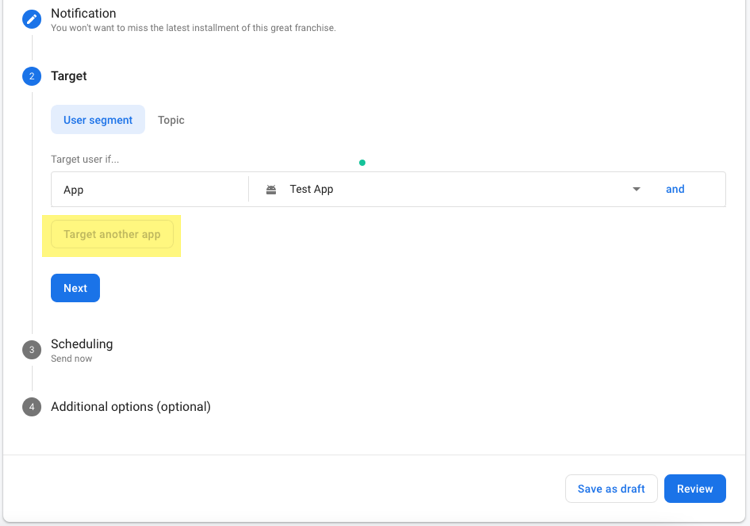
- Add any filters for each app to which you are sending the notification by clicking the and button.
- Click Next.
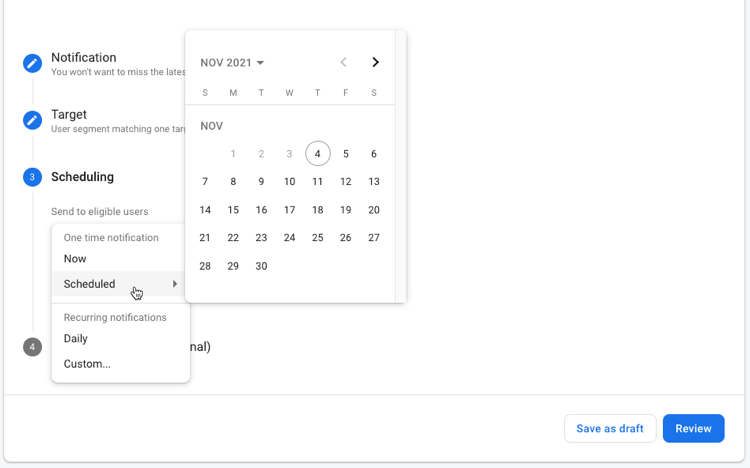
Schedule when the notification will be sent
You have the option to send the notification immediately or have it sent repeatedly.
- Choose when you will send the notification.
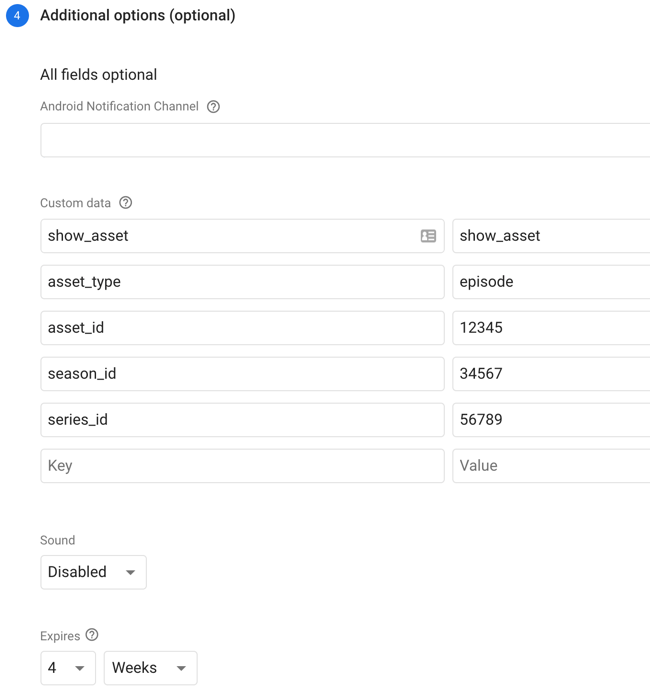
Add options for the video asset to which the notification is linked
You will often link to a video asset that will be displayed when the viewer clicks a link in your notification. The video asset is defined in the Addition options section. The options from which you can choose are defined in this table:
| Key | Value | Data Type |
|---|---|---|
| action | show_asset | The actual string show_asset |
| asset_type |
|
One of the strings from the possible value list |
| asset_id | asset_id | Numeric value retrieved from Beacon Classic |
| season_id | season_id | Numeric value retrieved from Beacon Classic |
| series_id | series_id | Numeric value retrieved from Beacon Classic |
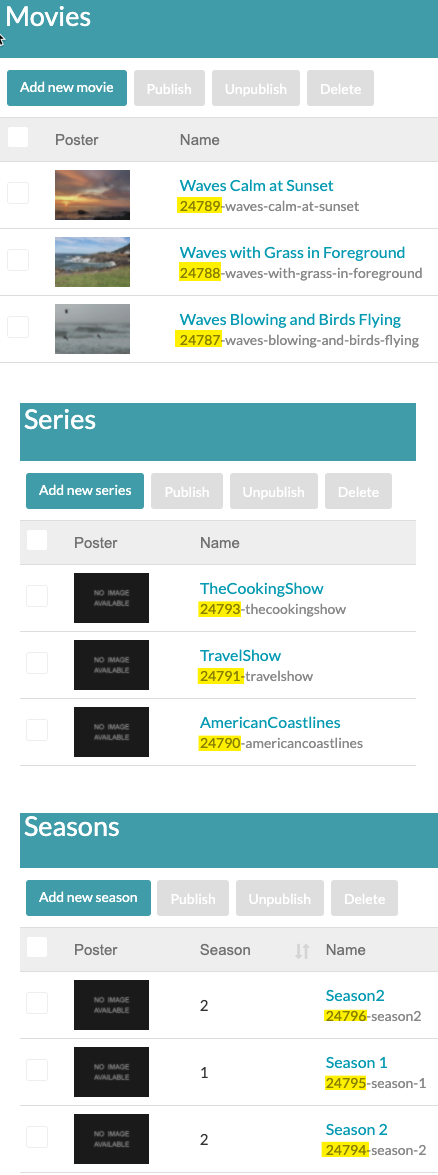
To find the IDs of the video assets, in Beacon Classic select the asset, season for series for which you need the ID. The ID will be part of the name information, as highlighted in the screenshots below.
- Complete the additional options for the video asset to which you wish to link. An example is shown here:
- Finalize the process by clicking Review, confirm the information in the Review message dialog, then click Publish.
Note the following:
- The season_id and series_id are optional and only used in the case when asset_type is episode.
- The series_id is also used if the asset_type is season.
- If you have the Explore option disabled and user has not authenticated, when the the app opens from a notification and the user authenticates the details page for the video asset is displayed to the user.
- When a asset is opened from a push notification, the workflow is the same as opening an asset from a carousel regarding:
- Entitlements checks and buttons displayed
- Continuous Play (applicable when the asset in the notification is a series/seasons)