Introduction
Creating a live event with DVR enabled involves a number of steps. At a high-level these steps are:
- In Beacon Studio, create a live event in the Live module. In the creation of this event you ensure DVR functionality is enabled.
- Create a live stream. In this document the free software tool OBS Studio is used.
- In Beacon Classic, create an event linked to the live event created in Beacon Studio.
- In Beacon Studio, publish the live event by adding the event to an OTT playlist and placing that playlist on a Beacon app page.
Create a Live event in Studio
The steps in this section lead you through the process of creating a Live event in Beacon Studio.
- Log in to Beacon Studio and select the Live module.
- In the top-right of the page click Create Event.
- Give the event a Event Name.
- For the Live Ingest Profile select the appropriate value for your environment.
- By default, the Convert event to video asset when complete is checked. Uncheck this if you do not wish to have the live event as a VOD asset after the event concludes.
- Open the Advanced Options section.
- Check the Create Cloud DVR checkbox.
- Supply a value for the DVR Window. This value is in seconds with a maximum of 24 hours, which is 86400 seconds, allowed.
- Check the Enable stream status notifications checkbox.
- Enter a URL based on the form:
where, as indicated, the domain of the URL points to the location of your Beacon Classic domain.https://YourBeaconClassicDomain/webhook/live_api_notification - Check to be sure the two values are changed, with your values, for the Advanced Options:
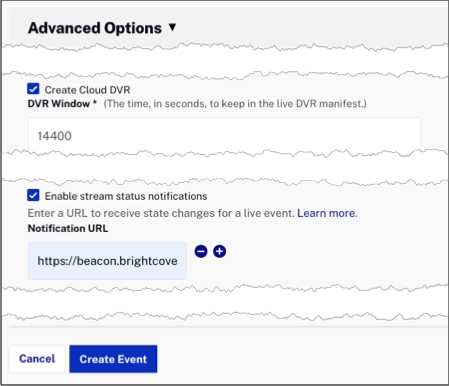
- Click Create Event.
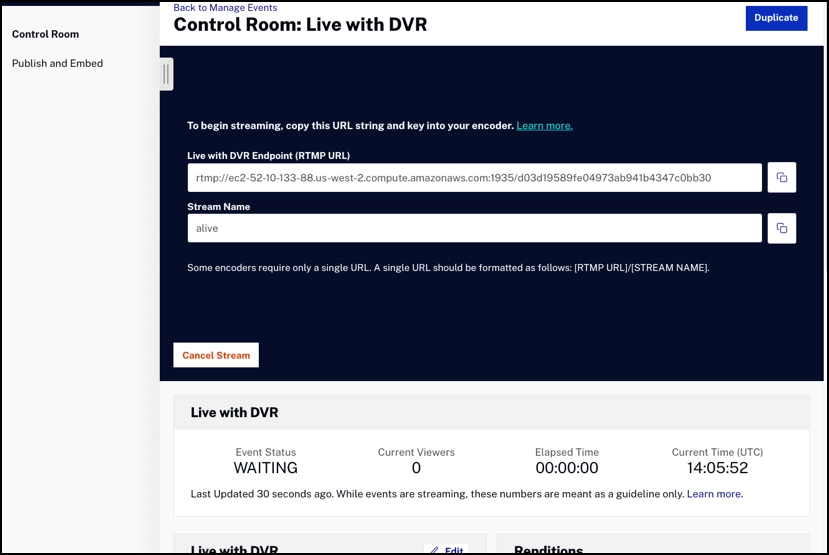
- Check to be sure you are taken to the Control Room for your live event. Note the event is in the Waiting status.
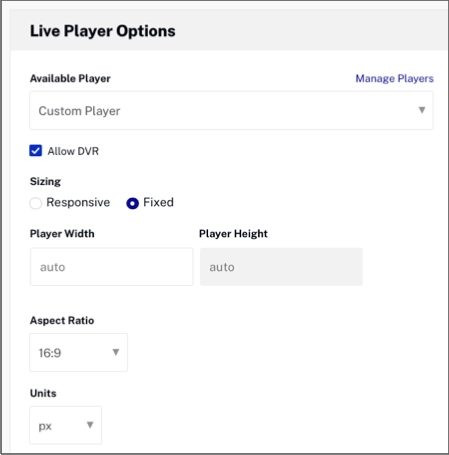
- Click on the Publish and Embed link to open that section of the page.
- In the Live Player Options details, be sure Allow DVR is checked.
- In a text file, BE SURE to document from the Control Room main page the following properties and associated values:
- Live with DVR Endpoint (RTMP URL)
- Stream Name
- Job ID
- Video ID
- Player URL - Note you use only part of this value later
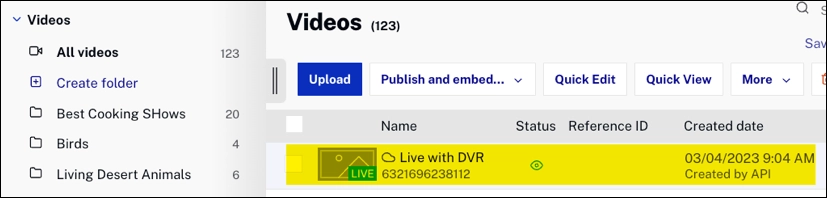
Note that the event also appears in the Media module as VOD content:
Stream a video
In this section you setup a live stream. These steps use the free video streaming tool OBS Studio. For more information on OBS Studio and its configuration, see the Step-by-Step: Using the Live Module with Open Broadcaster Software (OBS) document.
Of course, the setup depends upon the streaming hardware or software you are using.
- In OBS Studio, in the Sources panel, add your Video Capture Device.
- In the Controls panel, click Settings.
- In the Settings dialog, click Stream.
- From the Service dropdown, select Custom...
- For the Server value, paste in the Live with DVR Endpoint (RTMP URL) documented earlier.
- For the Stream Key paste in the Stream Name documented earlier.
- Click OK.
- Check to be sure OBS is streaming your video.
Create an event in Beacon Classic
You now create an event in Beacon Classic that can be added to an OTT playlist. Then that playlist is added to a page so the event appears in your Beacon app.
- Log in to Beacon Classic.
- In the top navigation, select Events.
- Click Ad new event.
- In the Basic Data tab, enter an event Name.
- Choose a date and time for the Event Start Date.
- For the Job ID paste in the Job ID documented earlier.
- Change to the Textual Data tab.
- Enter a Title.
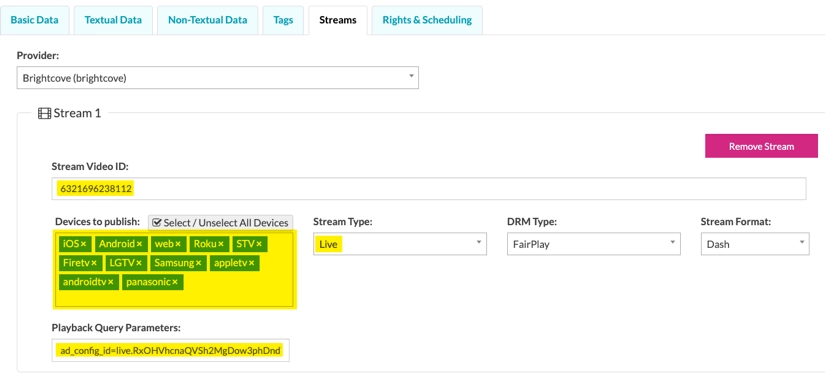
- Change the Streams tab.
- Click Add new stream.
- In the Stream Video ID, paste in the value for Video ID documented earlier.
- Select all for the Devices to publish.
- From the Stream Type dropdown, select Live.
- View the value documented earlier for the Player URL.
- Look for the string adConfigId (highlighted in red) in the URL and then copy the remaining value (highlighted in yellow).

- In the Player Query Parameters, enter the string ad_config_id= then paste in the value just copied. The completed value in the form should resemble:
ad_config_id=live.RxOHVhcnaQVSh2MgDow3phDndV_CZKYijFlfQlc1zFivy54hoqywi8xny3hukJzJmVAbZxcSngK037JgPMX1HEt5uHP5XQcO9b3SsSgHHfPWcao5LSW4BIk - Check to be sure your form appears similar to the following:
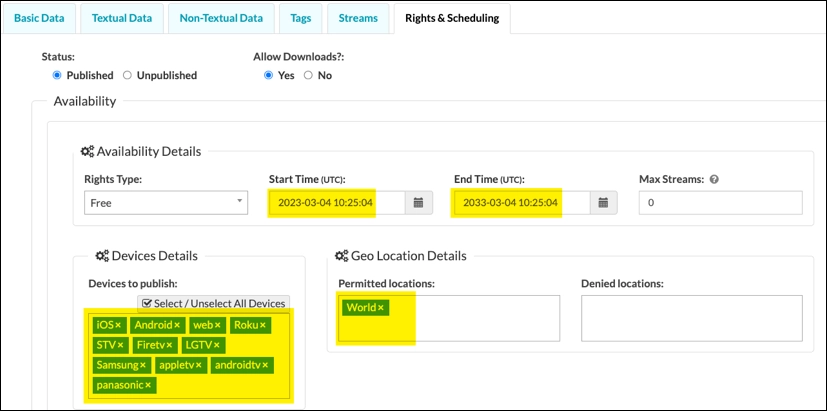
- Change to the Rights & Scheduling tab.
- Enter a Start Time for the event.
- Enter an End Time for the event.
- Select all for the Devices to publish.
- Select a geography for the Permitted locations.
- Check to be sure your form appears similar to the following:
- Click Create New Event.
Publish live event
Once you have created your event in Beacon Classic, it needs to be published so it appears in your Beacon app. This process is dependant on if the page and/or playlist you wish to you use is/are already created. The steps below give a high level view of the process.
- Designate or create the page on which you wish the event created in Beacon Classic to appear.
- Designate or create the OTT playlist in which the event created in Beacon Classic is placed.
- Add the event created in Beacon Classic to your OTT playlist.
- Add the newly changed playlist to your designated page. Of course, if the playlist previously existed, it may already be assigned to a page.
- If you created a new page, be sure it is published.
- Refresh the app's cache.
That's it, you have now created and published a live event with DVR functionality enabled.