


Creating Ingest Profiles for Dynamic Delivery
Ingest profiles contain the transcode settings that will be used when videos are transcoded. The ingest profile editor that is displayed will change based upon the transcoding options that have been configured for the account.
To access the Ingest Profiles administration page, click the Admin link and then Ingest Profiles. A list of ingest profiles will appear.

Your Brightcove account will be configured with one or more ingest profiles. All Brightcove accounts are configured with a default set of ingest profiles which can't be edited or deleted. These are marked with a Type of Standard VOD in the Studio. The Profile Version displays the type of transcoding that is used with the profile. For specific details on the renditions provided with the Brightcove supplied ingest profiles, see Standard Ingest Profiles for Dynamic Delivery and Context Aware Encoding.
Creating a new dynamic delivery profile
The Ingest Profiles administration page can be used to create new ingest profiles. Ingest profiles are defined using JSON.
To create a new dynamic delivery ingest profile:
- Open the Admin module.
- Click Ingest Profiles.
- Click New Profile > Dynamic Delivery. The profile editor will open.
- Enter a Name and Description for the profile.
- Decide whether to Store master files. Storing the master keeps a copy of the master file and provides the ability for the video to be retranscoded in the future without the need to upload it again. For additional information on archiving masters, see the Archiving Masters document.
- Enter the Width and Height for the Poster and Thumbnail images.
- Select a setting for the images:
- Capture images automatically at upload time - Brightcove will capture poster and thumbnail images when the video is uploaded. Images are captured at the 50% point in the video.
- Don't capture images; I'll upload or capture my own images - Poster and thumbnail images will be captured or uploaded using the Media module.
- Add the renditions you need for the profile. Be sure to select both video and audio renditions to ensure your videos play with audio. Also add progressive (MP4) renditions if you want downloadable renditions available for the video. Click Add Rendition.
- Continue to click Add Rendition to add additional renditions.
- Use the Codec, and Rendition dropdown lists to select an audio, video (H264, HEVC), or progressive (MP4) rendition to be included. The rendition details will display in the table.

- Click to save the new profile.
Adding custom renditions to an ingest profile
Your account may have custom renditions available that were created by Brightcove Support. Custom renditions can be added to new or existing ingest profiles. Typically, renditions are added to an ingest profile using the rendition dropdown list when adding/editing an ingest profile. However, custom renditions are not displayed in the rendition dropdown list. Follow these steps to add custom renditions to an ingest profile.
- Click on an ingest profile name to edit it.
- Click the Advanced Editor link at the top of the page.
- Locate the
dynamic_originentry. - Add the custom rendition(s) created by Brightcove Support to the
renditionssection.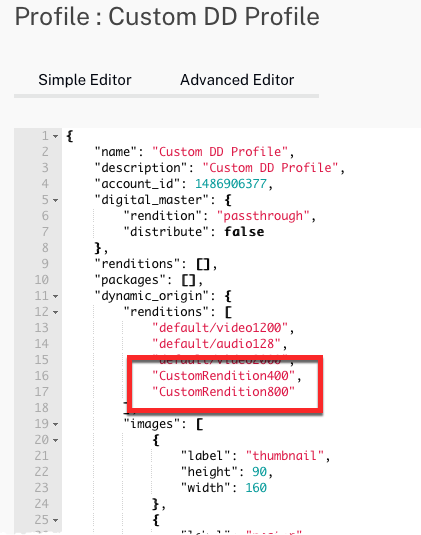
- Click .
Creating custom profiles for Social clipping
Custom ingest profiles can also be used for Social clipping. Generally, the lower quality renditions included in the Brightcove default ingest profiles aren't necessary for Social distribution use cases, so custom clipping ingest profiles can typically be limited a small number of medium to high quality renditions. For example, a custom clipping ingest profile that includes the video3500, video2000, and video1700 video renditions is more than adequate for most Social distribution use cases. Using a custom profile for Social clipping allows you to apply additional transformations to clips, such as the addition of watermark images. To create a custom profile with a watermark, contact Brightcove Support.
Duplicating ingest profiles
If you need to create a profile that is similar to an existing profile, you can duplicate an existing profile and then edit it to make the needed changes.
To duplicate an ingest profile:
- Open the Admin module.
- Click Ingest Profiles.
- Click on the ingest profile to duplicate.
- Click Duplicate.
- Use the Profile Editor to edit the profile name and definition. Renditions can be removed by clicking the remove icon (
 ) next to a rendition.
 - Click .
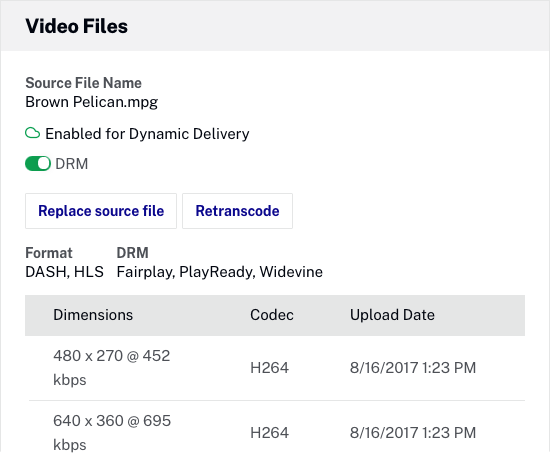
DRM support in profiles
Contact Brightcove Support to set defaults for DRM packaging of your videos. You do not need to specify DRM packaging in your ingest profiles. If your account is enabled for DRM and you want to deliver some titles without DRM, edit the video properties in the Media module and set the DRM flag for the video to No DRM.
Editing ingest profiles
The Ingest Profiles administration page can be used to edit ingest profiles. Note that the default set of ingest profiles (marked Standard VOD) can't be edited.
To edit an ingest profile:
- Open the Admin module.
- Click Ingest Profiles.
- Click on the ingest profile to edit.
- Use the Profile Editor to edit the profile definition. Renditions can be removed by clicking the remove icon () next to a rendition.
- Click .
Deleting ingest profiles
The Ingest Profiles administration page can be used to delete ingest profiles that are no longer needed. Note that the default set of ingest profiles (marked Standard VOD) can't be deleted but they can be hidden if they are not needed.
To delete an ingest profile:
- Open the Admin module.
- Click Ingest Profiles . The Ingest Profiles administration page will open displaying the ingest profiles that have been created for your account.
- Click the delete icon (
 ) next to the ingest profile or click the profile name and then click the Delete button.
 - Confirm the deletion by clicking .
Selecting a default ingest profile
A default ingest profile can be configured for when videos are uploaded and when creating clips using the Social module. The upload default profile is indicated with  next to the profile name. The social clipping default profile is indicated with
  next to the profile name.
To select a default ingest profile for uploading/clipping:
- Open the Admin module.
- Click Ingest Profiles. The Ingest Profiles administration page will open displaying the ingest profiles that have been created for the account.
- Click the ingest profile name for the profile you want to set as the default.
- Click the Uploading or Social clipping link at the top of the page to set current profile as the default.
Hiding and showing ingest profiles
Ingest profiles can be hidden by clicking the slider associated with the profile to the Hide position. This is useful to hide default profiles that may not be needed.

Ingest profiles that are hidden will not appear in the Ingest Profile list in the Upload module.
Using the Advanced Editor
Ingest profiles are defined using JSON. To view the JSON syntax for a profile, edit a profile and then click the Advanced Editor tab. The JSON representation of the profile will display.
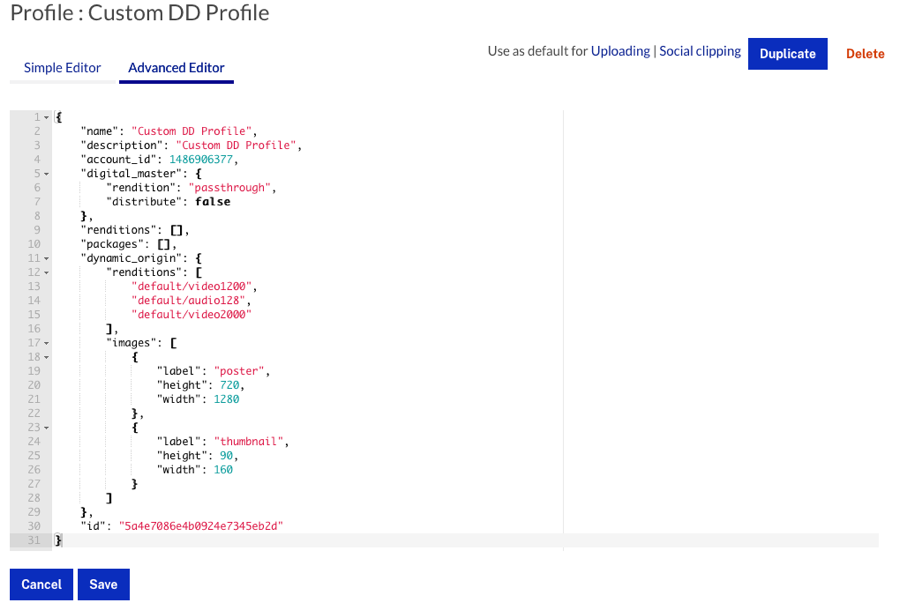
While the JSON can be edited here, Brightcove recommends editing profiles using the Simple Editor to reduce the likelihood of mistakes. For information on the available attributes, see the Ingest Profiles API Fields Reference for Dynamic Delivery and Context Aware Encoding topic.