

Overview
To stream a Live event to your application, you must follow a series of steps to connect your Beacon Studio Live account and Beacon Classic.
A high-level view of the process is:
- In Beacon Classic, create an event and a playlist.
- In Beacon Studio, access the Live module to create your event and obtain a job ID.
- In Beacon Classic, register your live event using the job ID from Beacon Studio.
- The Live video will start streaming in the Beacon App.
In the last section of this document you will see the steps to create a different type of event in Live by using a Static Entry Point. This allows for recurring live events that can be activated and deactivated and need to be configured only once.
The rest of this document will provide details for each of the steps above.
Creating a Live event in Beacon Classic
Follow these steps to create an Event in Beacon Classic.
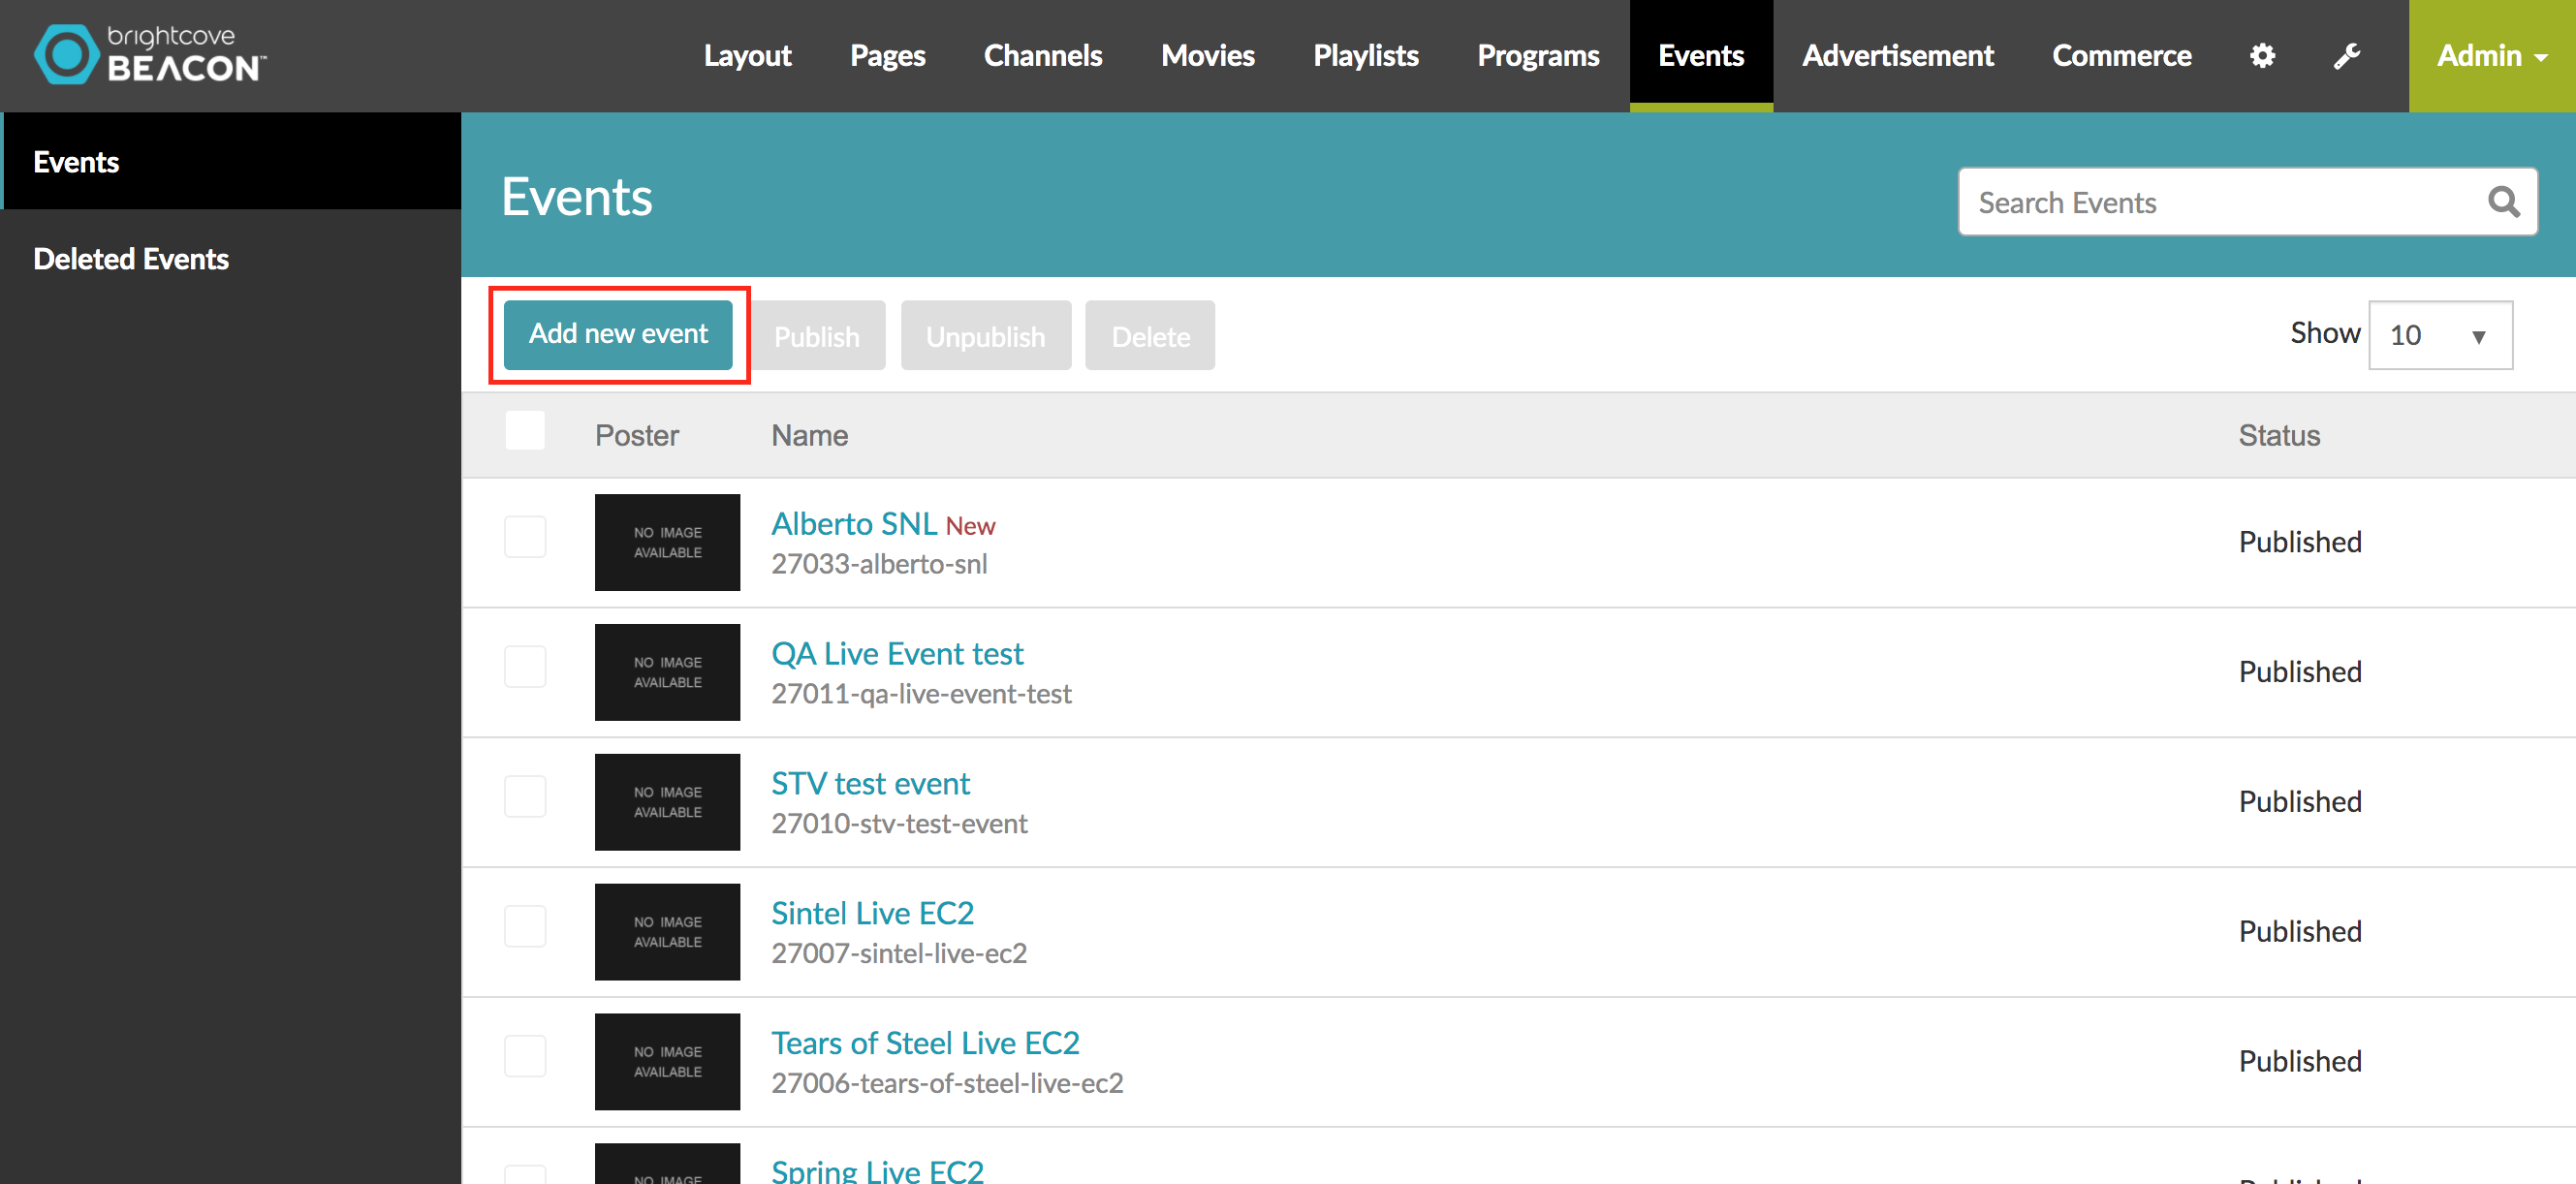
- In Beacon Classic, click on the Events tab to start the set up of an Event.
-
Click on Add a new Event.
-
Give the Live event a Name and an
Event Start Date.
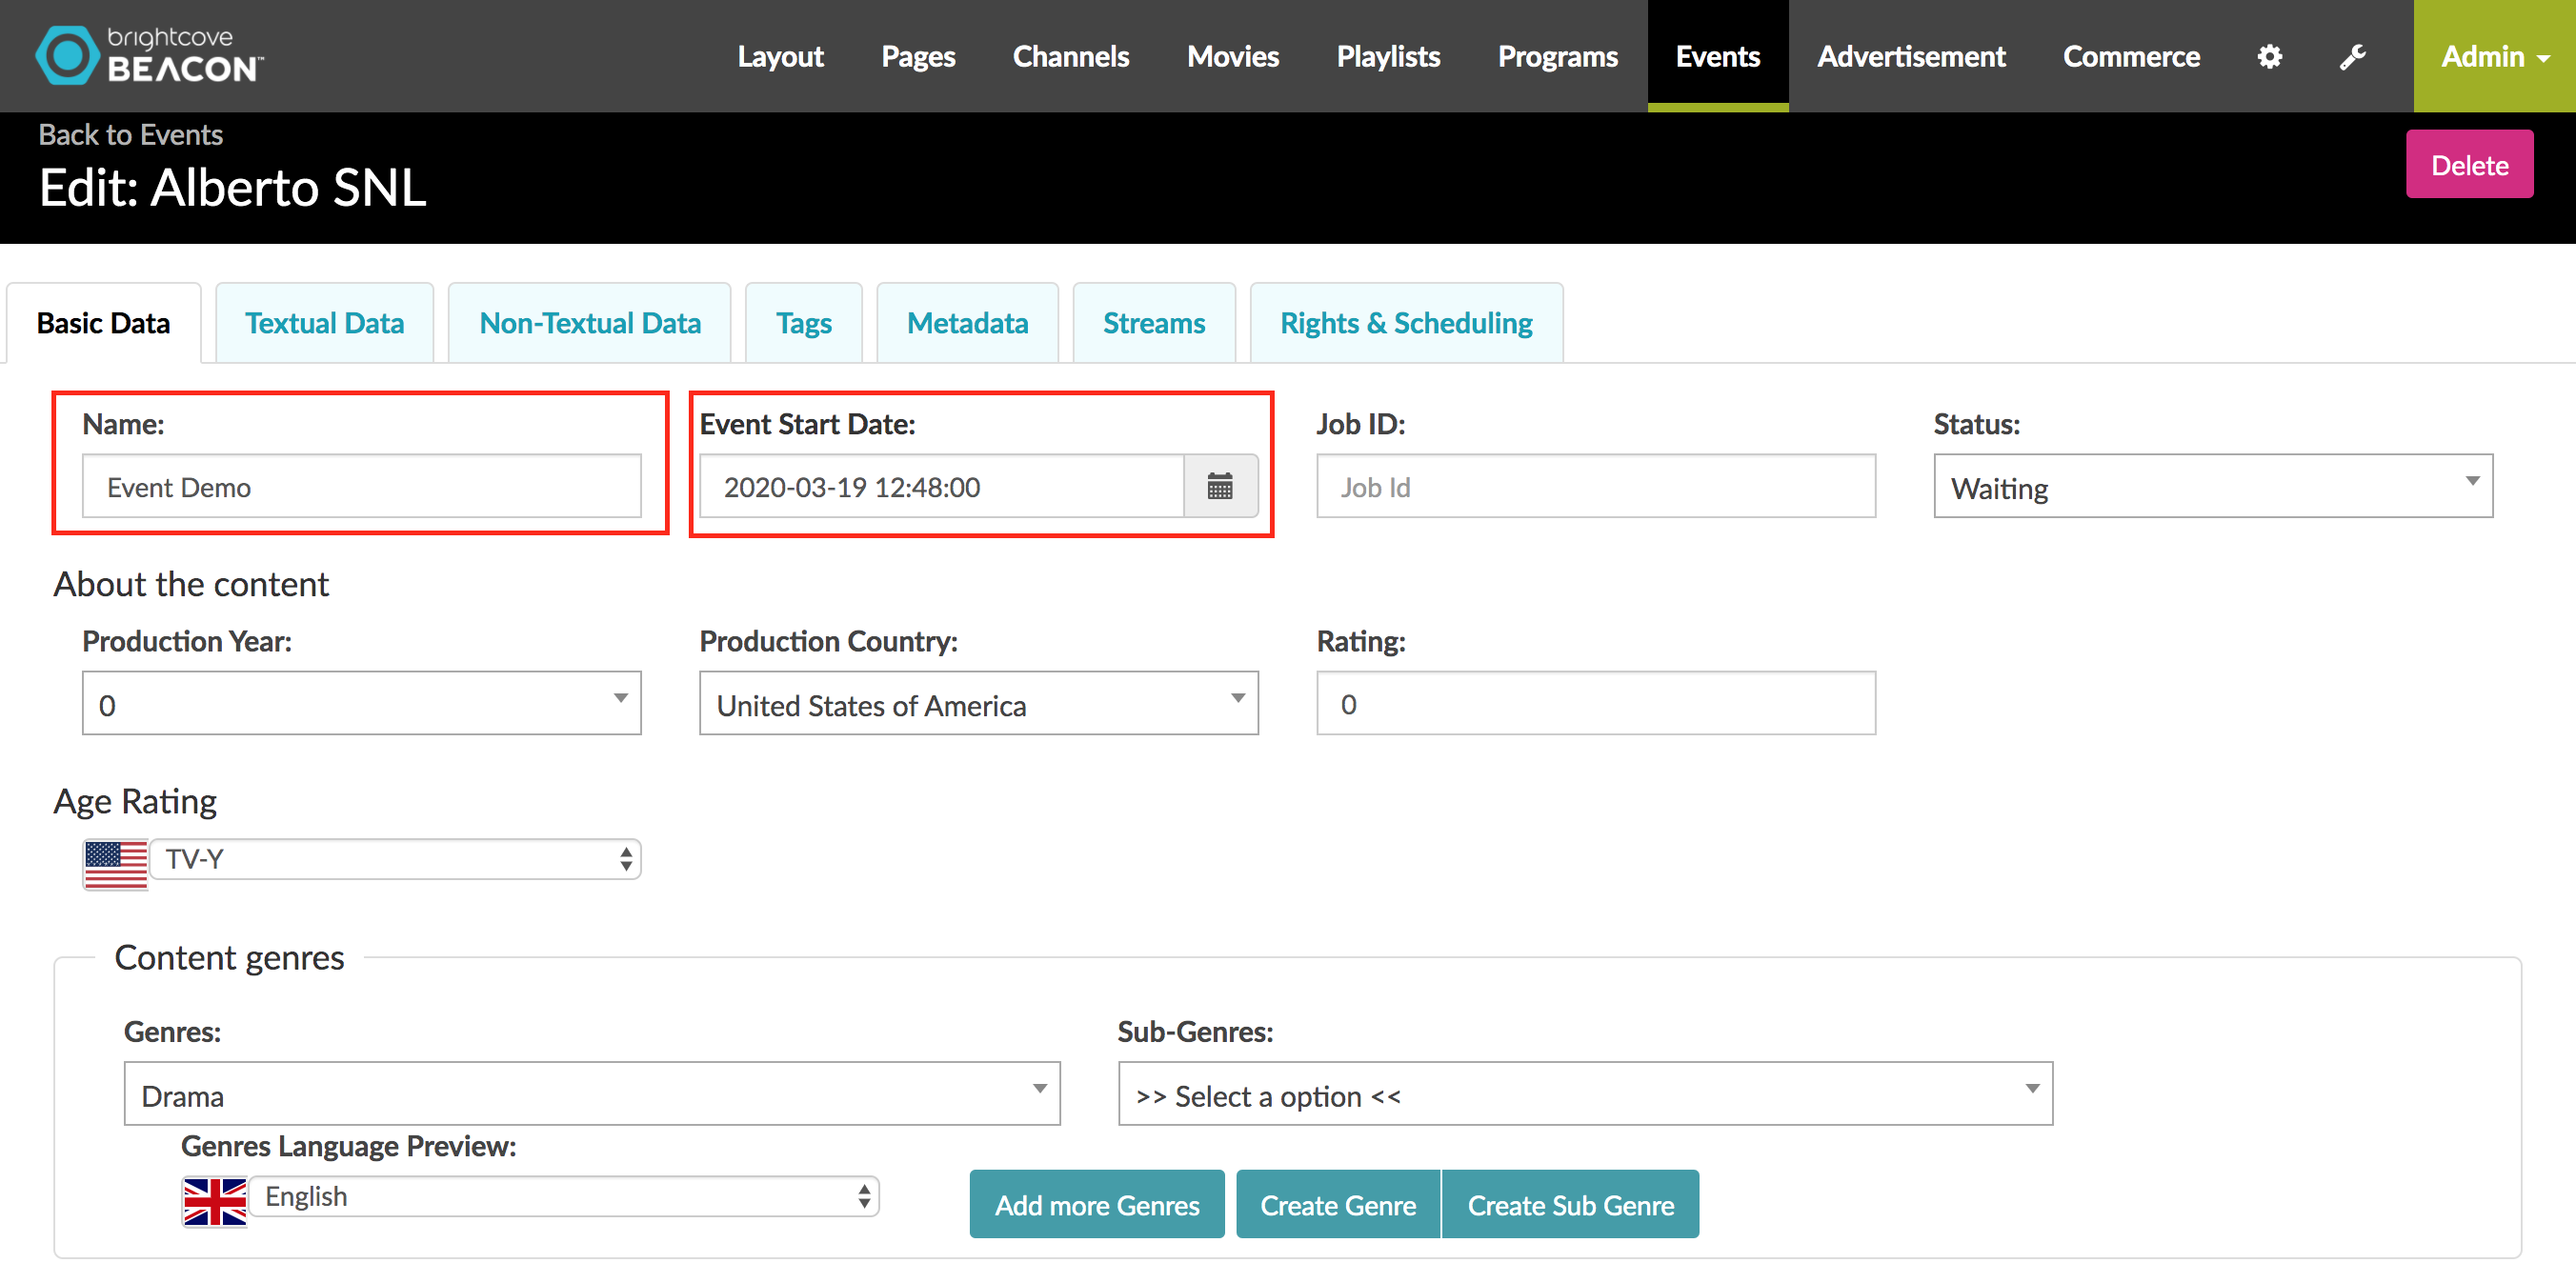
-
In the Textual Data tab, fill in your event
information.
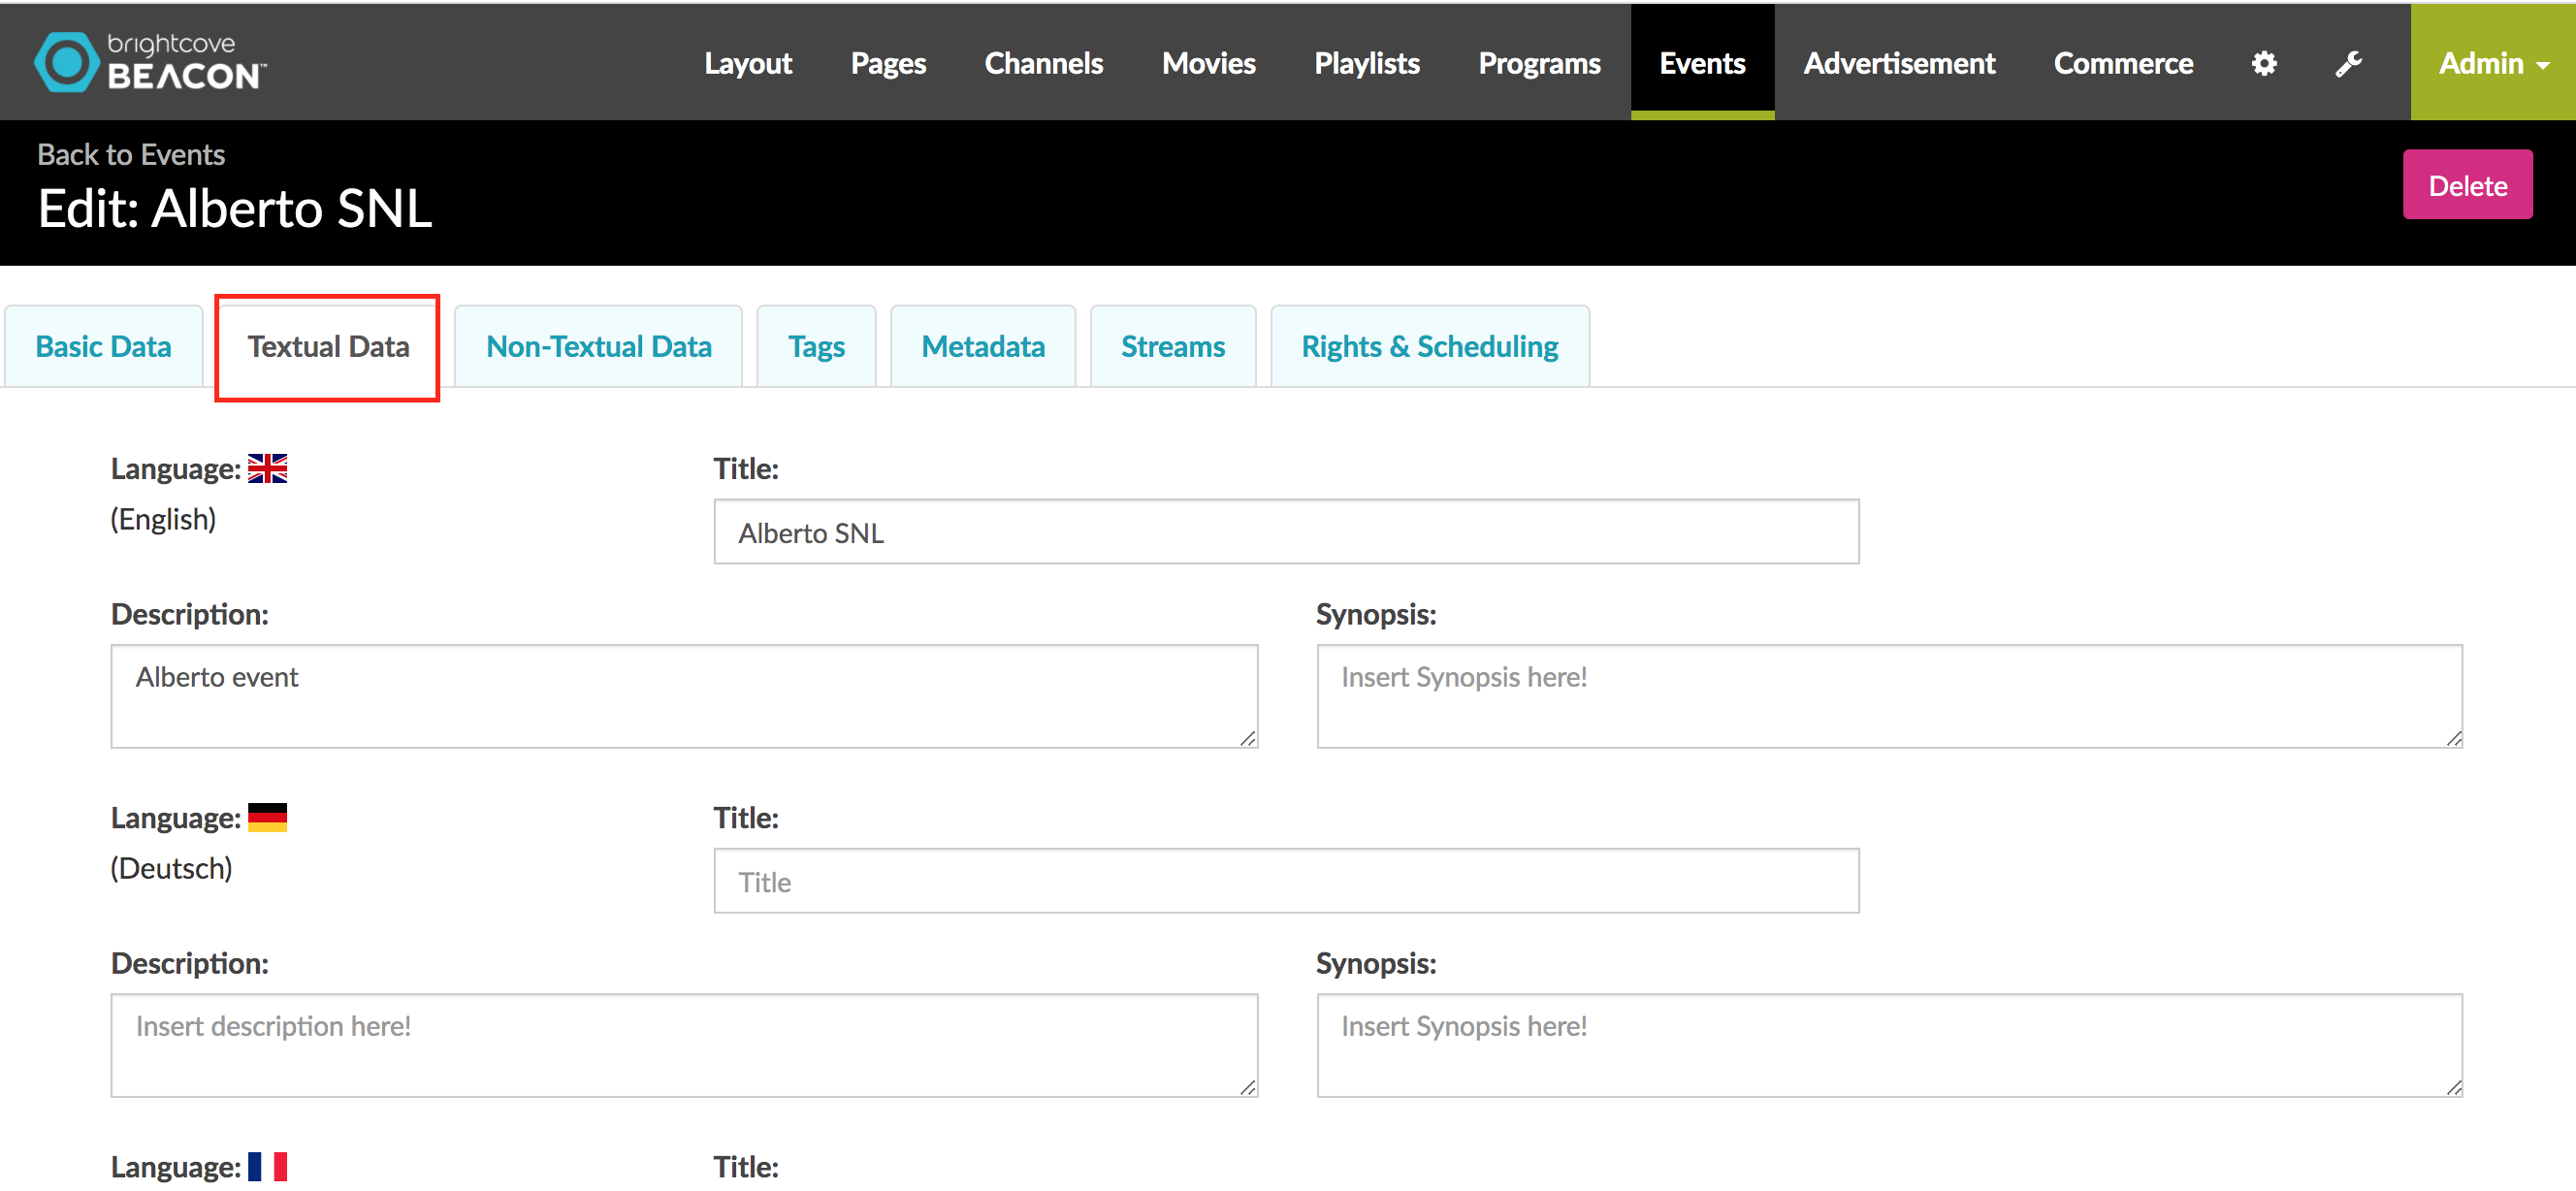
- Click on the Non-Textual Data tab.
-
Supply an image for the Portrait Poster and
Landscape Poster matching the requirements below. You
DO NOT need to supply images for Thumbnail and
Wide banner.
Image Requirements Portrait Poster Poster image (2:3) Minimum Width: 1000px Height: 563px Maximum Width: 4000px Height: 2250px Landscape Poster Landscape image (16:9) Minimum Width: 1000px Height: 563px Maximum Width: 4000px Height: 2250px -
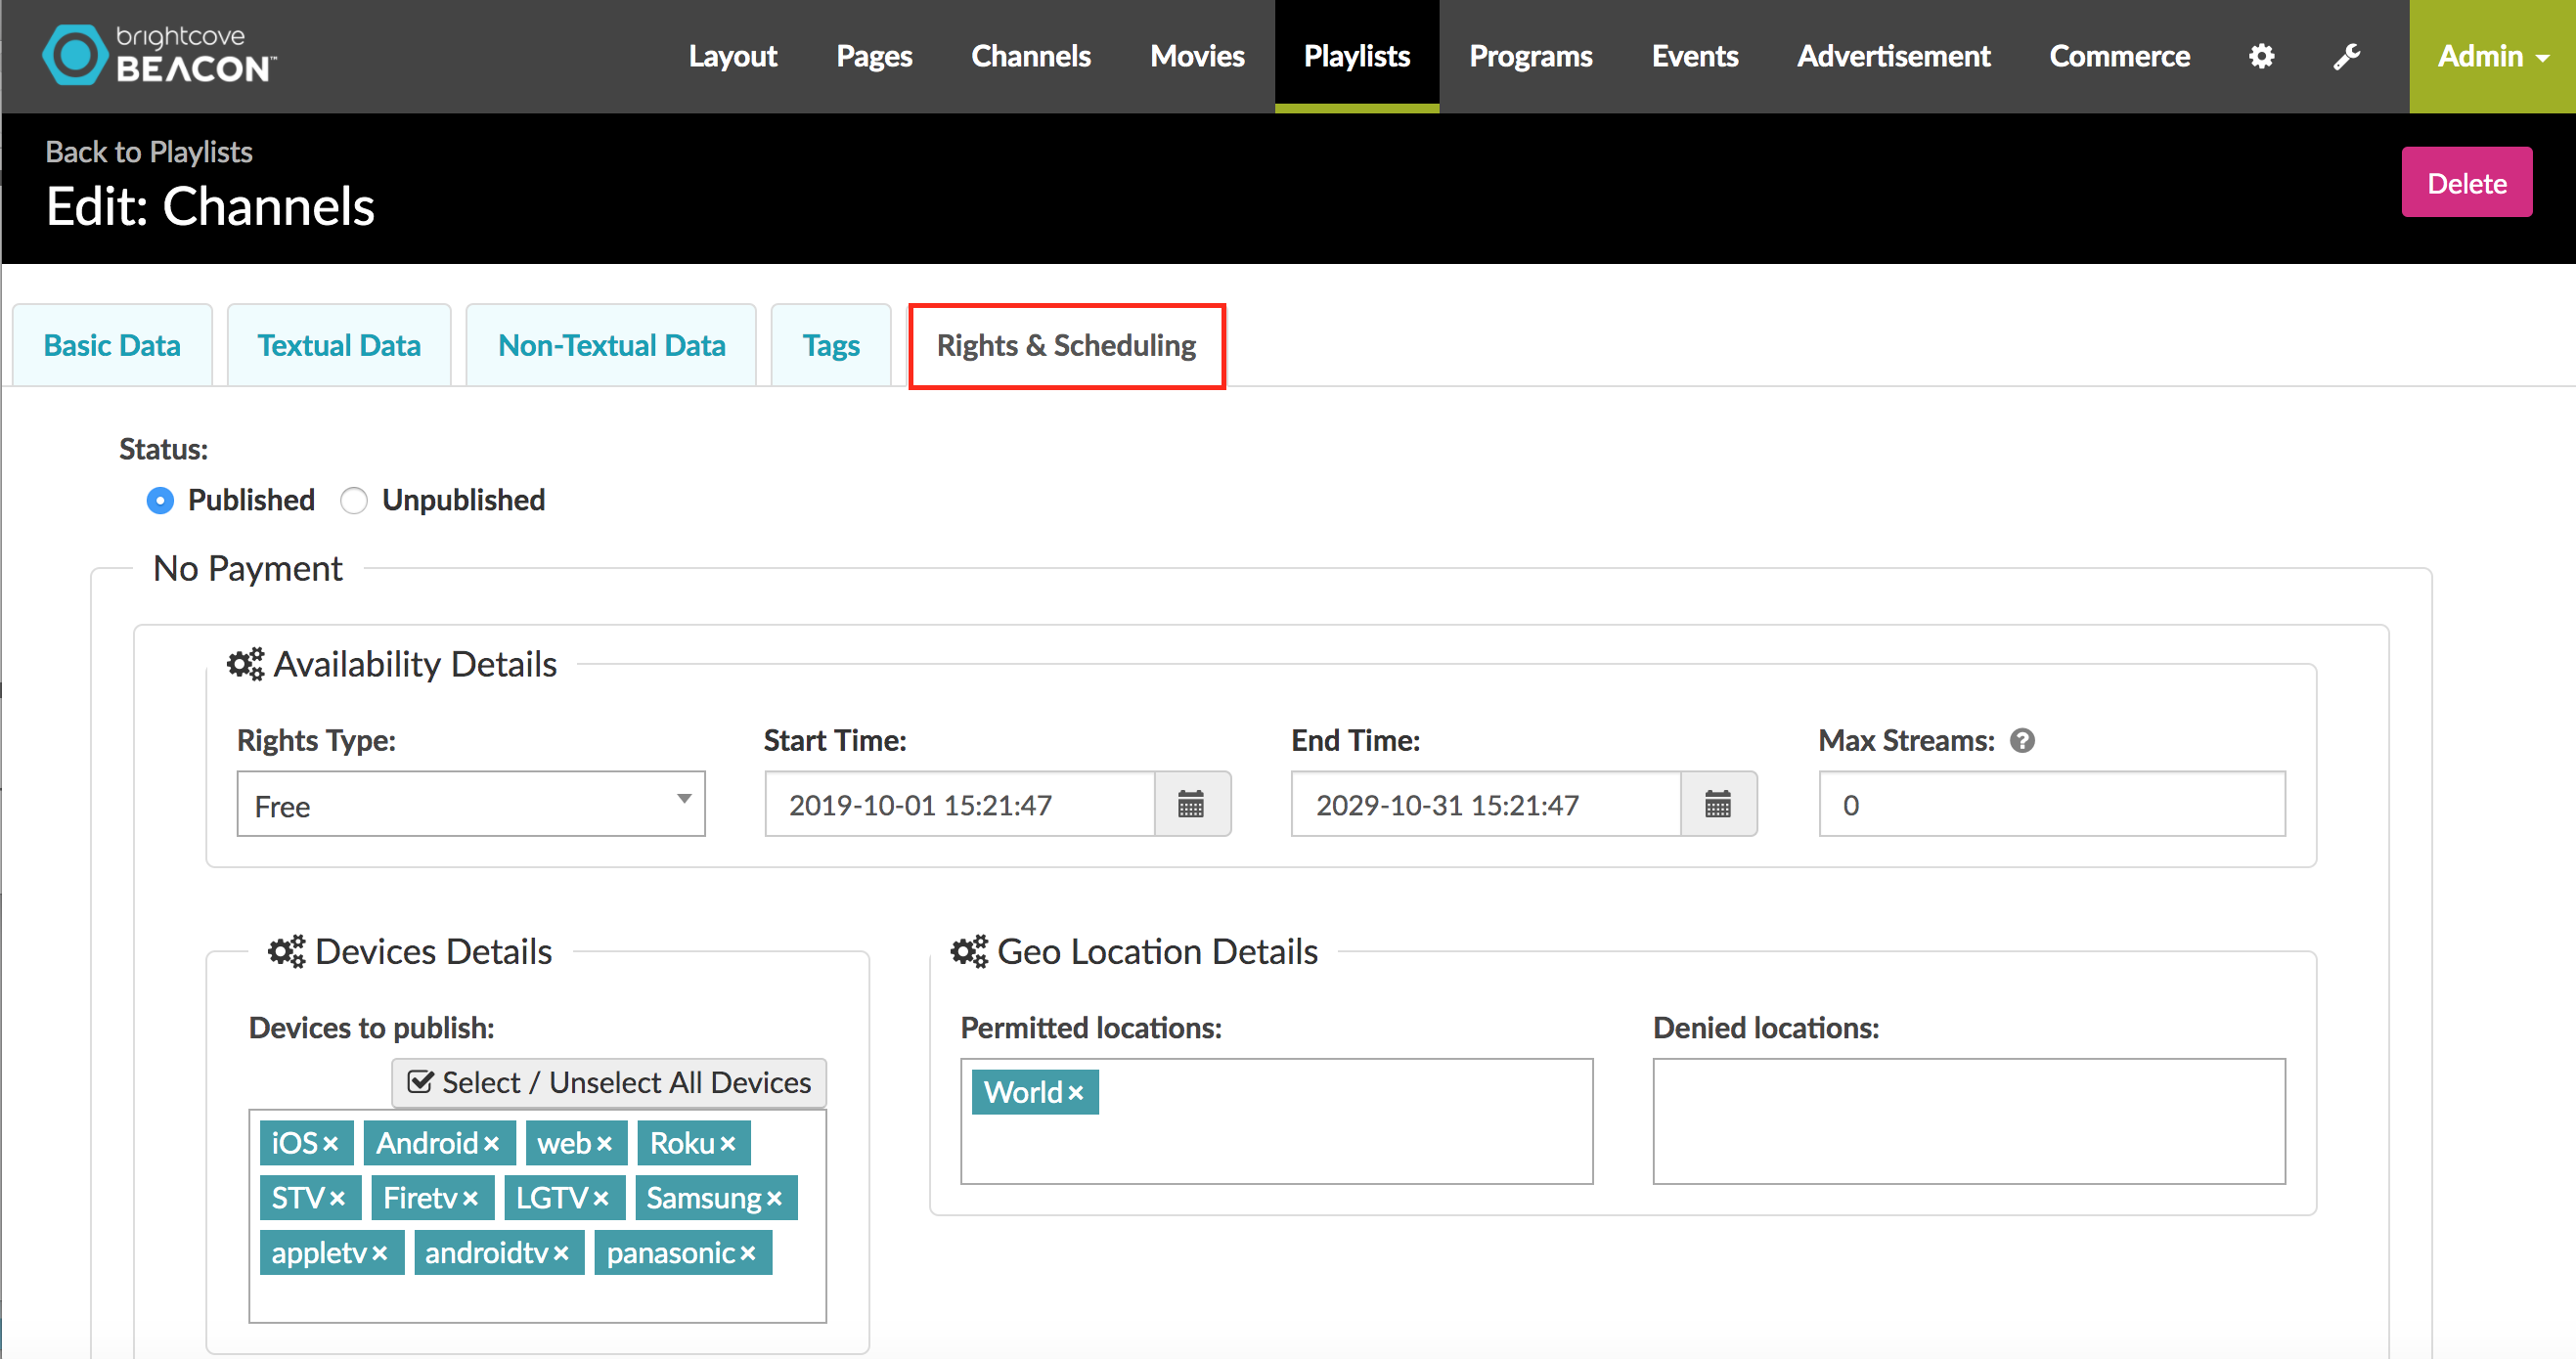
Click the Rights & Scheduling tab, as shown here:
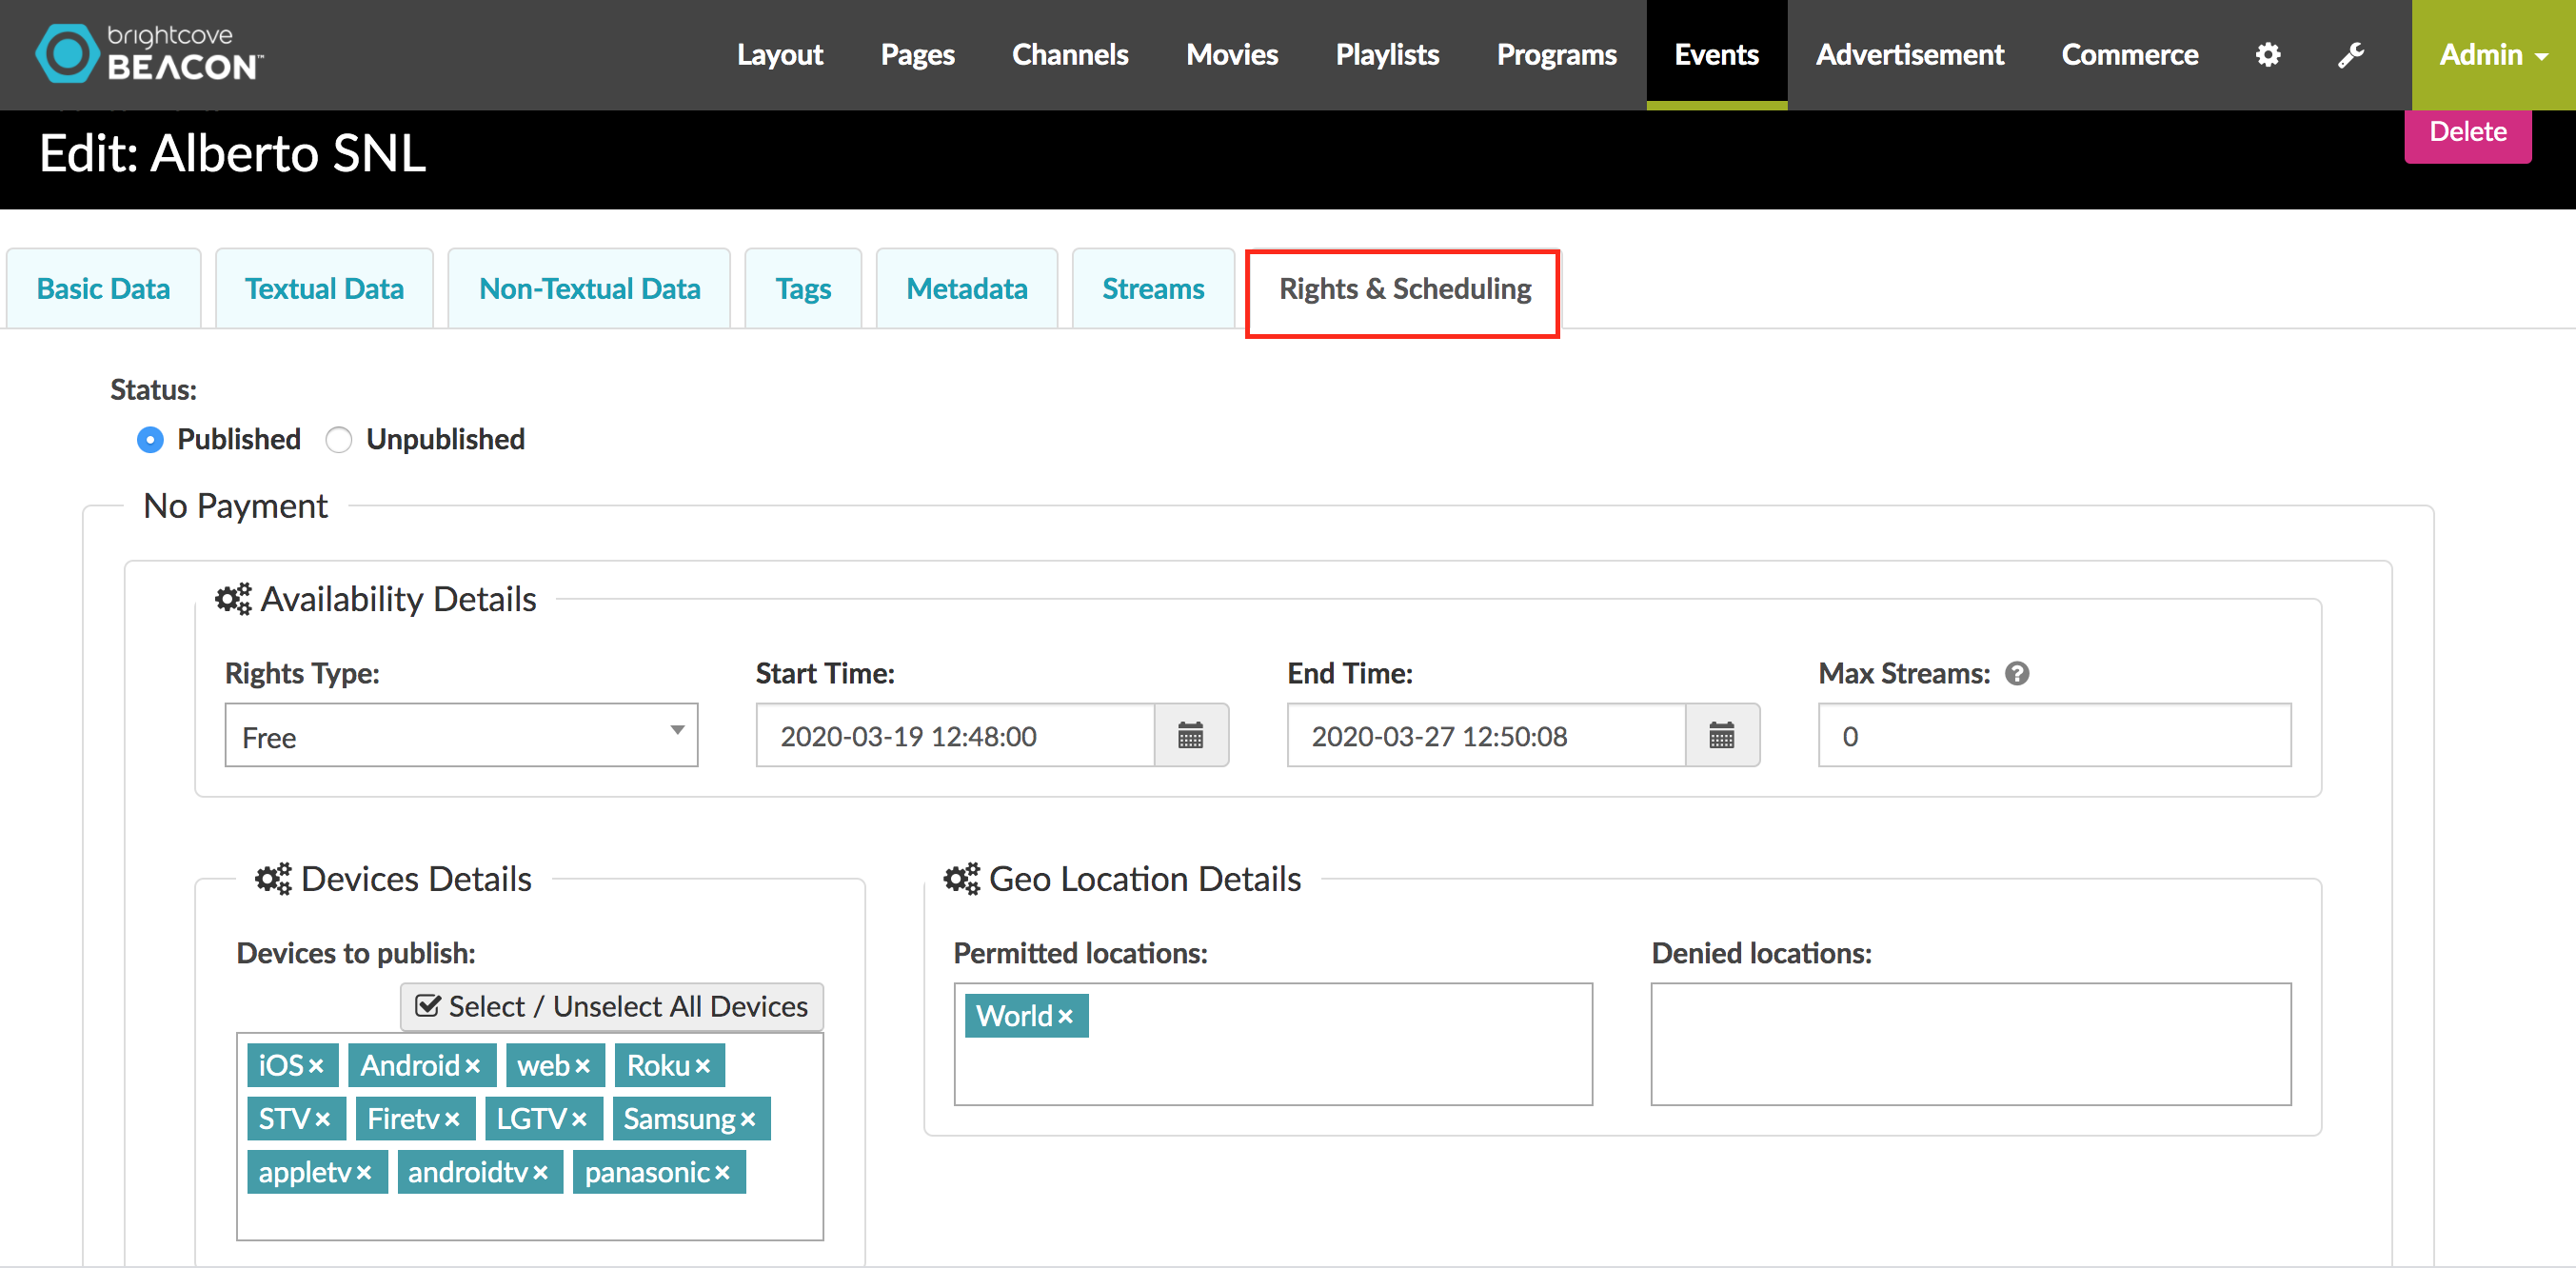
-
Add values for the following fields:
- Rights Type: Choose the type of rights between Advertising, Subscription or Free.
- Start Time: Set the start date of your event.
- End Time: Set the end date of your event.
- Max Streams: Set the maximum number of streams allowed to view the live event. The default number is 0 (zero).
- Devices to publish: Add the devices to which you wish to publish. Click Select / Unselect All Devices to see a list of available devices.
- Permitted locations: Select the locations where you want to stream your content, if no restrictions enter World.
- Denied Locations: Select the locations where you DO NOT want to stream your content.
- Click the Create New Event button to create your event.
Adding the Beacon Classic event to a playlist
Once you create an event, the next task is to add the event to a Playlist. The following steps lead you through that process.
-
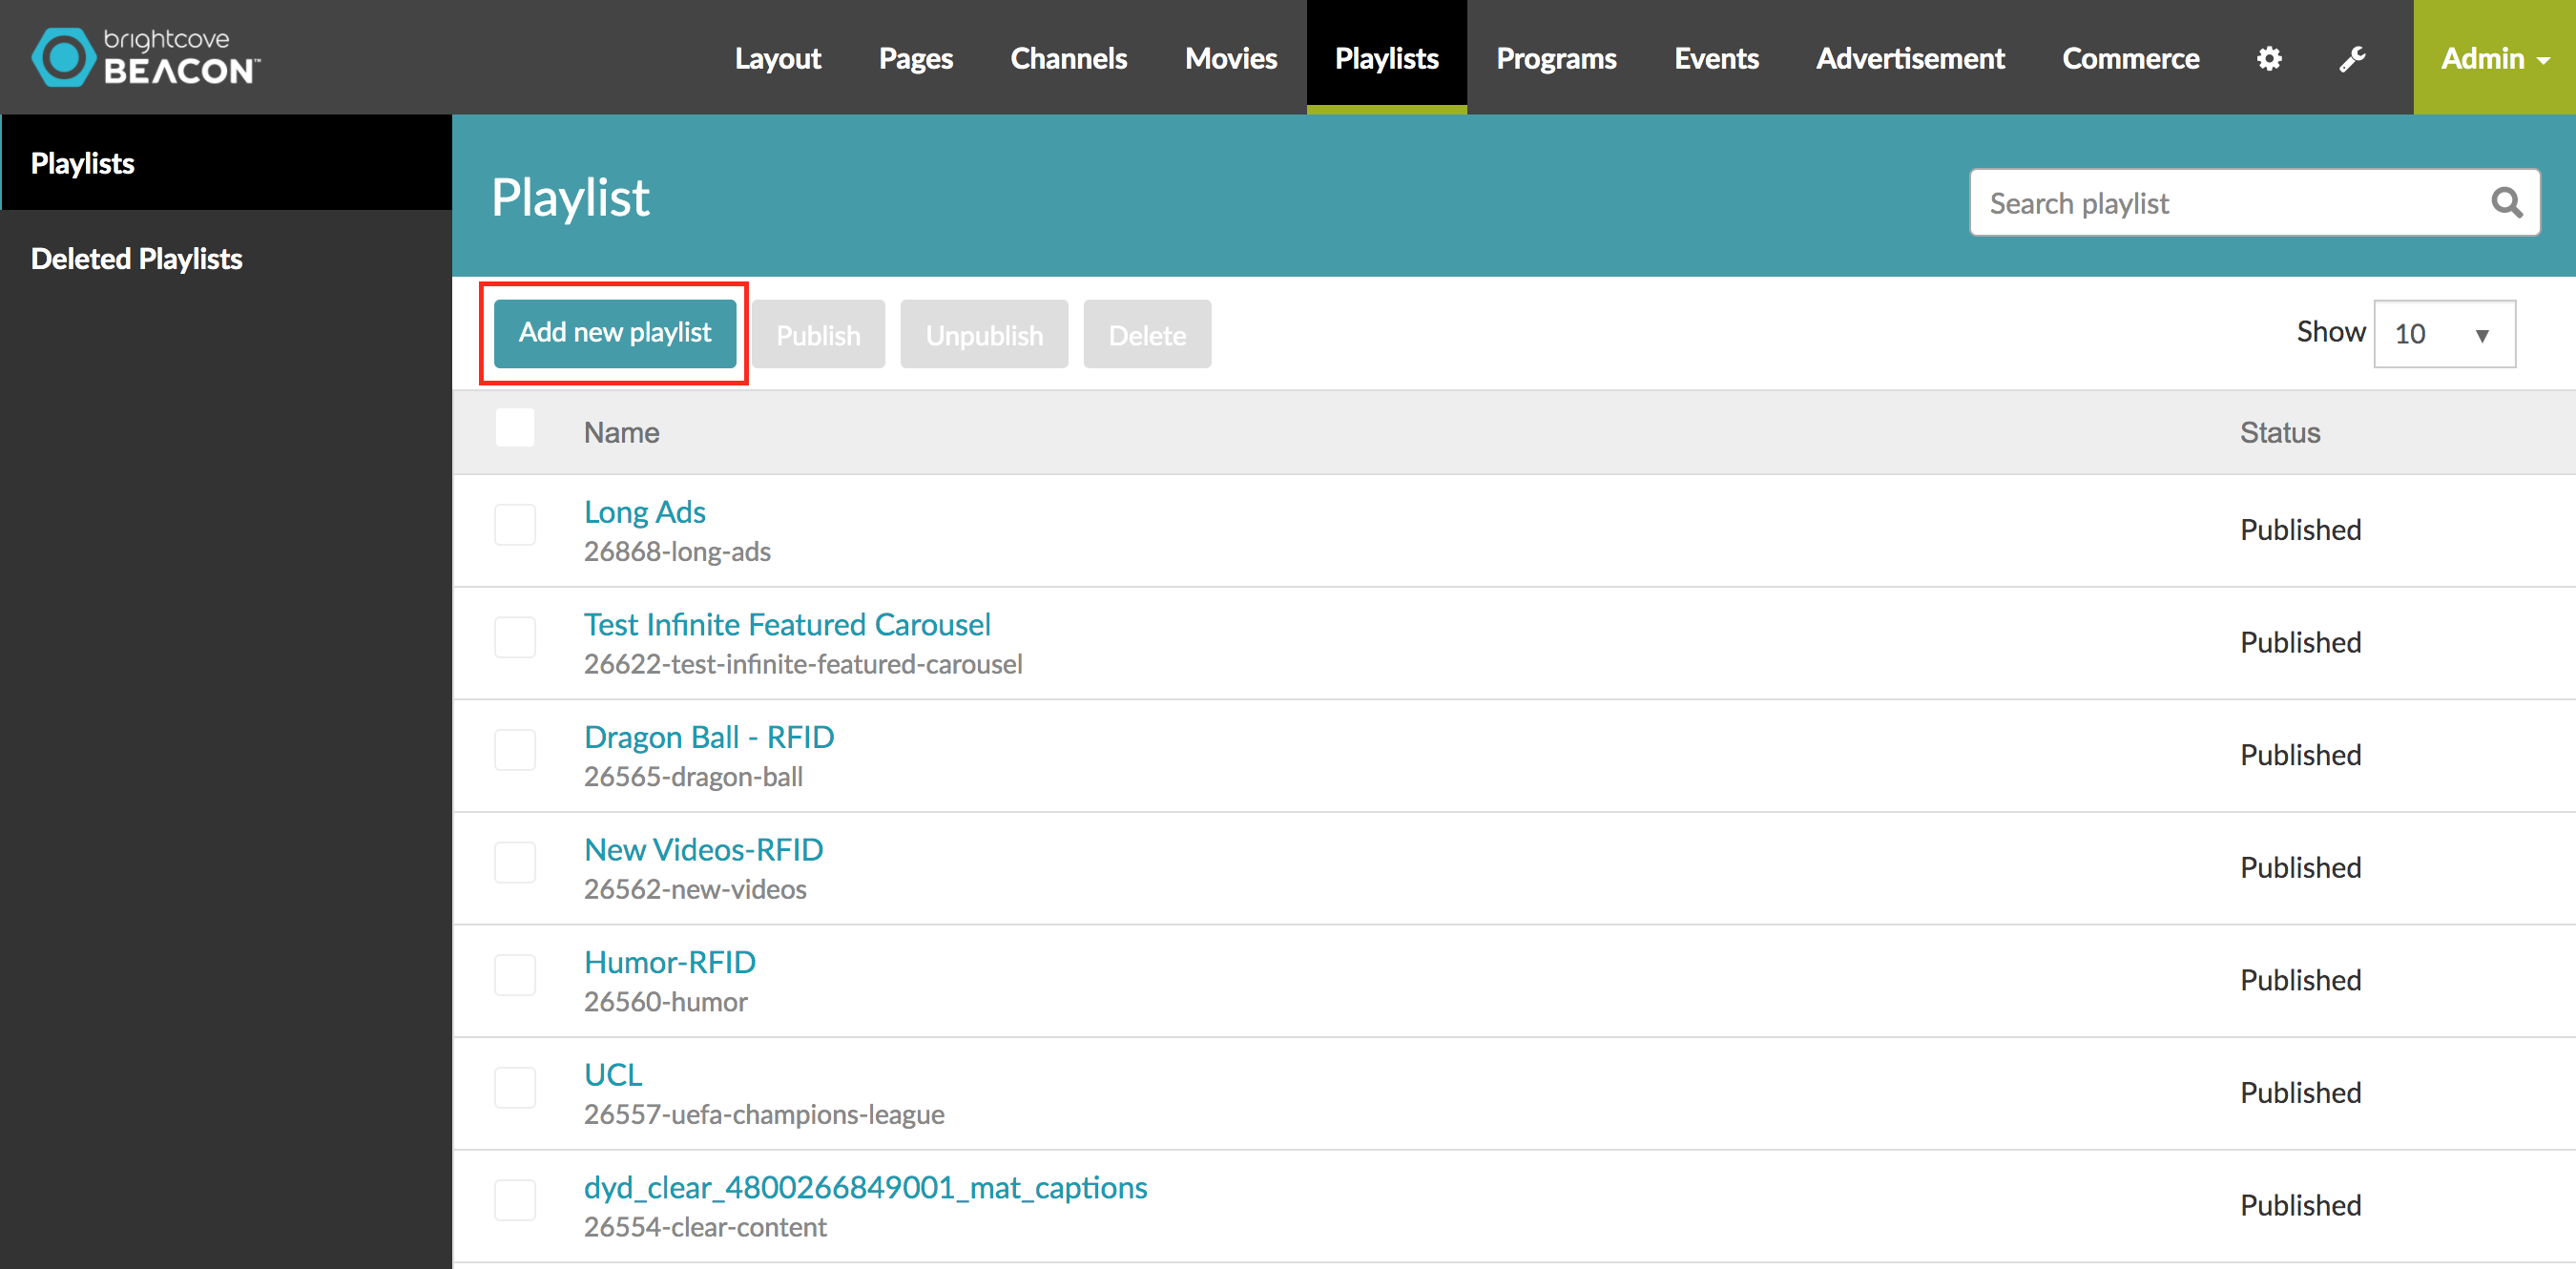
In Beacon Classic, click the Playlists tab.

-
Click on the Add new playlist button.
-
In Playlists, from the content type tabs, select the
Events tab.
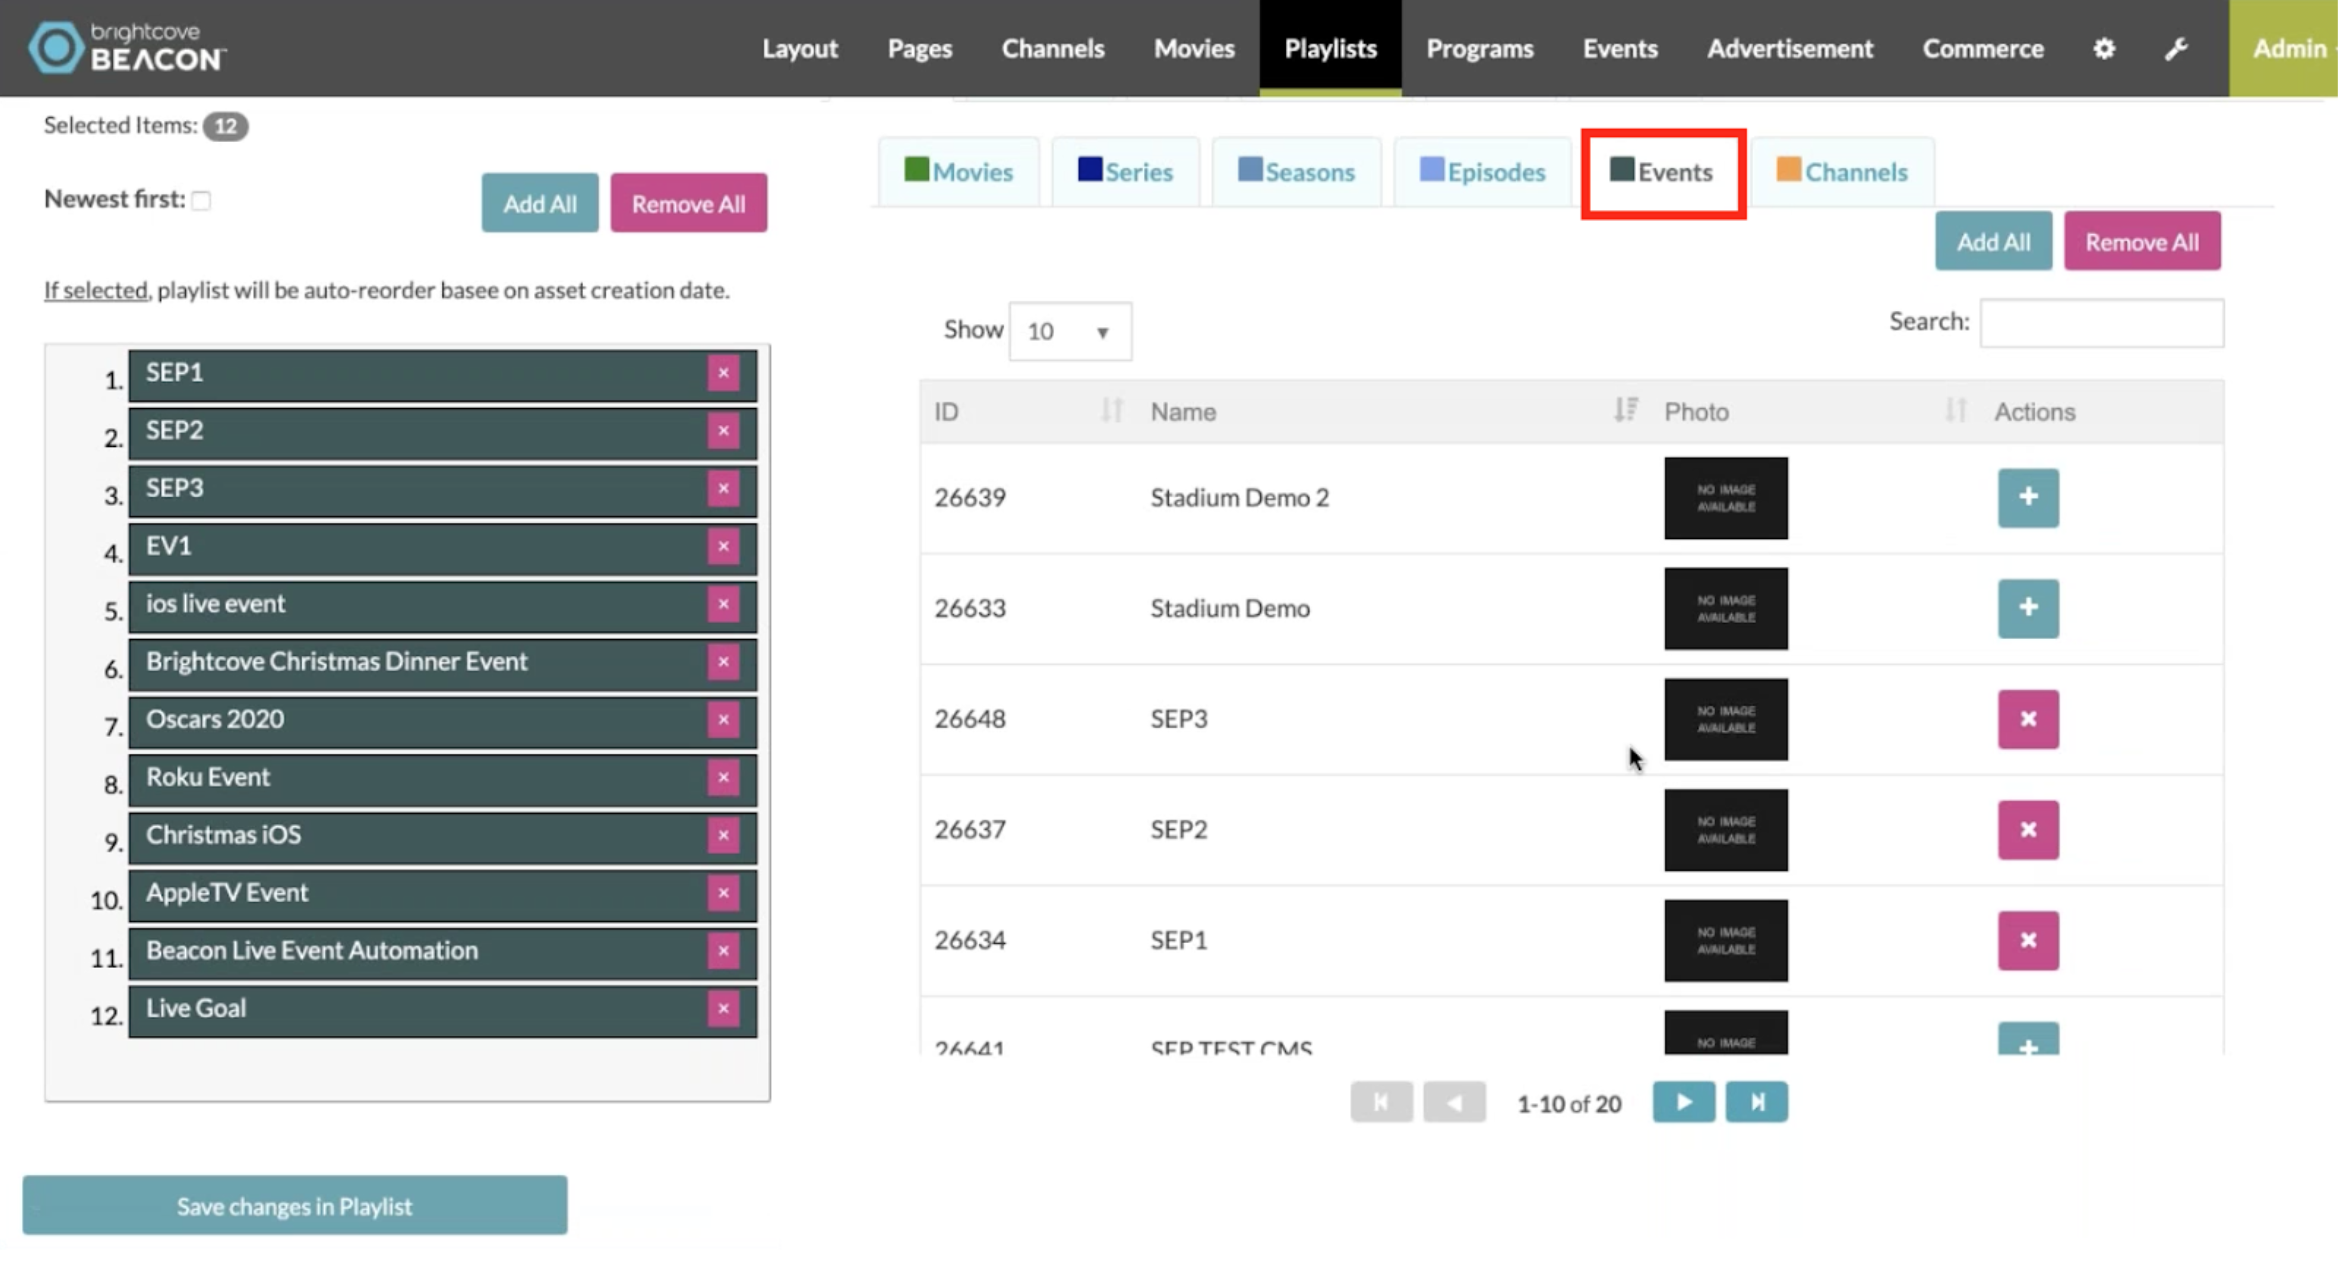
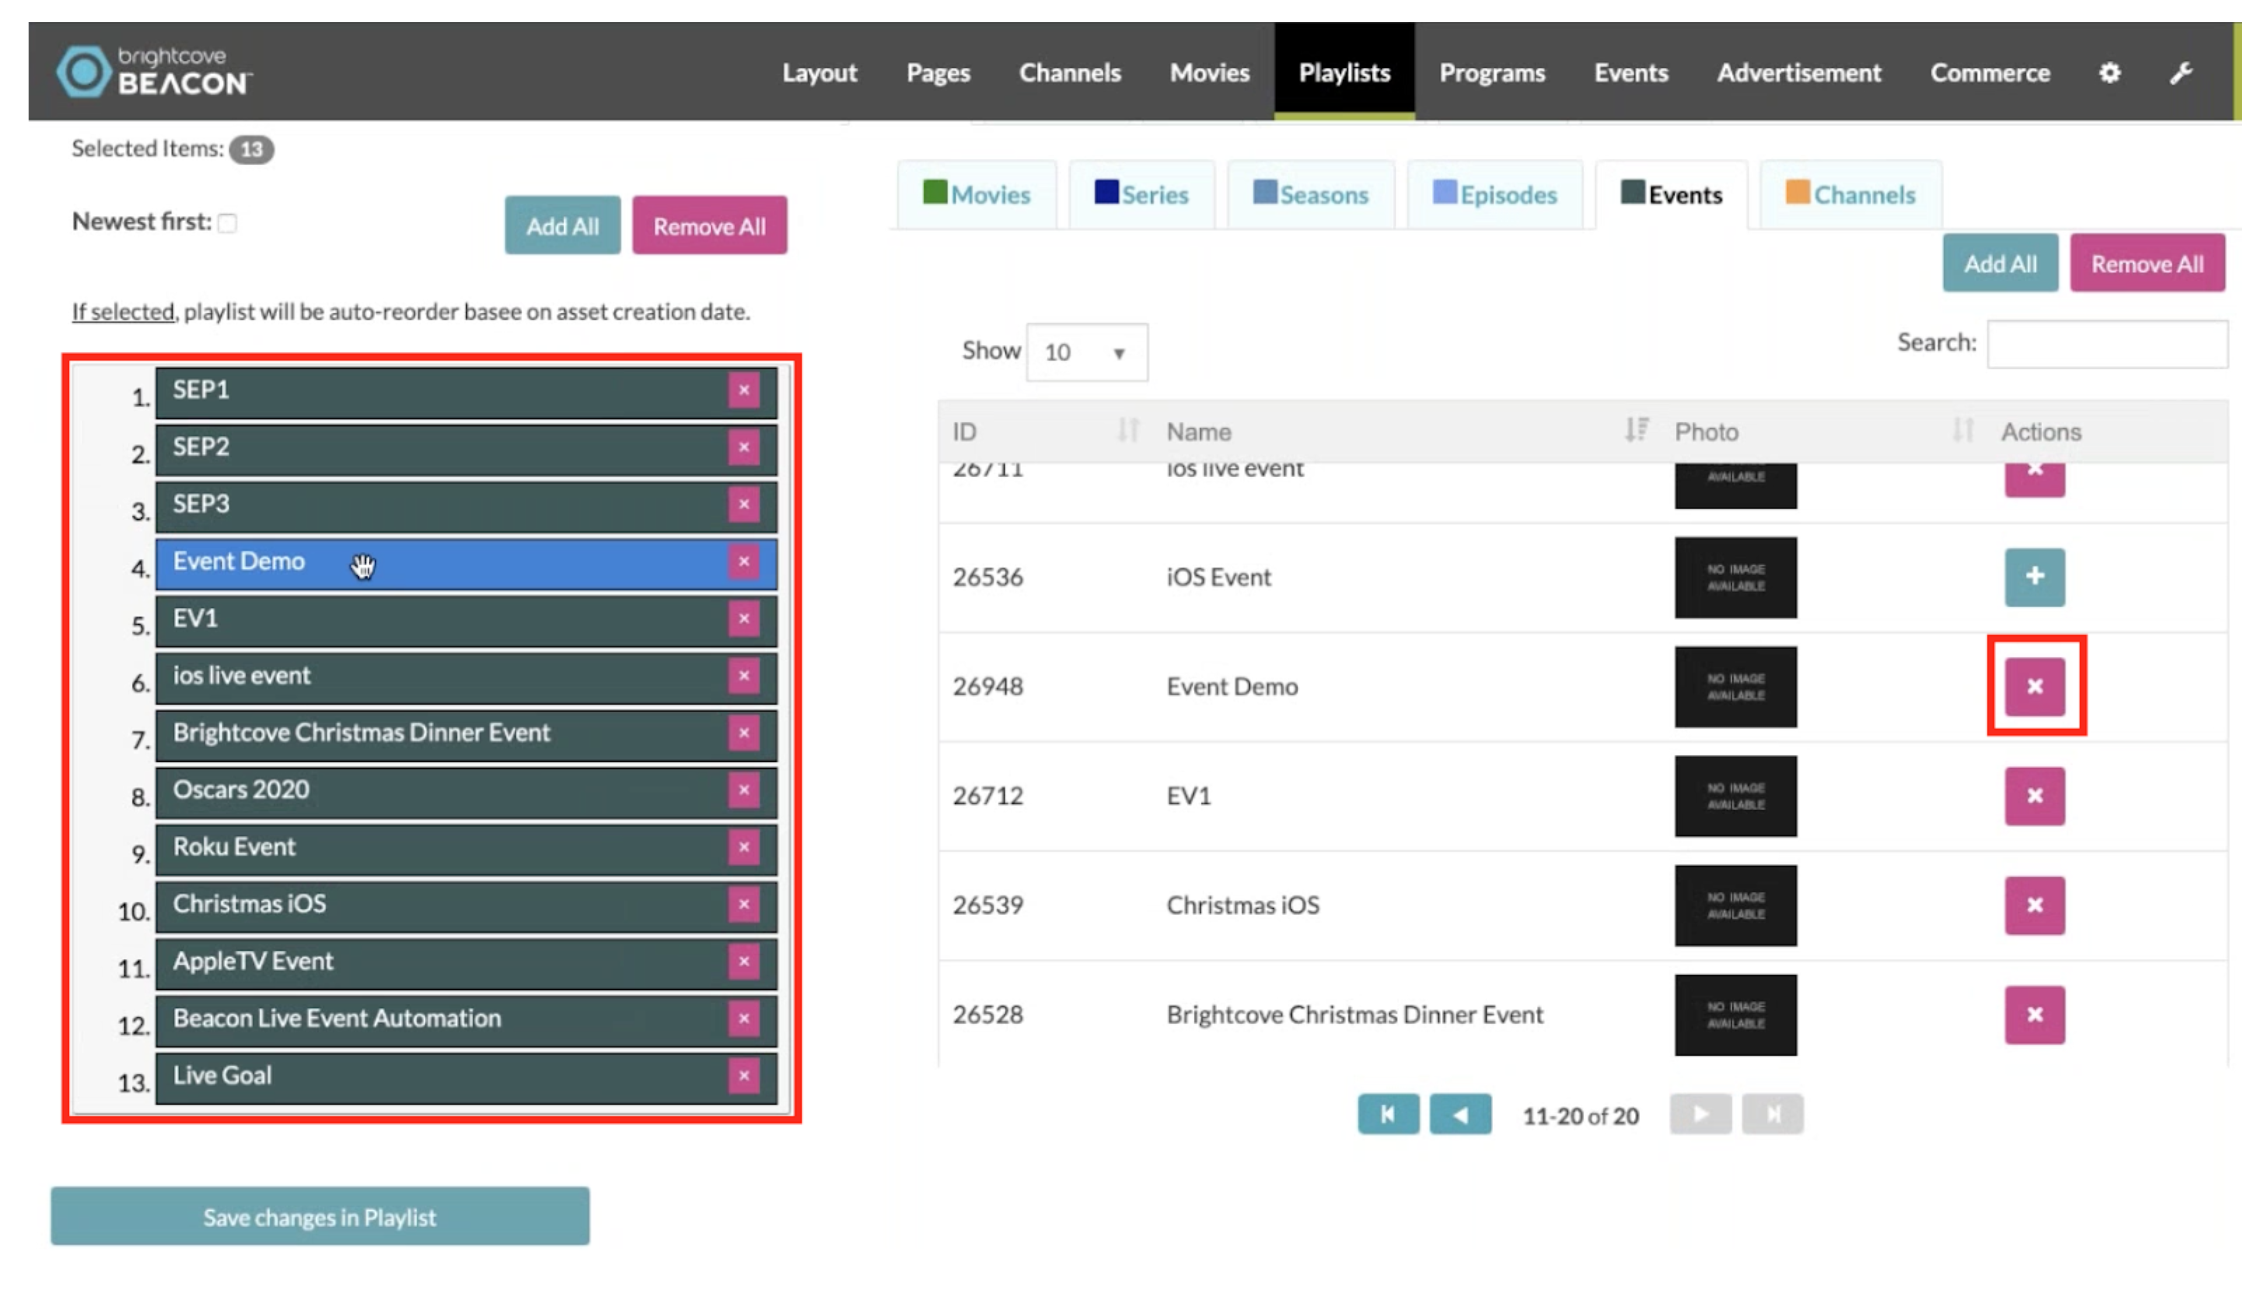
-
Look for your event in the contents list and click on the (+) button to
add it to the left playlist. You can position the order of the events in
the way you want them to be displayed in the app.
-
Adjust the settings of your playlist (time, devices, location, etc.) in
the Rights & Scheduling tab, as you did with your
event.
- Click on the Save changes in Playlist button.
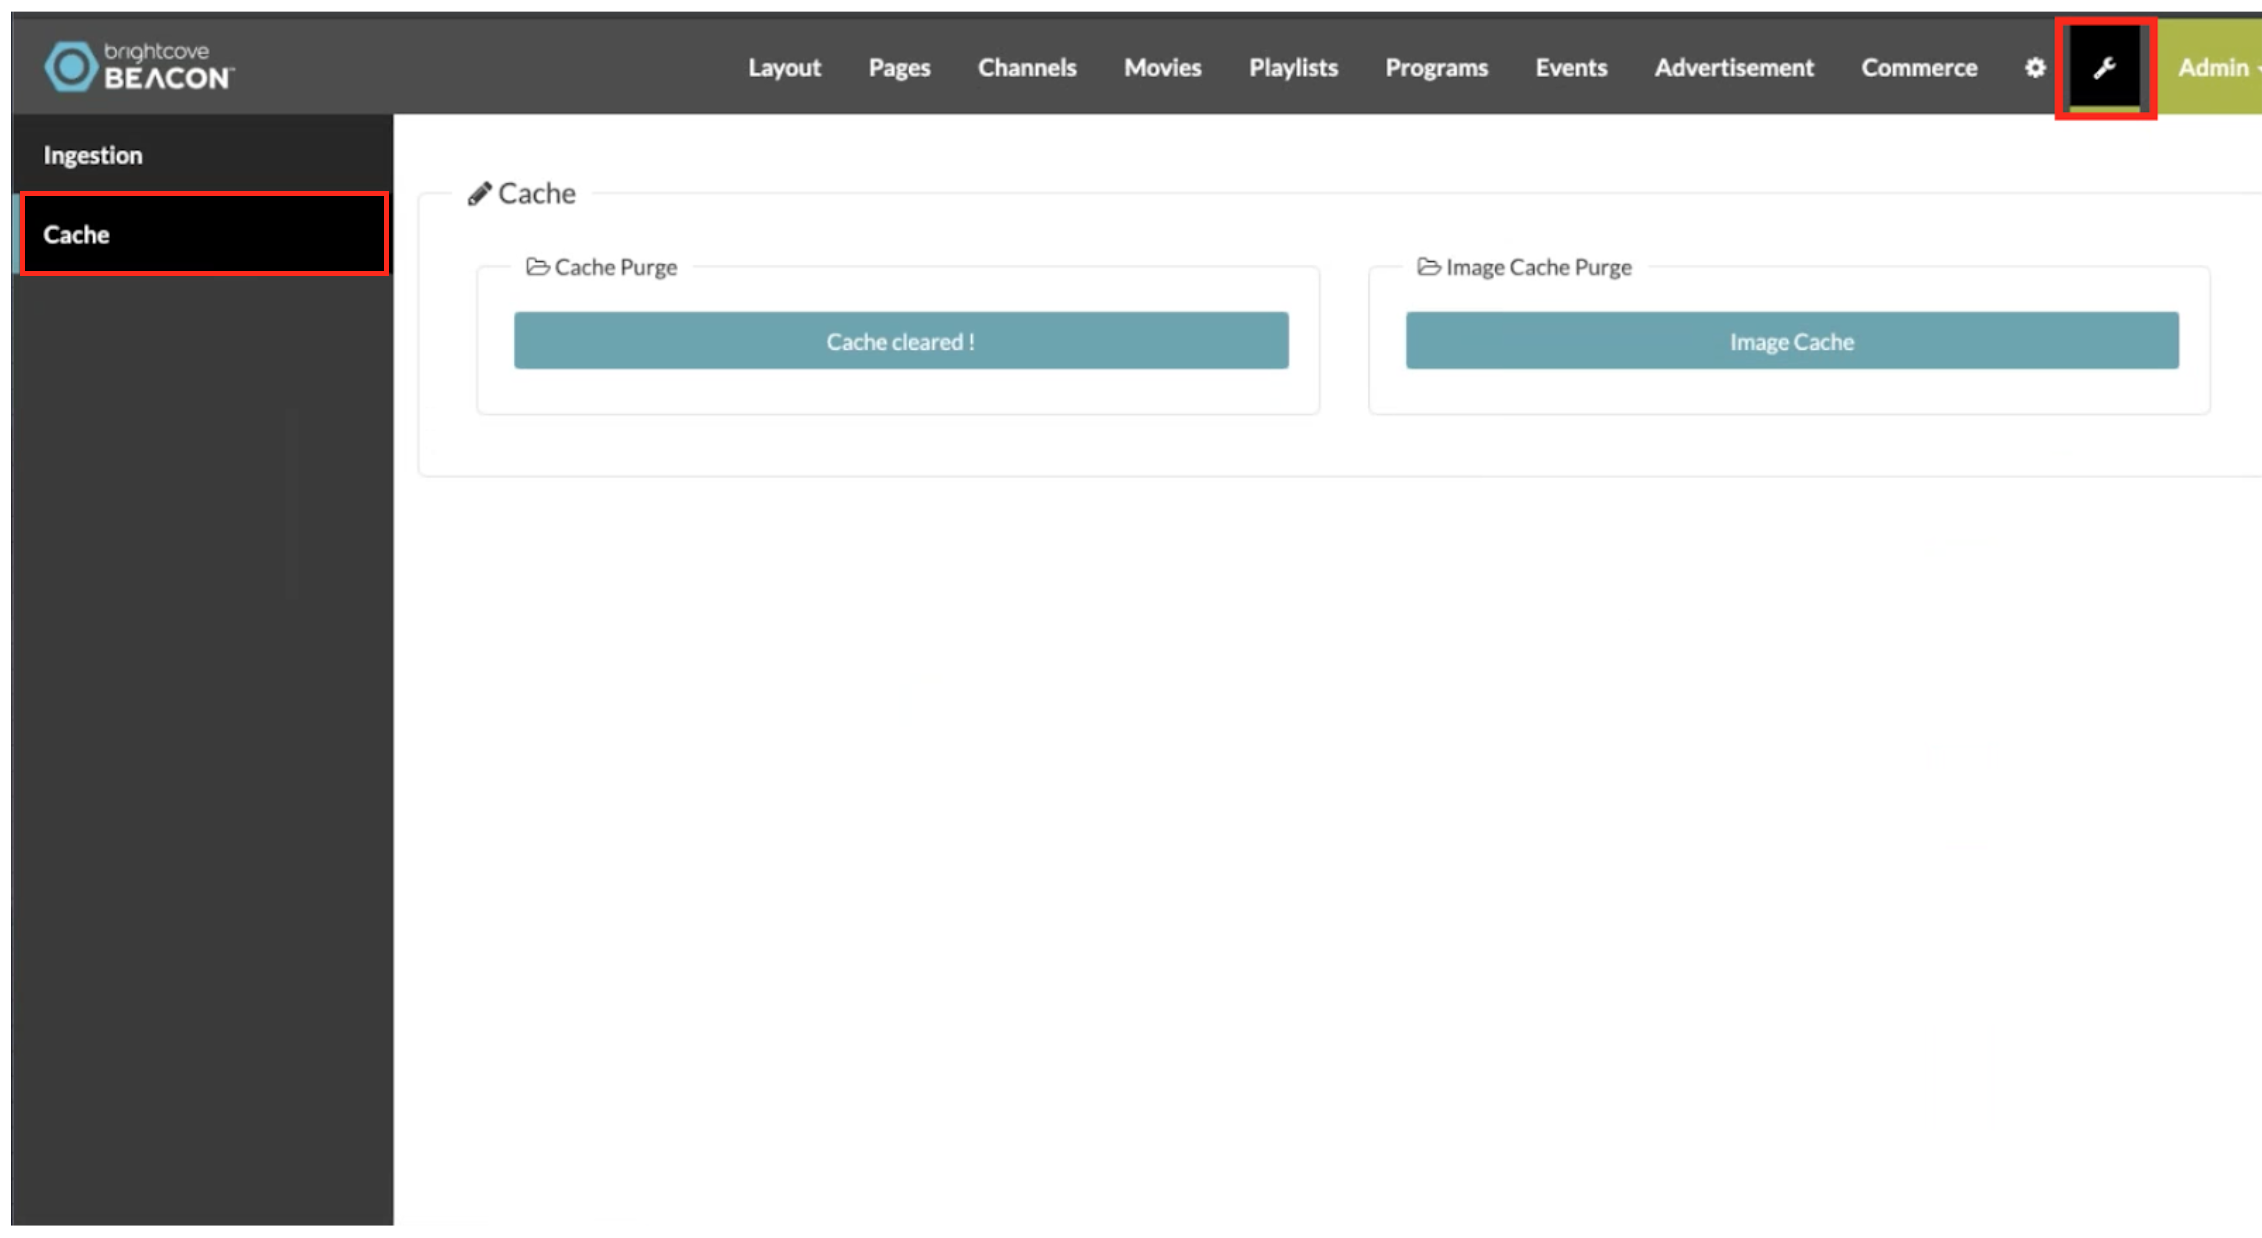
-
Click on the Tools (wrench) button in the upper right
of the screen. Then clear the cache.
At this point, your event is created as a container in the Brightcove Beacon app as shown in the left image (the event names and pictures on the image are for example purposes only), click on your event, and you will see something similar to the image on the right. To actually start streaming a Live video, you will need to set up your transmission in the Beacon Studio Live Platform.
Creating a Live event in Beacon Studio
Follow these steps to create the actual live event that will be streamed to the Beacon App.
-
Log in to Beacon Studio and click Live in the
in the primary navigation.
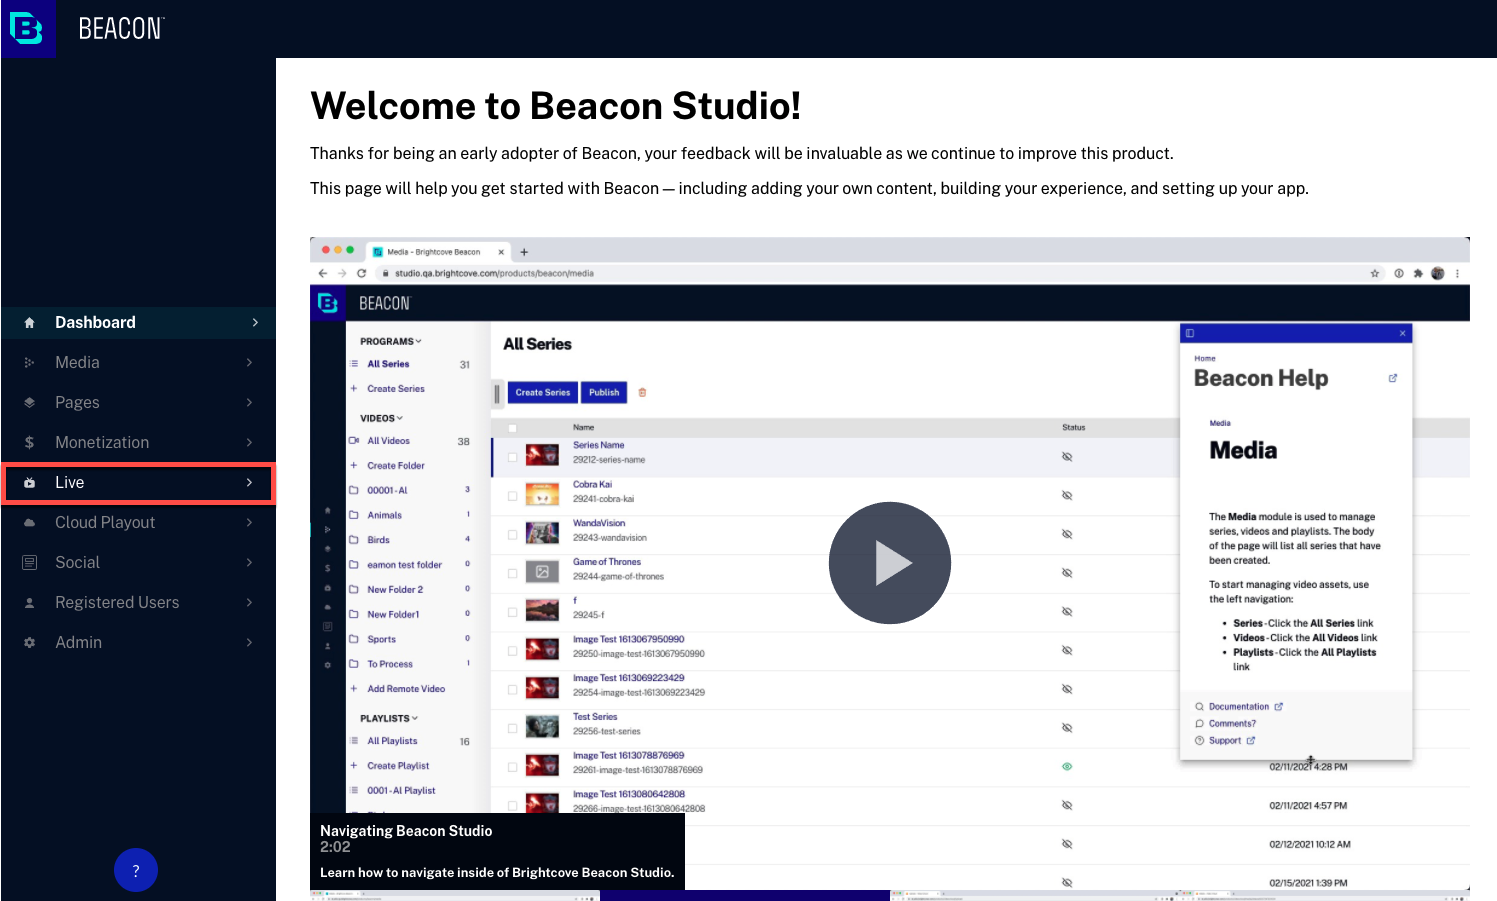
-
From the Manage Events page, click
Create Event. The
Create Live Event page will open.
-
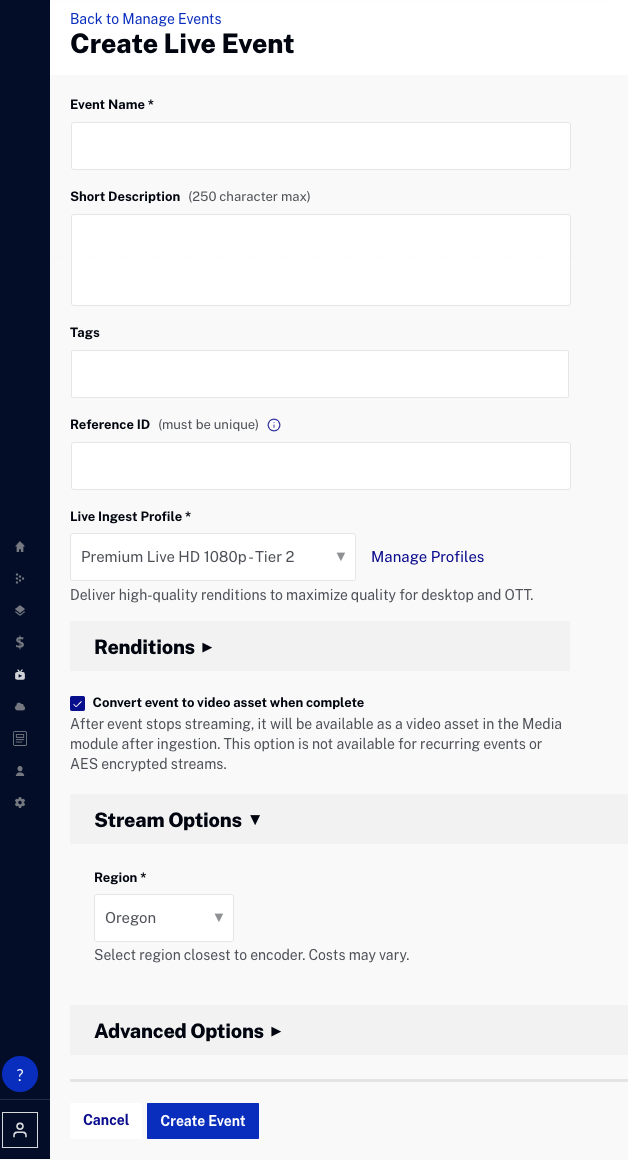
Enter the event details.
- Event Name - Name for the event; this name will also appear in the Media module if the live event is saved as a video asset (max 255 characters)
- Short Description - Description of the event (max 250 characters)
- Tags - Tags to associate with the event; tags will be assigned to the video if the live event is saved as a video asset (max 128 characters and 1200 tags)
- Reference ID - Reference ID for the event; must be unique (max 150 characters)
- Click Allowed if you wish to enable the live event to be streamed to social media platforms, otherwise click Not allowed. This can be done once the event has started streaming or by using the Social module.
- Select a Live Ingest Profile. The dropdown list will list all Live ingest profiles. The ingest profile will control the quality and number of live renditions that are created. Clicking the Manage Profiles link will open the ingest profile editor in another browser tab. Note that you must be an account administrator to access the ingest profile editor. Click the RENDITIONS link to view the renditions that will be created using the selected ingest profile.
- Select Convert event to video asset when complete to save a VOD version of the live event to your Beacon Studio account. When this option is selected, the highest quality rendition from the selected Live Ingest Profile is used as the source for the VOD video. The default ingest profile for the account is used when creating renditions. Note that the VOD version is not available as soon as the live event ends, the video will be available once the ingestion process is complete.
- Click ADVANCED OPTIONS and view the advanced options. Only one of which will need your attention.
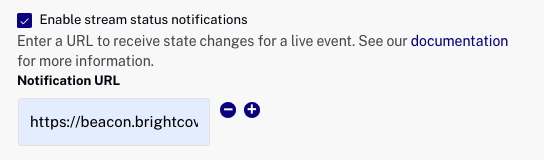
-
Click in the
Enable stream status notifications checkbox and add the
notifications URL from Beacon Classic CMS (your Brightcove Support
representative will provide this URL).
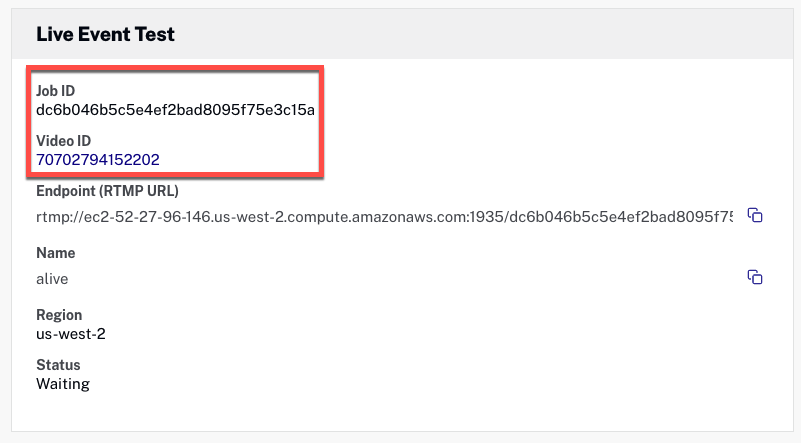
- Click Create Event to start the live event. The Control Room page will open with details about the live event including the Streaming Endpoint (RTMP URL) and Stream Name which will be used by your encoder. It will take about a minute to process your streams.
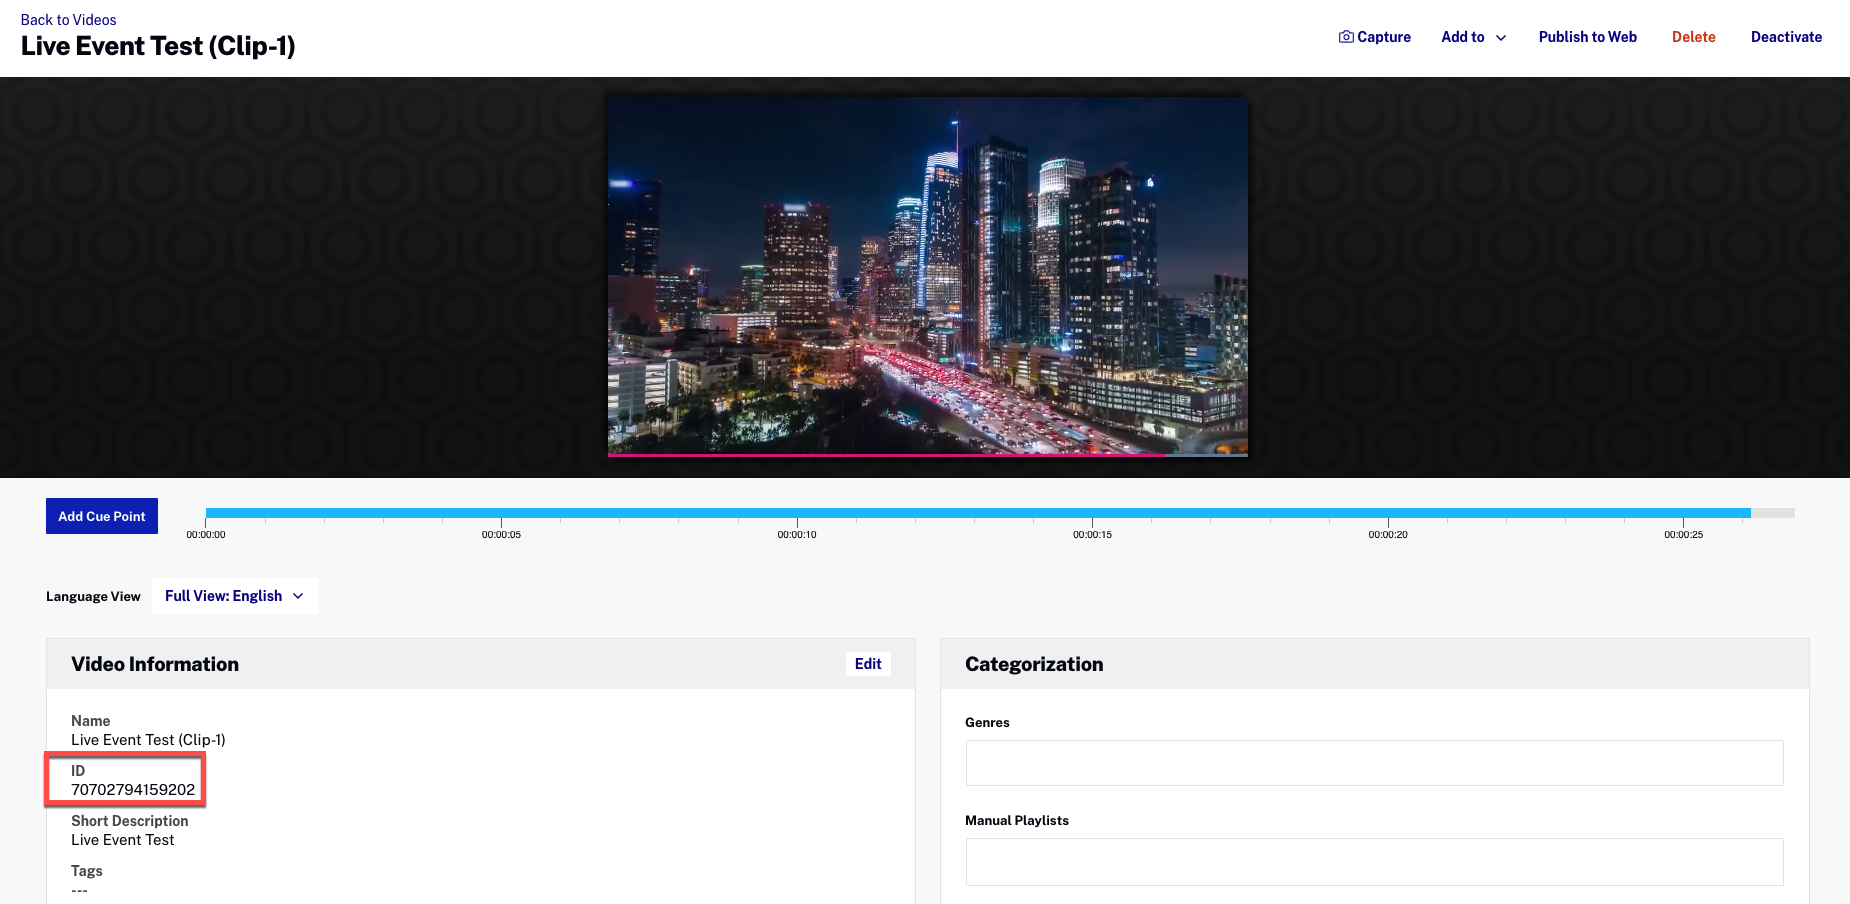
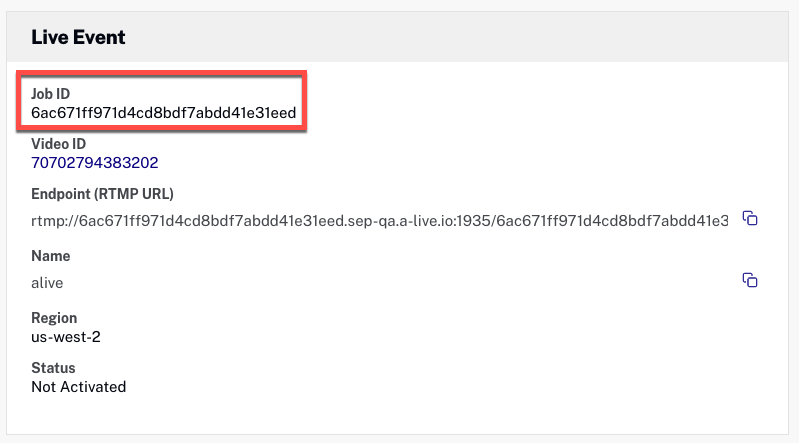
-
In the Control Room, copy the
Job Id and the Video ID from the
Test Event panel, you will need both to configure the
Live event in the Beacon Classic platform settings.
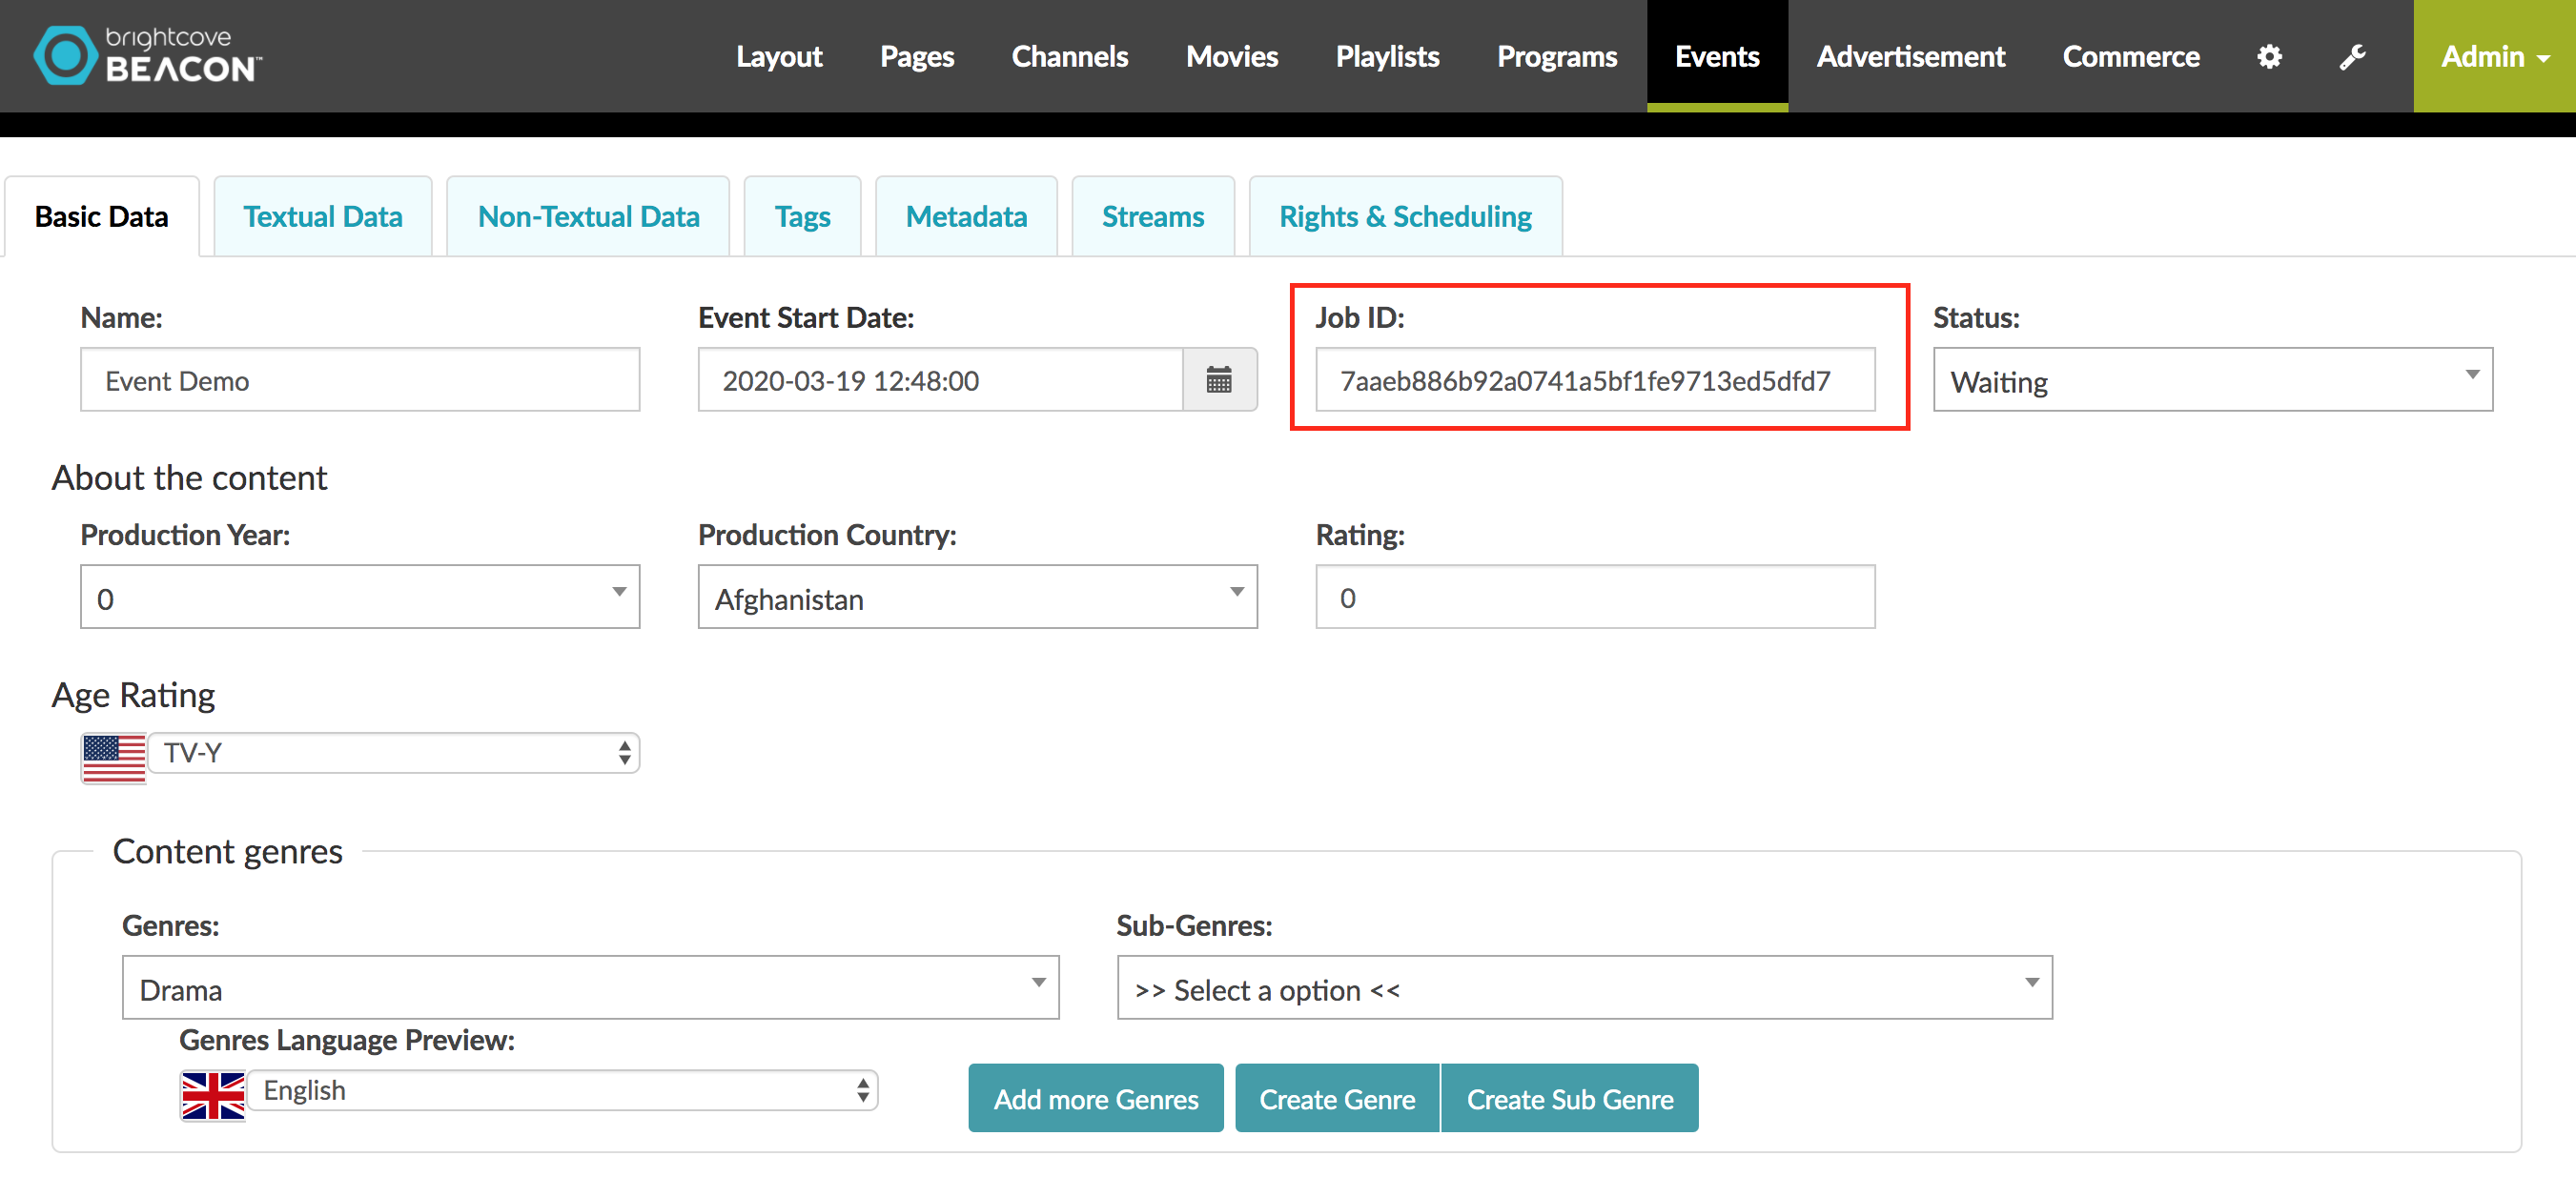
-
Next, go back to Beacon Classic and click in the
Event tab. Select the event you previously created
there, and in the Basic Data settings paste the
Job ID of your Live event.
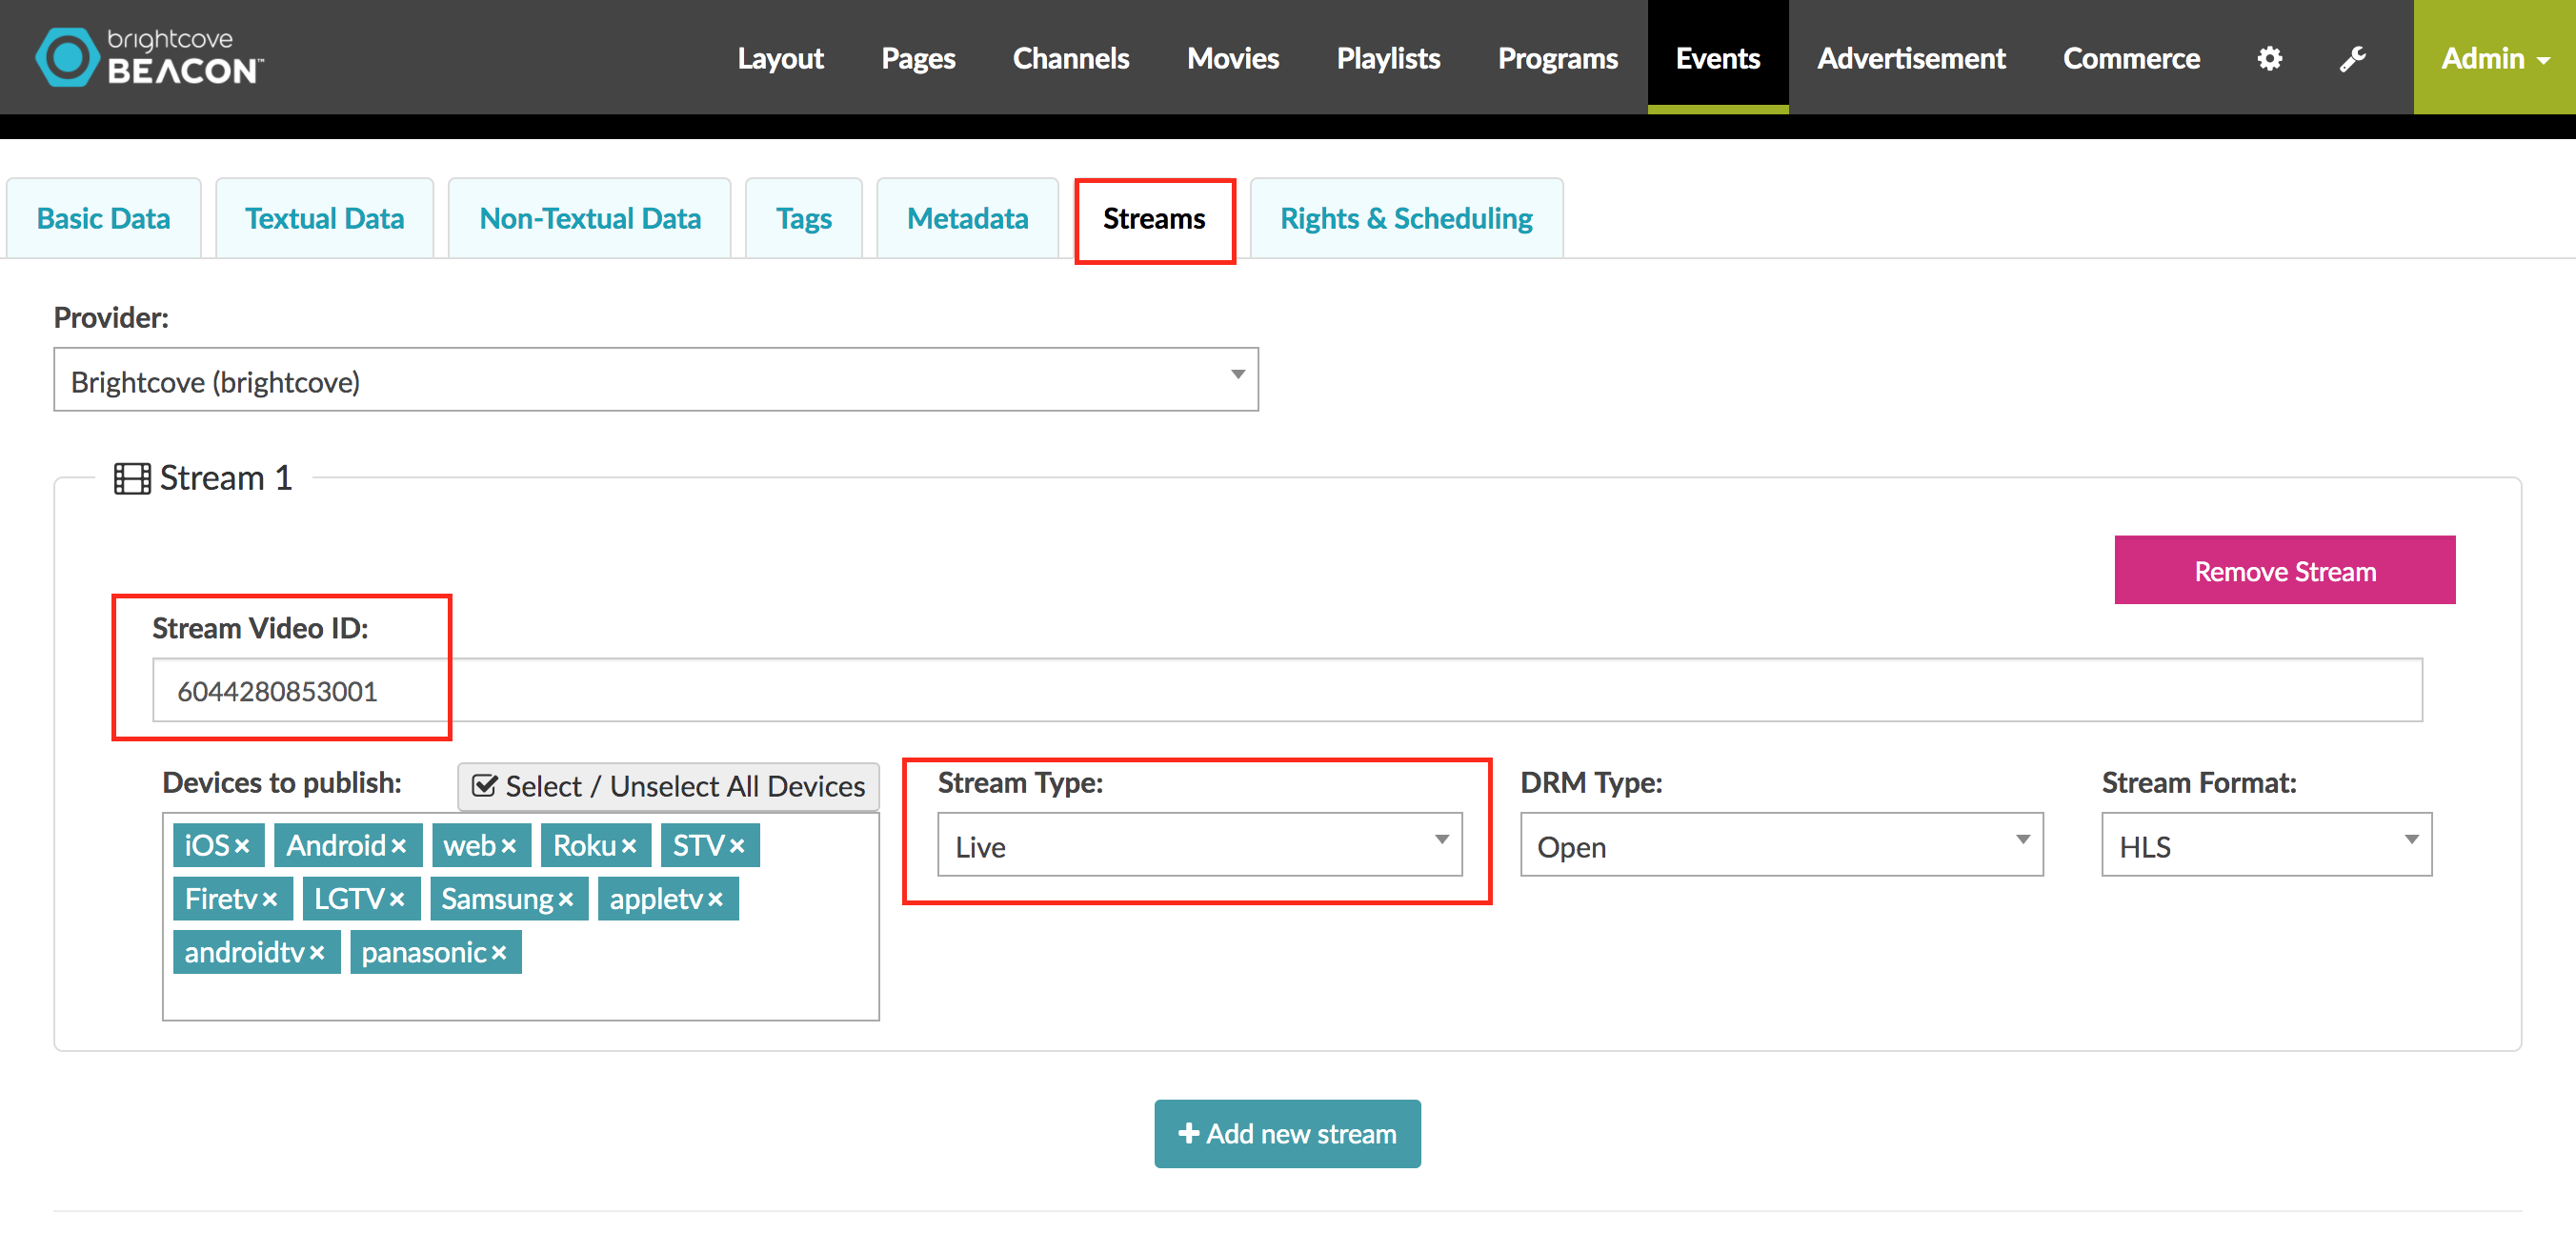
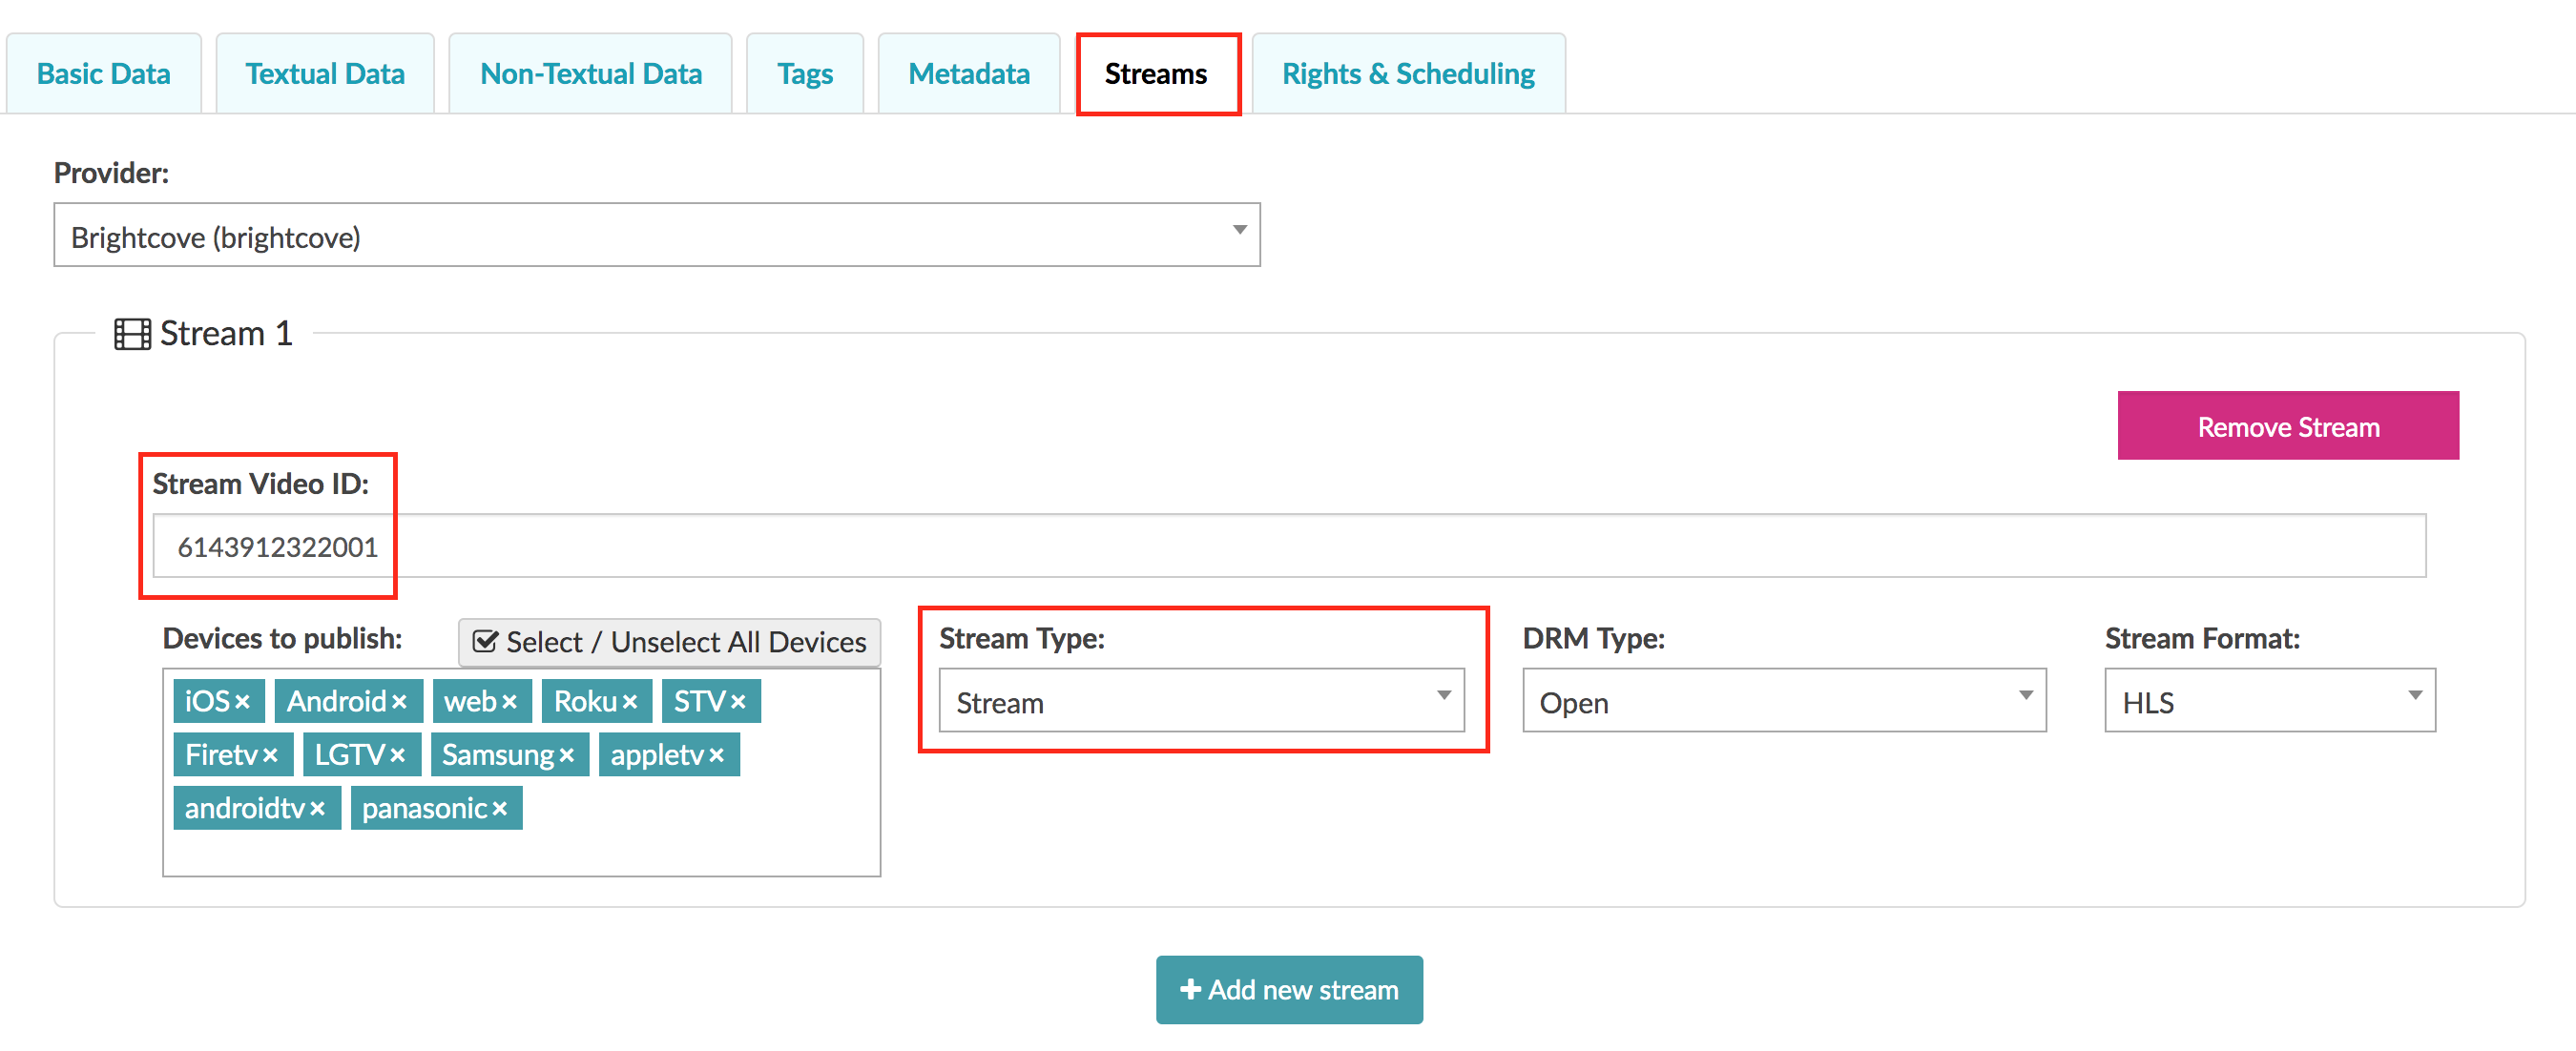
- Go to the Streams tab and create a new stream by clicking in the + Add new stream button.
-
In the Stream Video ID field, paste the
Video ID from the Beacon Studio Event you previously
created. Also fill in the following information about the stream:
- Select the number of devices in which you can publish your video.
- Set the Stream Type to Live from the dropdown menu.
- And click the Update event button before leaving the page.
-
Click on the Tools (wrench) button in the upper right
of the screen. Then clear the cache.
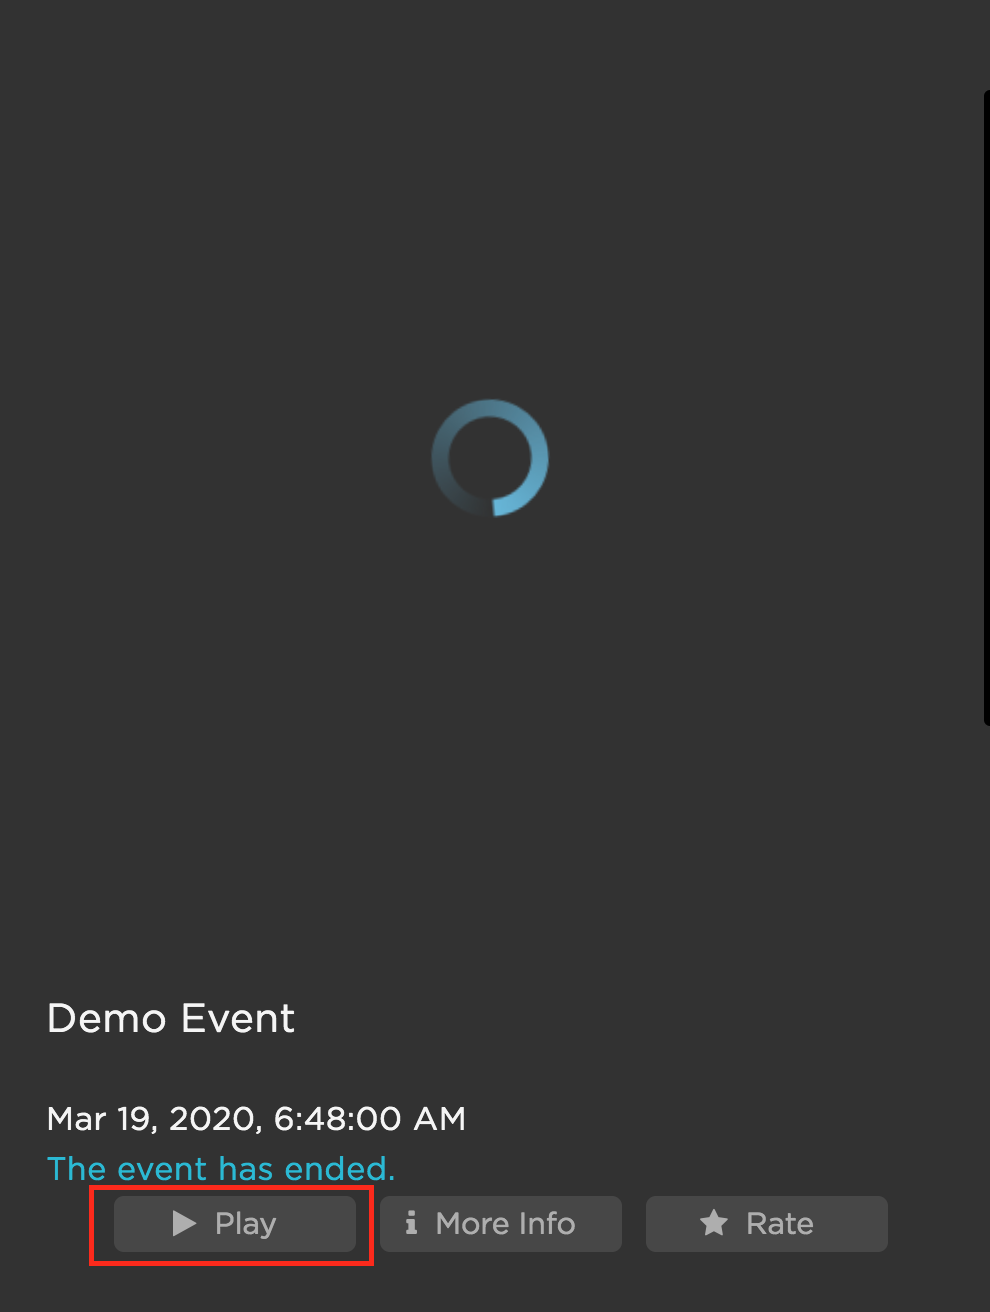
-
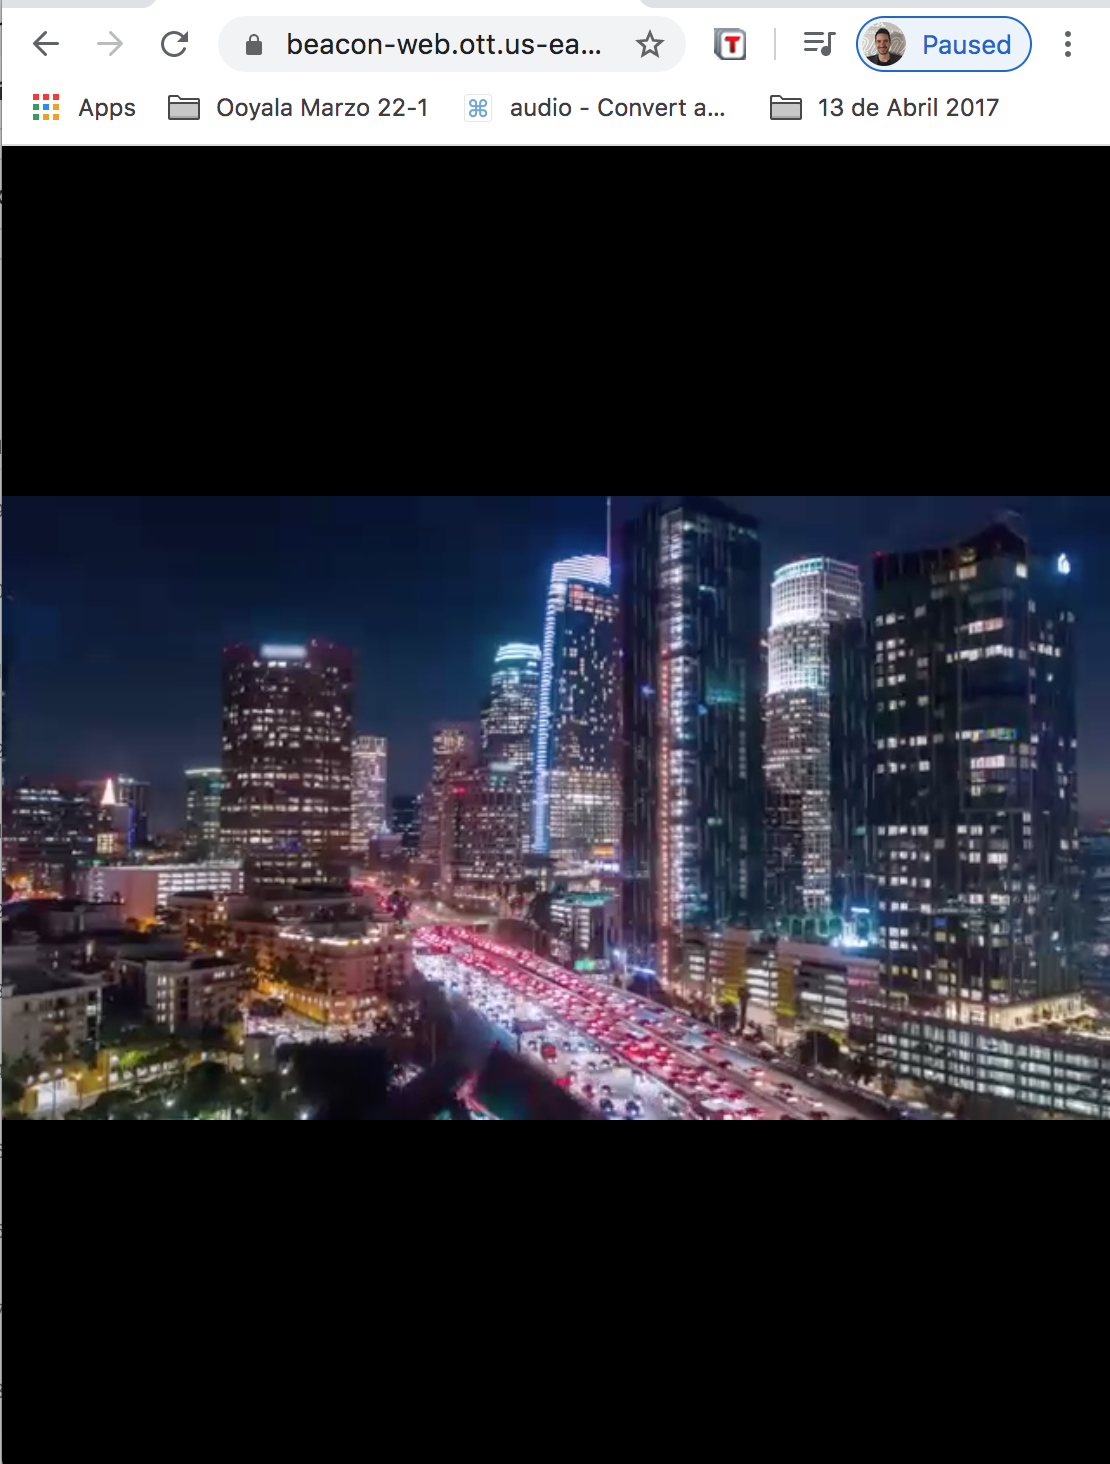
Open your Beacon App and select your event (the event names
and pictures on the image are for example purposes only).
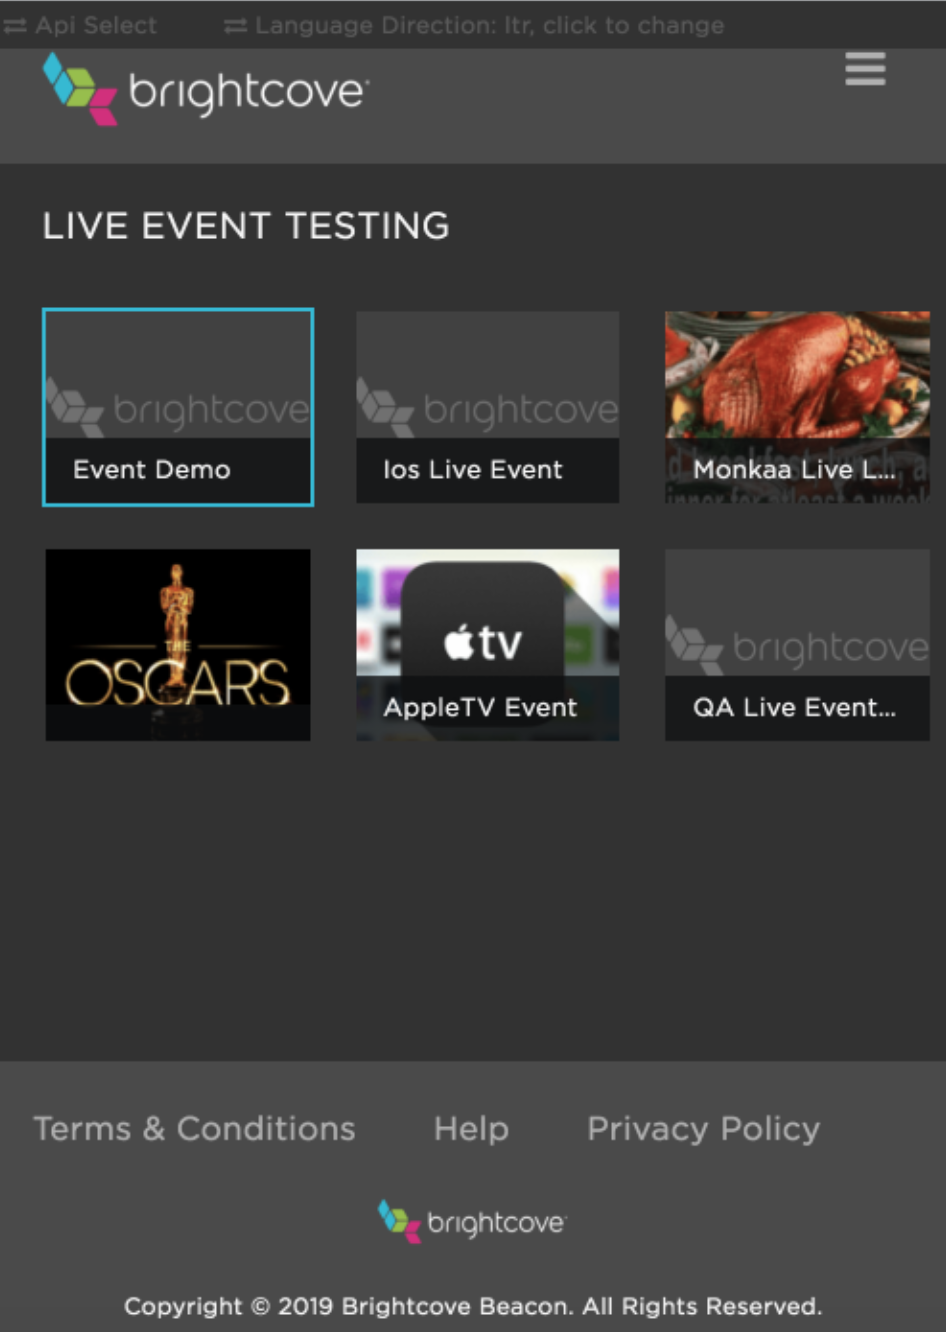
-
Click on the Play button, and you should now be able to
see your Live Event streaming from Beacon Studio in the Beacon Classic
App.
Once your event ends, you can save all or part of it as a clip that becomes a video asset in Beacon Studio or a playable stream that can be shown in Beacon Classic. The process is detailed in the next section of this document.
Creating a Clip from your Live event
The Live module provides the ability to create video clips from completed events. Clips can also be created while a live event is in progress.
For a complete Clipping feature list, please review the Creating a Video Clip Using the Live Module documentation.
-
In the Live module go to the Create Clip tab in the
left panel.
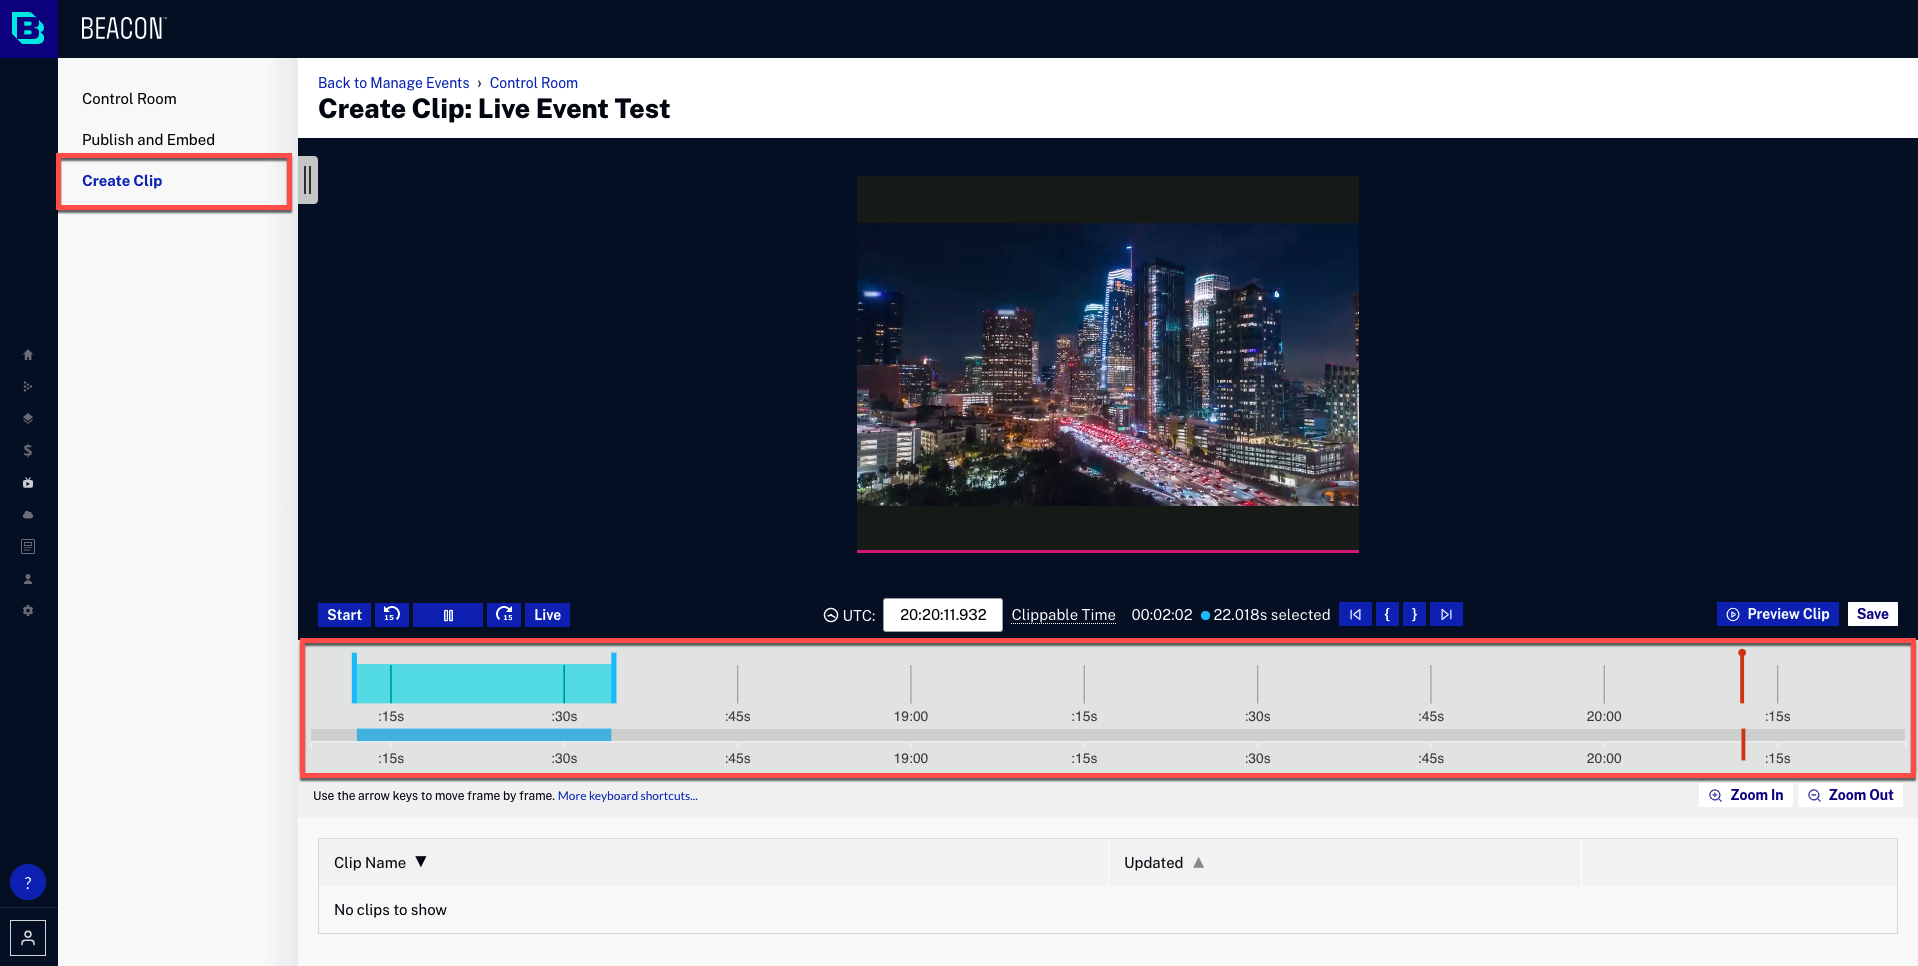
- Using the clipping buttons or shortcut keys, set the start and endpoints for the clip. You can also just click on the Save button to keep the entire video.
-
Enter the clip video properties.
- Clip Name - Name of the clip
- Short Description - Description of the clip
- Tags - Tags to associate with the clip
- Reference ID - Reference ID to assign to the clip
- Remove Source Ad Break Content - This option removes ad breaks triggered within the clip, keeping only program content
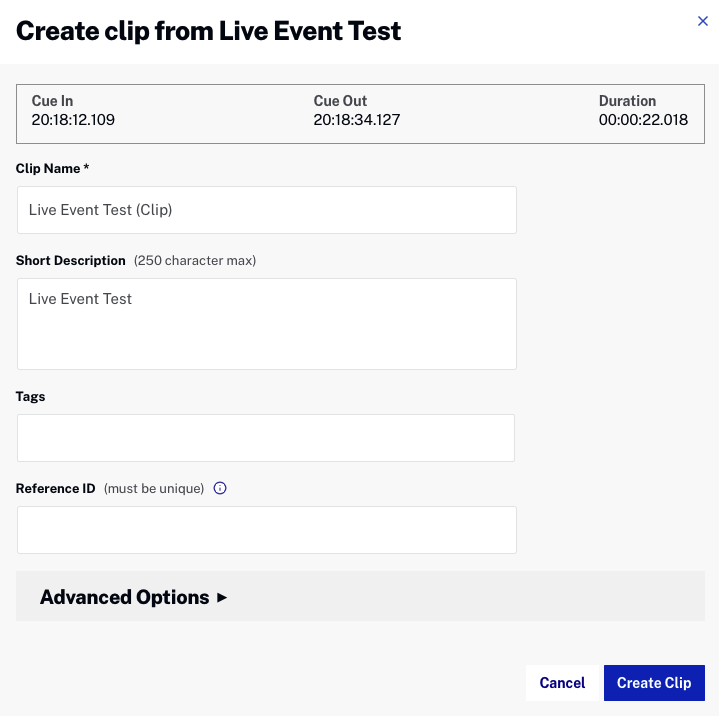
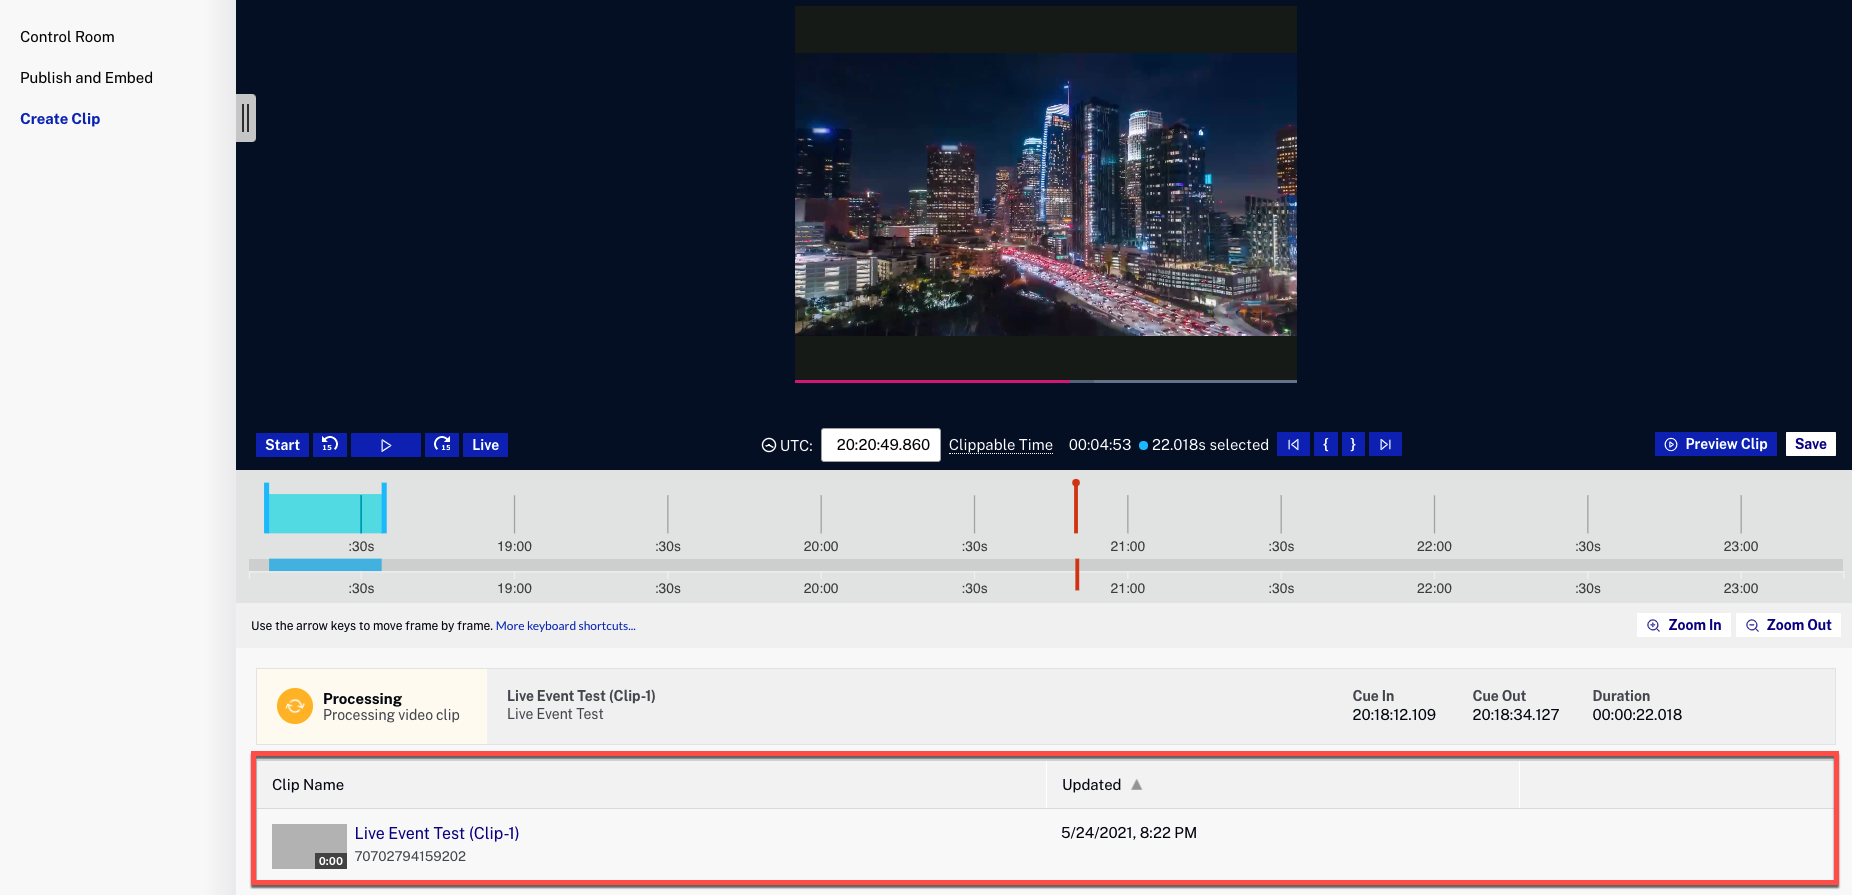
-
Click Create Clip. The transcoding process for the clip
will begin. Clips are transcoded using the default ingest profile for
the account.
Adding your Clip to Beacon Classic as a playable stream video
Here you will use the ID of your newly created clip video and make it a stream that can be played in Beacon Classic.
-
While still in Beacon Studio's Live module, copy the number
ID of your created clip.
-
In the Beacon Classic platform, go to the Events tab
and select the Streams menu. You will see the following
form:
- Paste the ID you just copied from Studio's Live platform into the Stream Video ID field.
- From the Stream Type dropdown change Live to Stream.
- Click in the Basic Data tab and change the Status from Ended to Finished.
-
Before leaving, click the Update Event button at the
bottom of the page. This will make the Play button
available in the Beacon App to see the recording of the
event.
(Static Entry Point) SEP Live events
SEP Live Events are recurring events that you can activated/deactivated when your event starts over and over again as for a weekly program, for example. This event can be used as a one for all Live Job ID that can be transmitted to several channels in the Beacon App.
Follow these steps to create a SEP (Static Entry Point) Live event in Beacon Classic.
- In the Live Platform, Create a new Event. For more information in how to create an event please read the Creating a new event section of the Creating and Managing Live Events using the Live Module document.
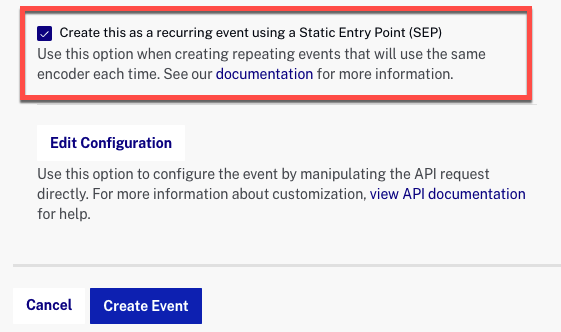
-
Expand the ADVANCED OPTIONS, and enable the
Create this as a recurring event using a Static Entry Point
(SEP)
option. For more information on SEP see the
Working with recurring events
section of the
Creating and Managing Live Events using the Live Module
document .
-
If you already have a SEP event, click on the
Standby tab, and you will be able to
activate/deactivate it from the Live Control Room.
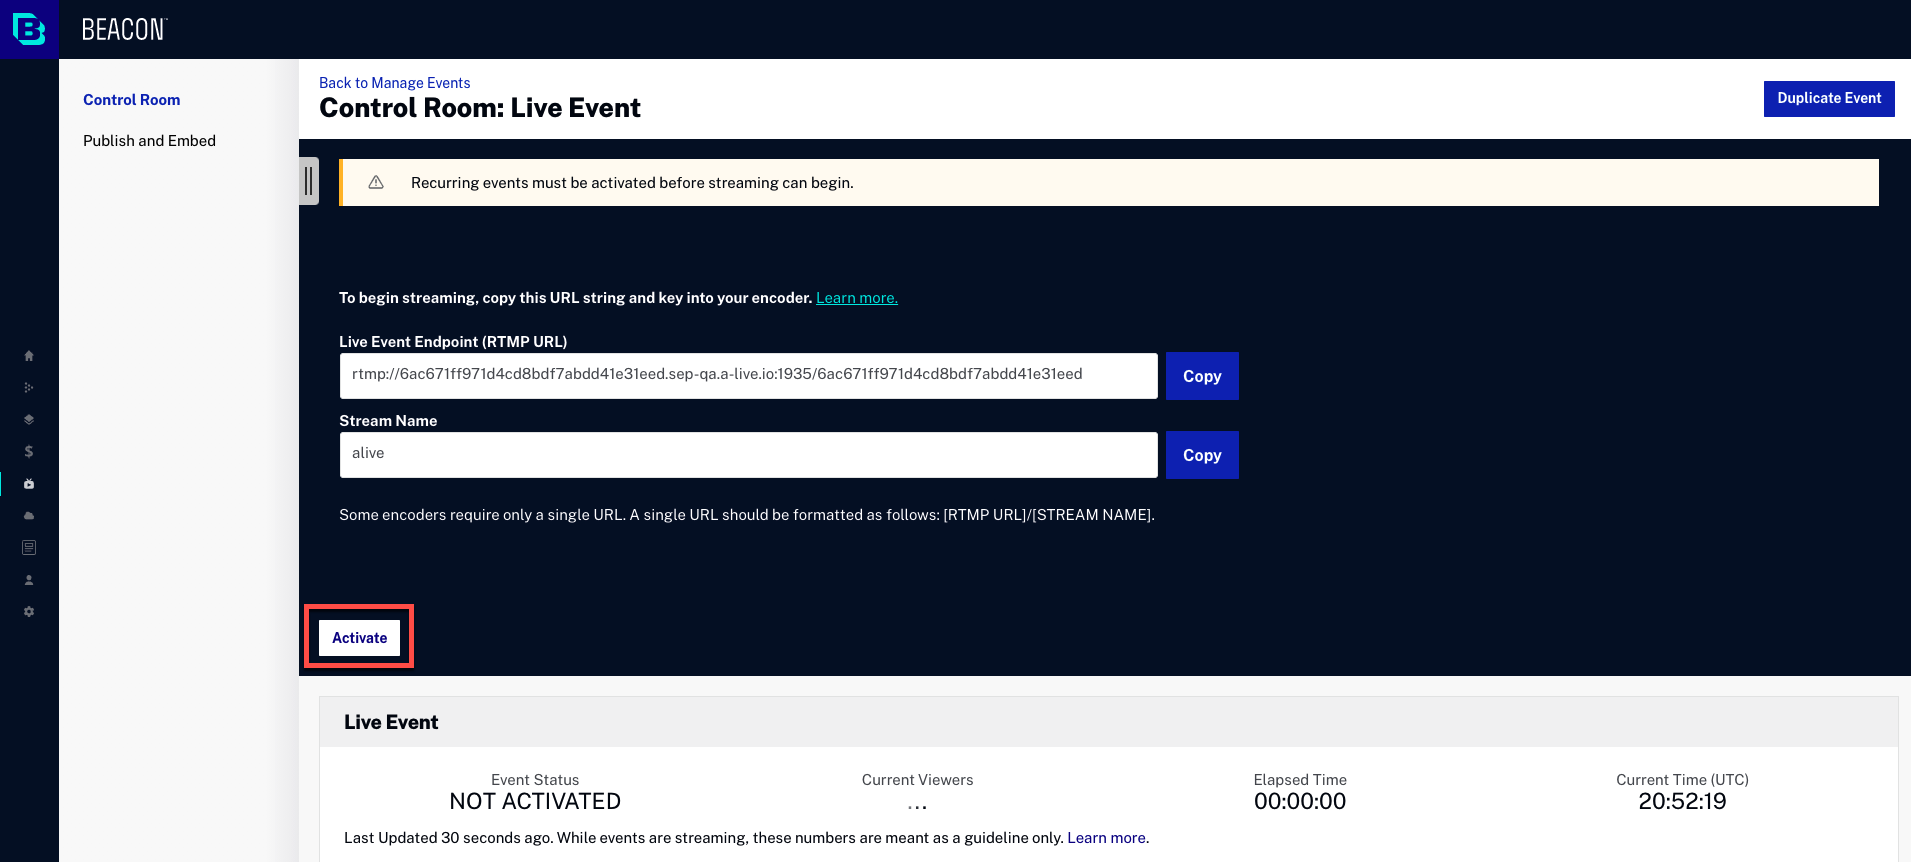
-
Copy your Live Job ID.
-
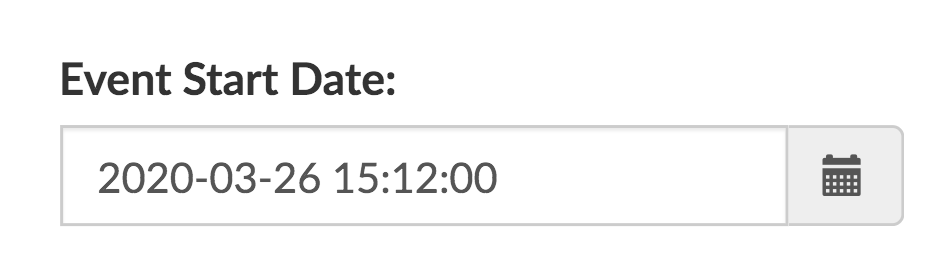
Return to the Beacon Classic platform and configure your event by
pasting the Job ID of the recurring event. Also supply
a Name and an Event Start Date.

-
The date and time of your event must be in the following format.
- Click in the Update event button.
You can perform this process for all the Live events you want in the Beacon Classic platform. All of them will be streaming from the same Live transmission, but each one with the different date and time that you adjusted in its event settings.