
Overview
Brightcove Beacon supports Server-Side Ad Insertion (SSAI) in Live events so server-side ads can be requested and displayed during a Live stream. Note: if you are using redundancy with SSAI, you must insert ads into all jobs in the group at the same time.
A high-level view of the process is:
- Create an Ad Configuration in Video Cloud Studio.
- Create a fill slate for your Live event.
- Create a Live event with SSAI enabled.
- Publish the Live event to Beacon Classic.
SSAI provides these main features during Live events:
- Since ads are stitched into the Live video stream on the server-side, they are not affected by ad blockers.
- Ads are inserted at cue points sent from your encoder or you can create an instant cue point using the Live module Control Room.
- You can configure fill slates to fill any unused ad time.
Configuring Server-Side Ad Settings
Here you will create an SSAI Ad Configuration to be used as your set of ads that will be displayed in your Brightcove Beacon Live event.
- Log in to Video Cloud Studio.
-
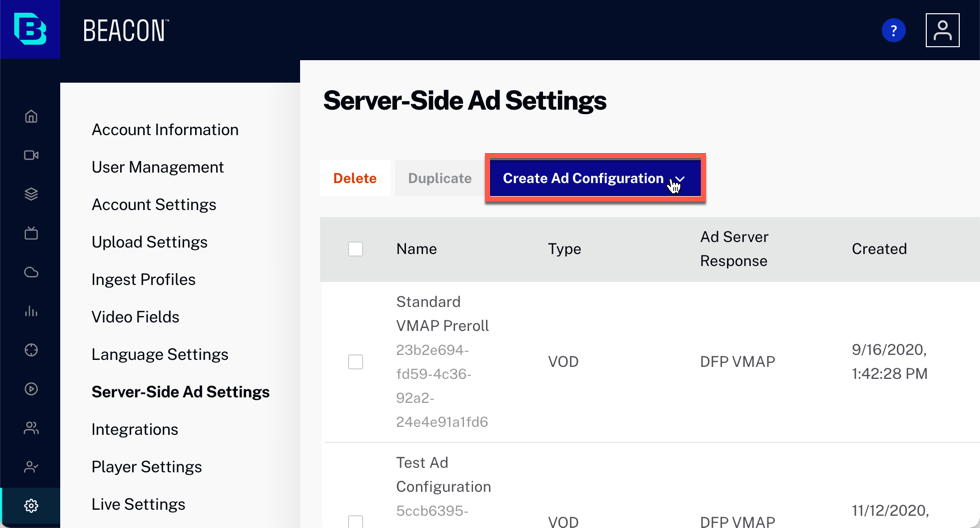
In the navigation header, click ADMIN and select Server-Side Ad Settings. A list of all ad configurations will be displayed.

-
To create a new ad configuration, click the
Create Ad Configuration button.
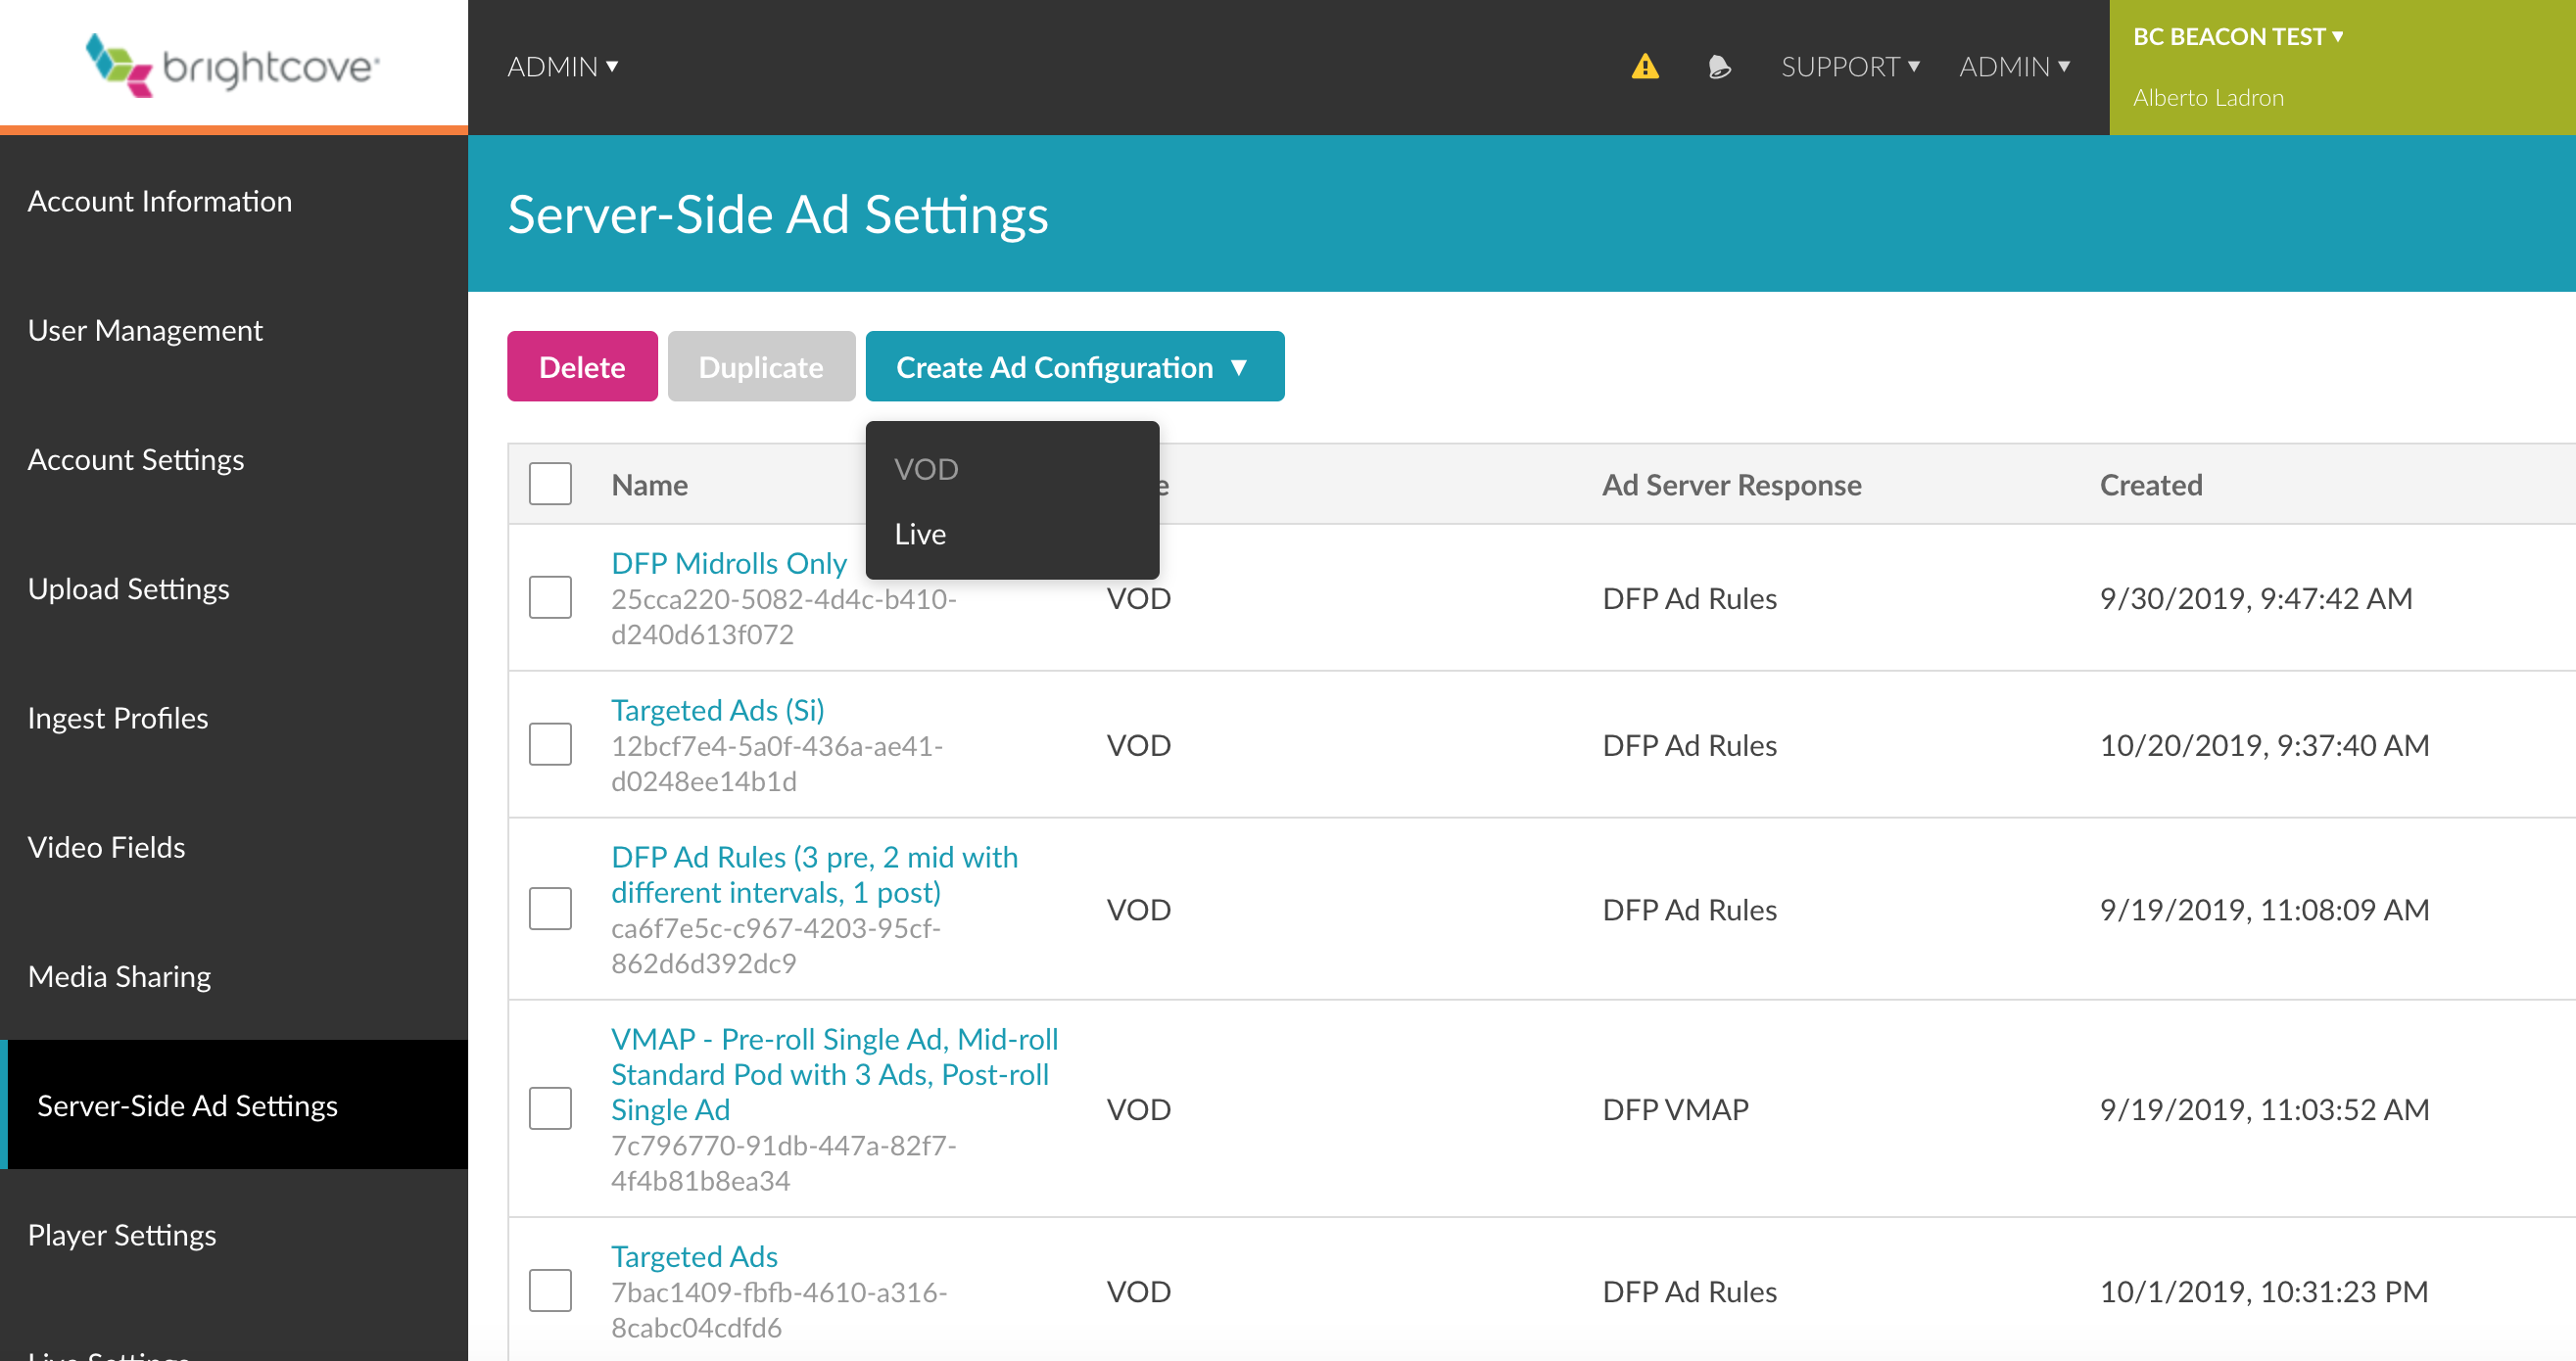
-
From the dropdown, select Live as a type.
-
Check to be sure you are seeing the
Server-Side Ad Settings form.
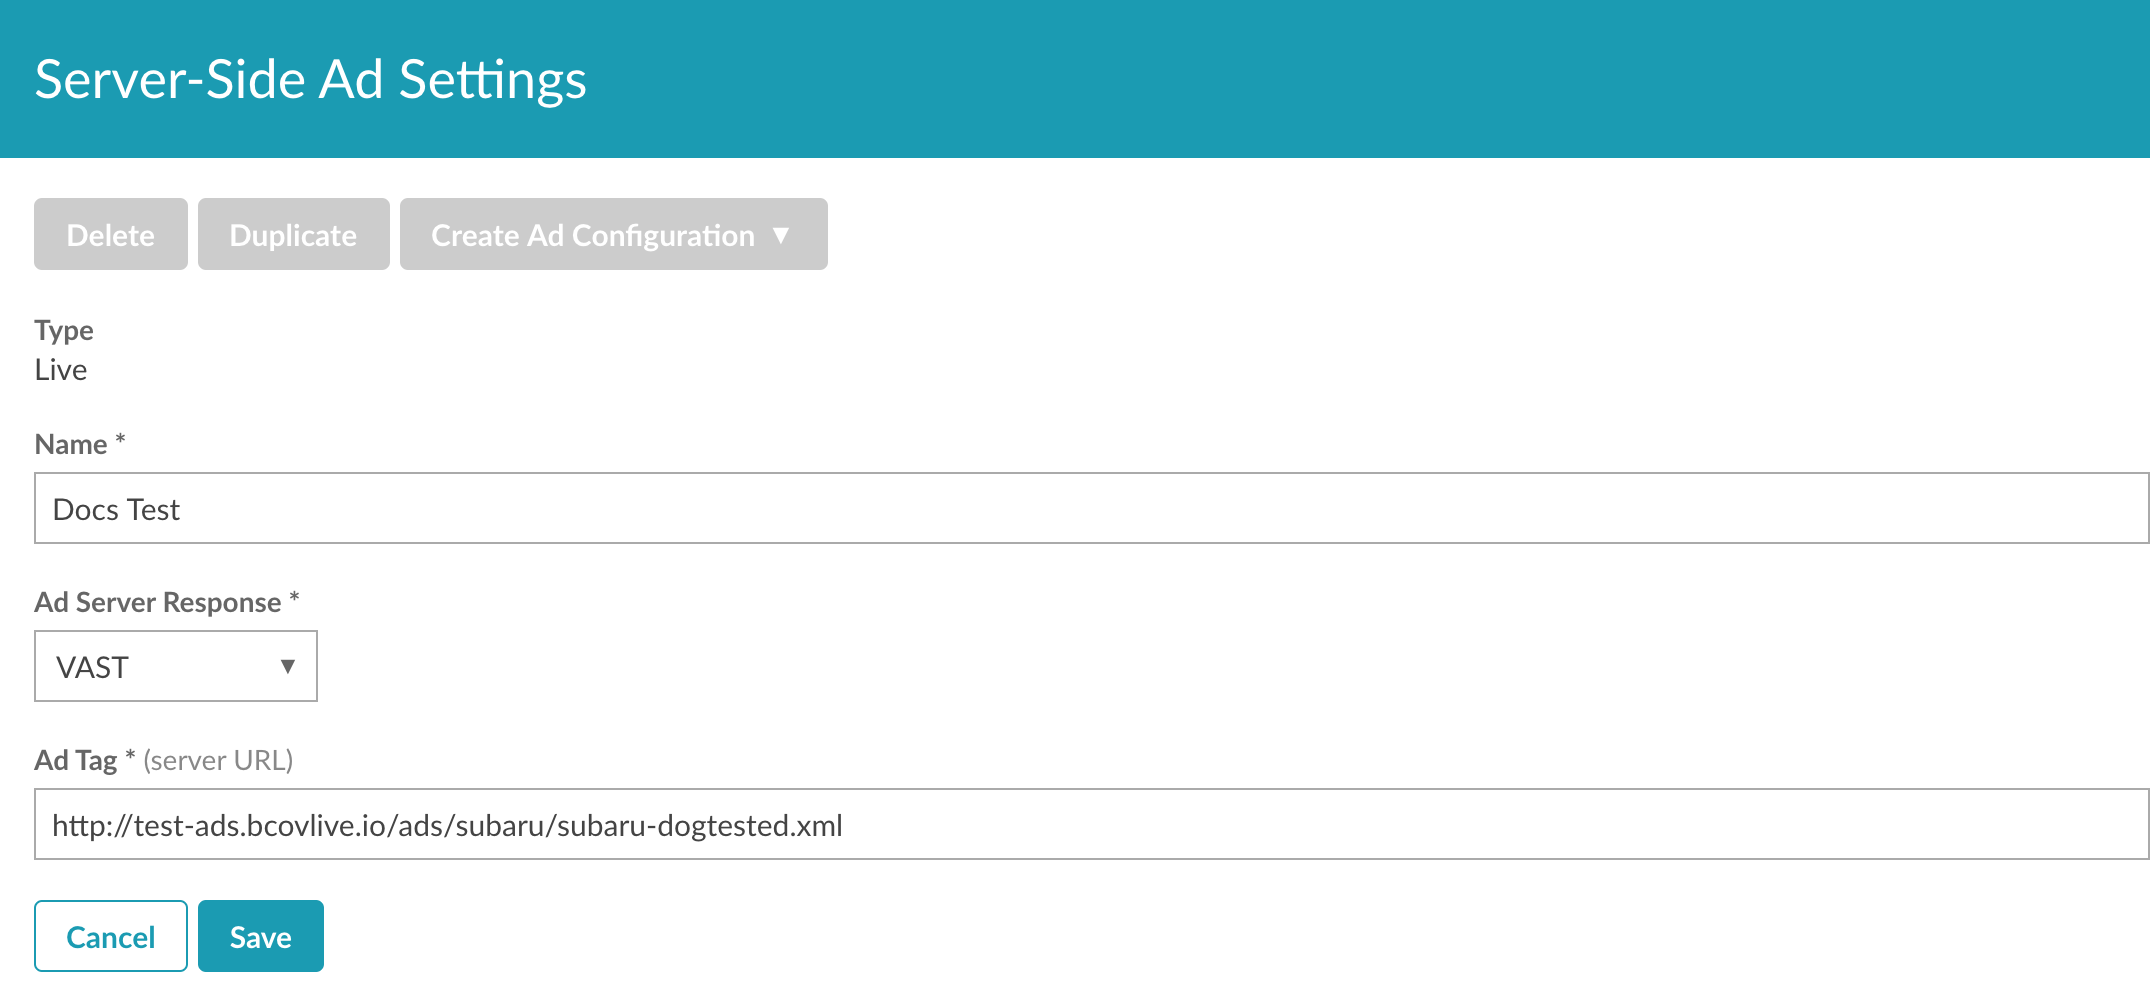
- Give your ad configuration a Name.
-
Select the Ad Server Response:
- VAST
- DFP (Ad Rules)
- Smart XML
- Enter the Ad Tag (server URL).
- Click the Save button.
Configuring a Fill Slate
Fill slates are videos that will be displayed when there are gaps in a Live stream ad break that cannot be filled with a dynamically-served ad. If the requested ad is shorter than the Ad break time, the fill slate will be displayed so viewers don't see a blank player.
To add a fill slate, follow these steps:
- Click the ADMIN > Live Settings link in the Studio header.
-
Click + Add Fill Slate. You should be seeing the following form:
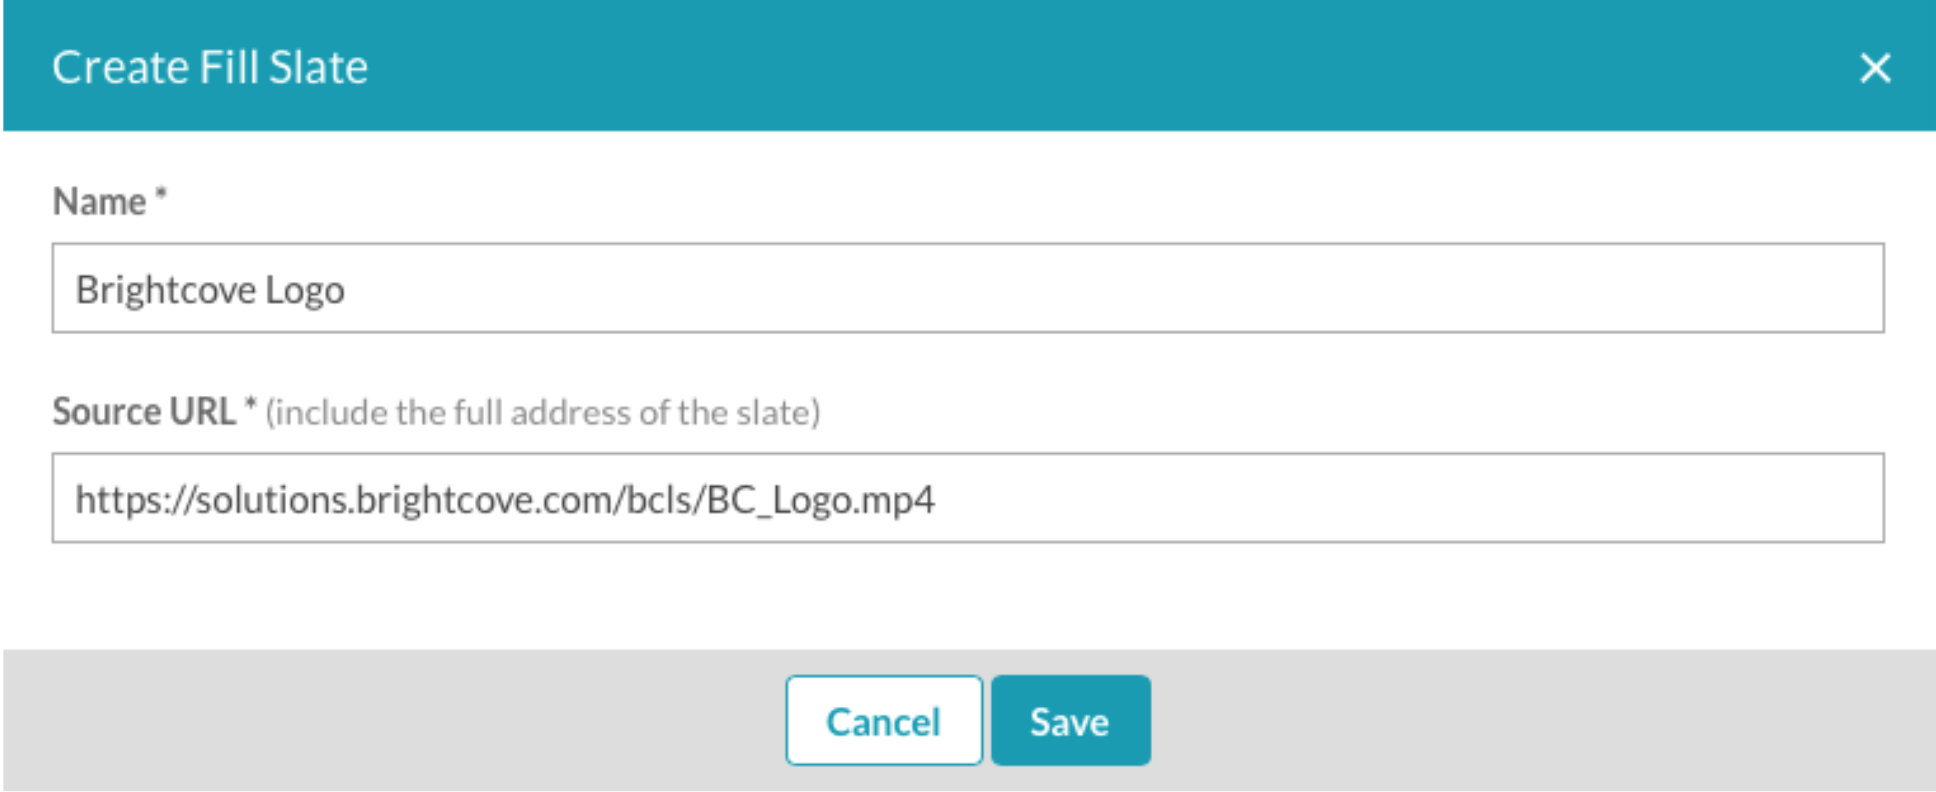
- Enter a Name for your fill slate.
- Enter the Source URL for the slate.
- Click Save. The ingestion process for the slate will begin.
To delete a fill slate, click the delete button (![]() ) next to the fill slate.
) next to the fill slate.
Creating a Live event that supports SSAI
In order for a live event to use SSAI (Server-side Ad Insertion), the Enable Server-Side Ad Insertion (SSAI) setting must be selected when the event is created, and a previously created fill slate should be chosen for playback.
Follow these steps to create an Event that supports SSAI ads in Brightcove Beacon:
- Open the Live module in Studio.
- From the Manage Events page, click Create Event.
- Enter your event details. For complete information on creating a live event using the Live module, please see Creating and Managing Live Events using the Live Module.
- Click ADVANCED OPTIONS to expand the advanced options.
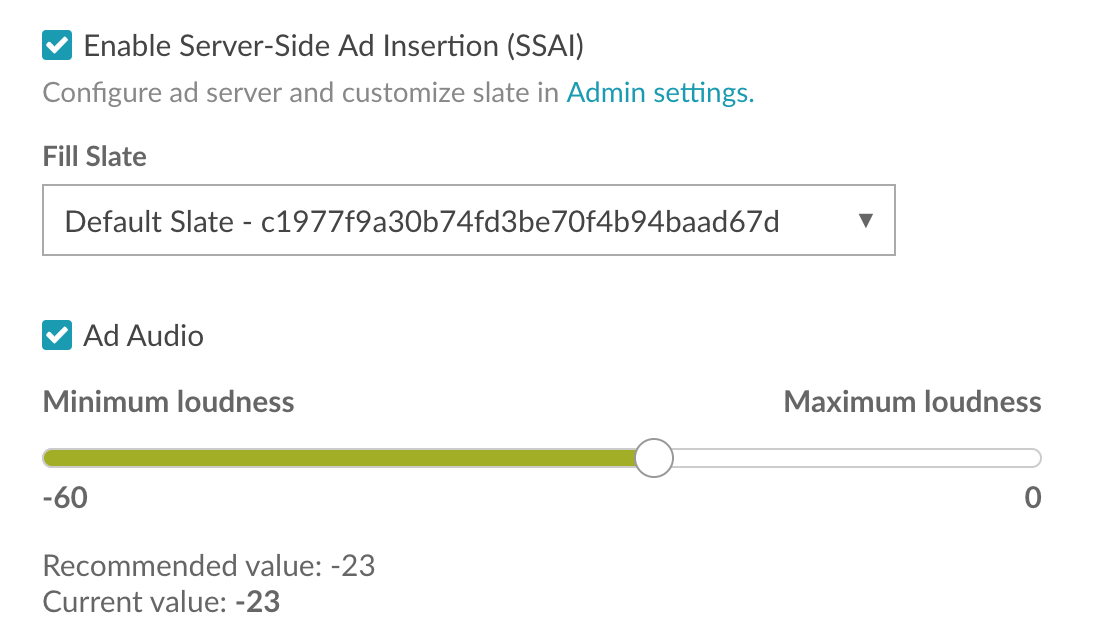
- Check Enable Server-Side Ad Insertion (SSAI). This will enable server-side ad insertion.
- Select a Fill Slate. The fill slate will be displayed when there are gaps in a live stream ad break that cannot be filled with a dynamically-served ad.
-
When the Ad Audio setting is checked, the audio levels on ads will be normalized based on the adjustment that is set. This can be used as a way to help make sure ads aren’t significantly louder than the content. Brightcove recommends selecting this option.
- Click Create Event
- The Control Room page will open with details about the Live event including the Streaming Endpoint (RTMP URL) and Stream Name. These values will be used by the encoder.
- Configure your encoder and start the Live stream.
-
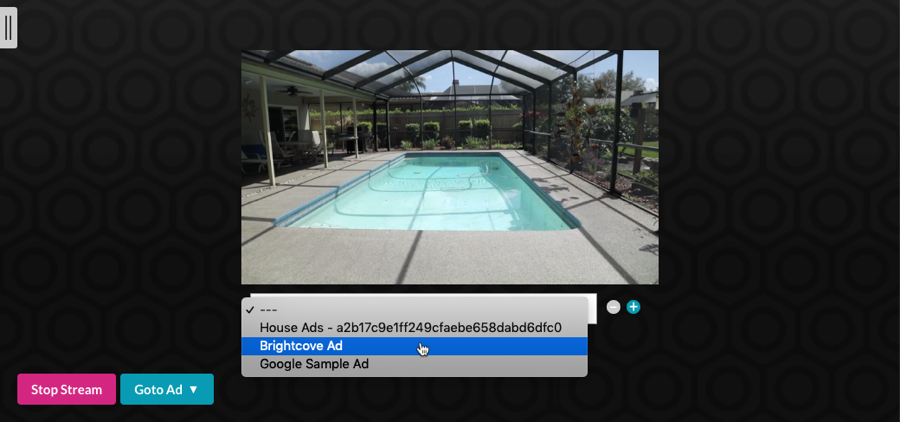
By default, the Control Room preview player shows the ad-free stream. Ads will not be shown in the Control Room unless a Live ad configuration is selected. Use the dropdown below to the player to select an ad configuration.
-
(Optional) Click the plus button (
 ) to select an additional ad configuration. Doing this will add another preview player on the Control Room page.
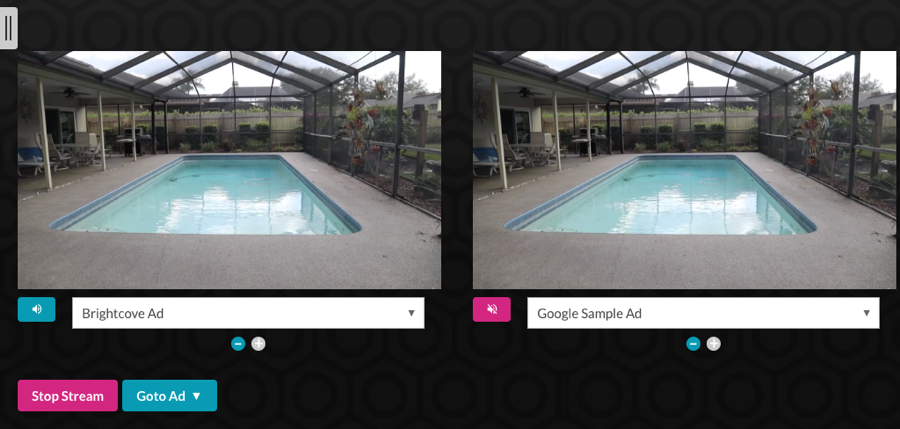
Click the volume button below the preview player to control which player audio stream is active.
Requesting an ad
Follow these steps to request an ad in the Live Control Room:
-
Click Goto Ad and from the dropdown choose the length of your desired ad break.
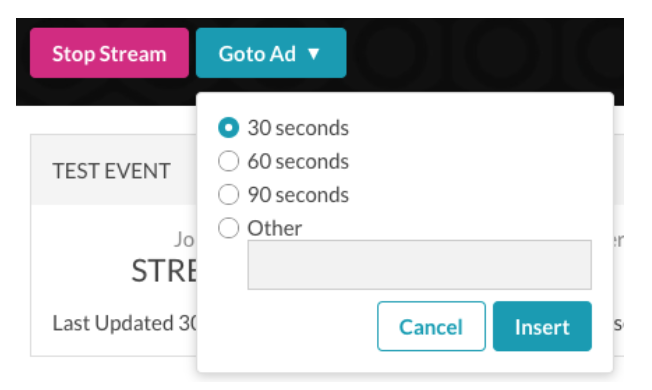
- Click Insert to insert an ad break into the live stream. If the ad doesn't fill the entire ad break time, the fill slate (being selected when the event was created) will be displayed.
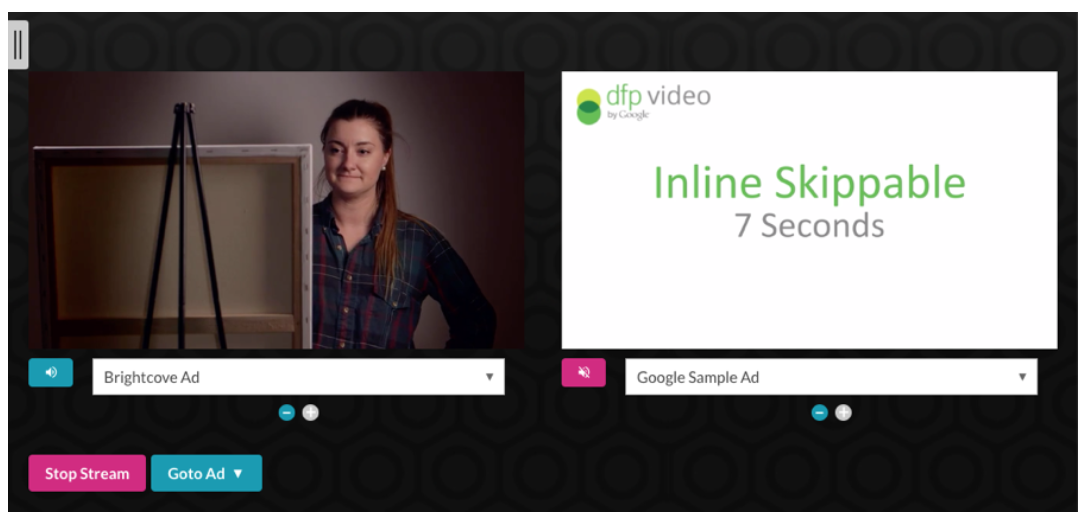
Ads will be seen in the Control Room preview player and in players that are published using the Live module. This example shows 2 ads being displayed in the Control Room.
Publishing a Live event in Brightcove Beacon
To publish your Live event with server-side ads in Brightcove Beacon, follow these steps:
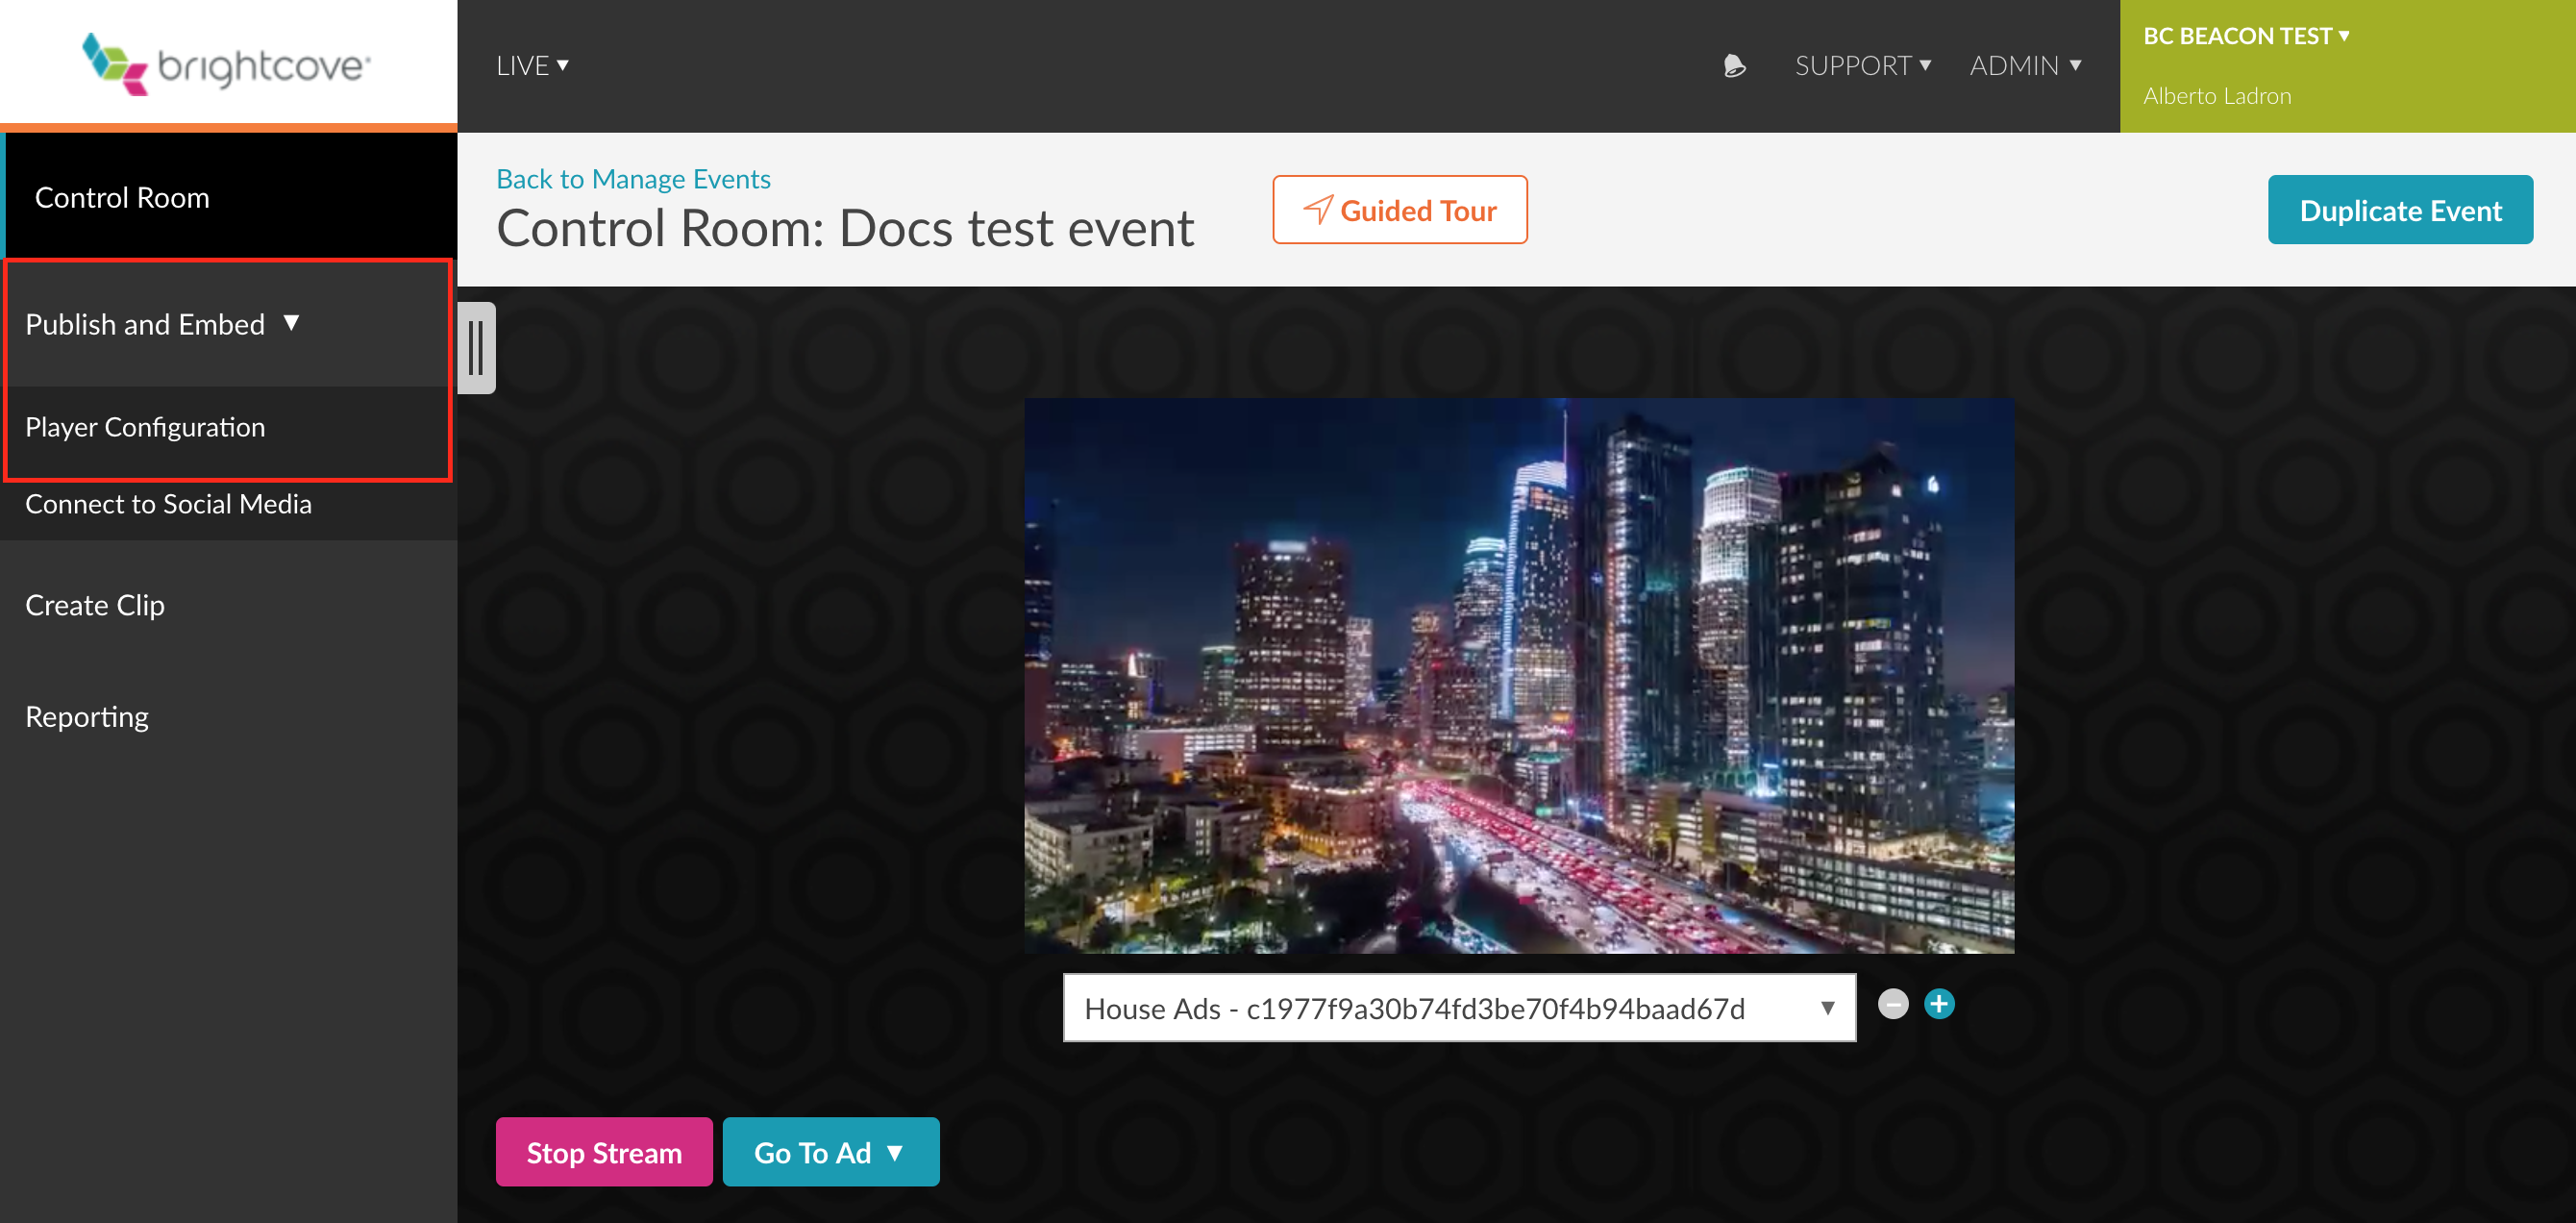
- In the Live Control Room click Publish and Embed in the left navigation.
-
Select Player Configuration.
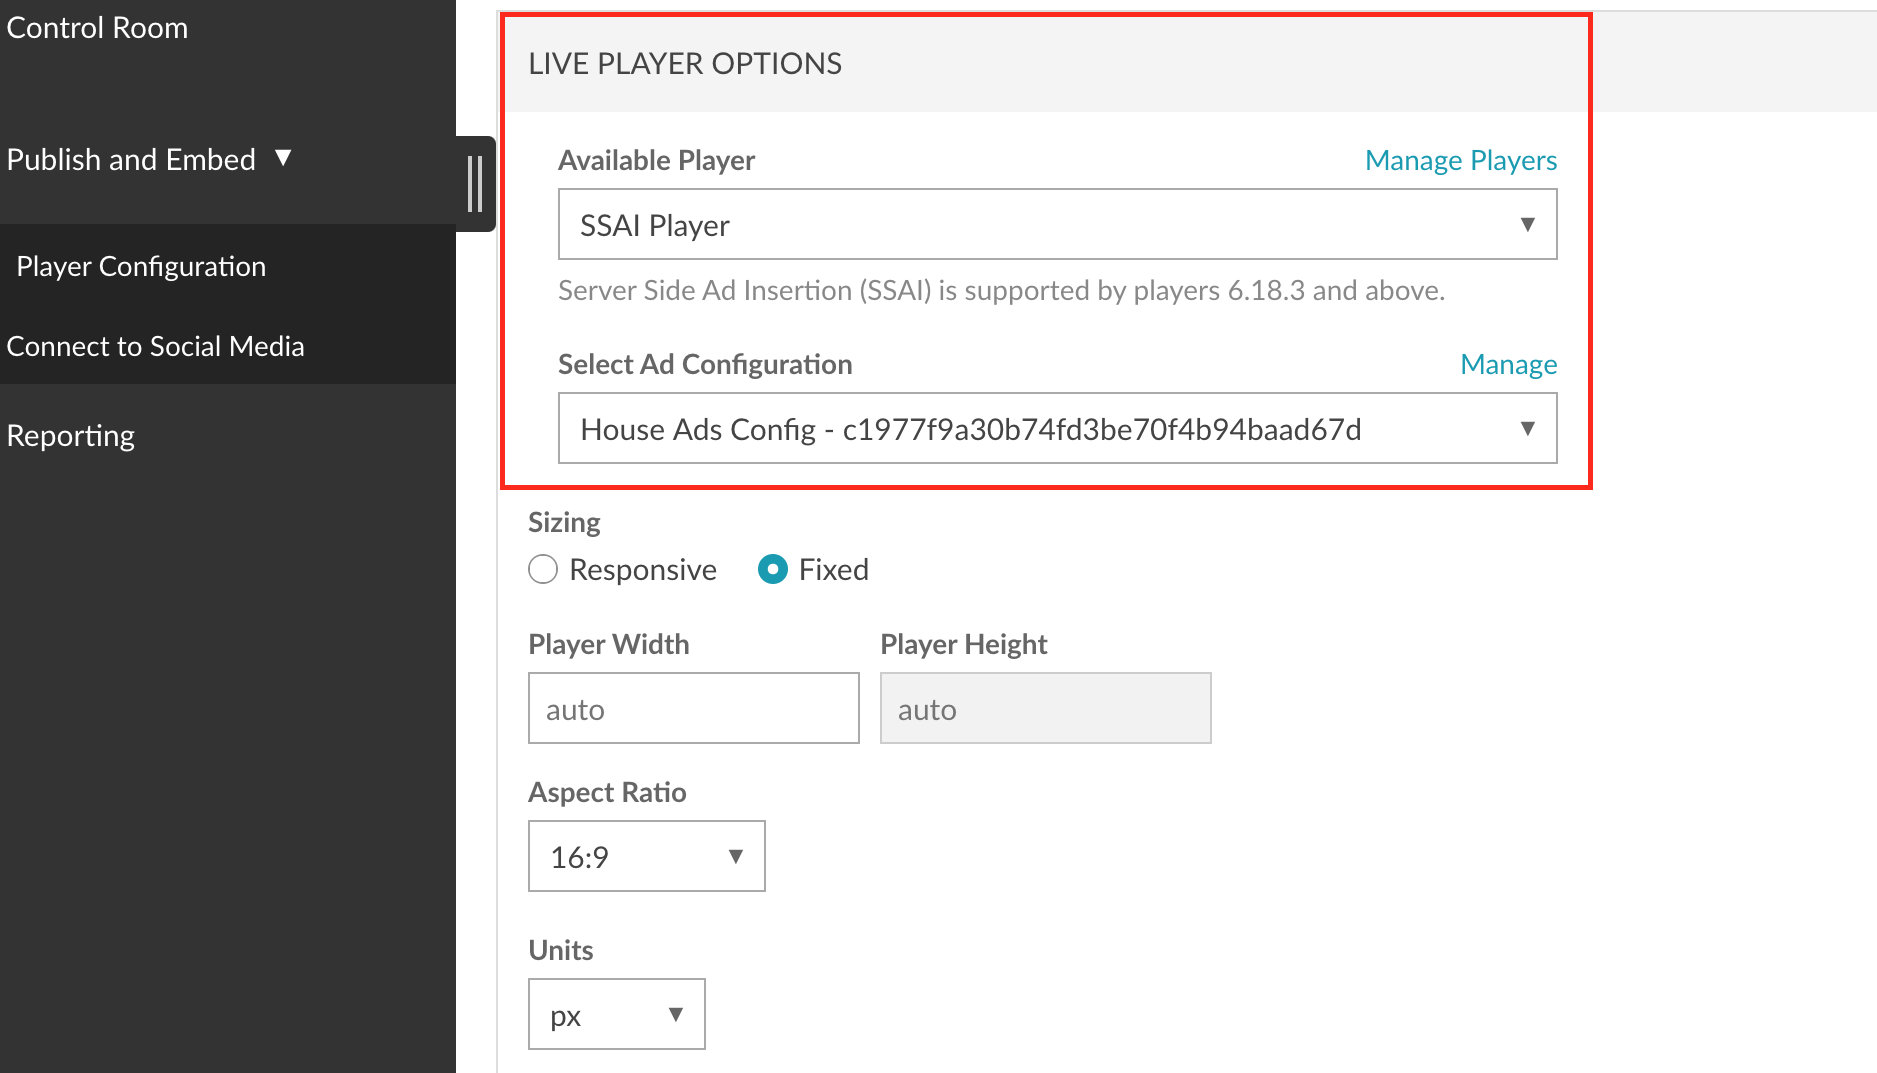
- In the Live Player Options select an Available Player.
-
Select your Ad Configuration previously created in the Server-Side Ad Settings.
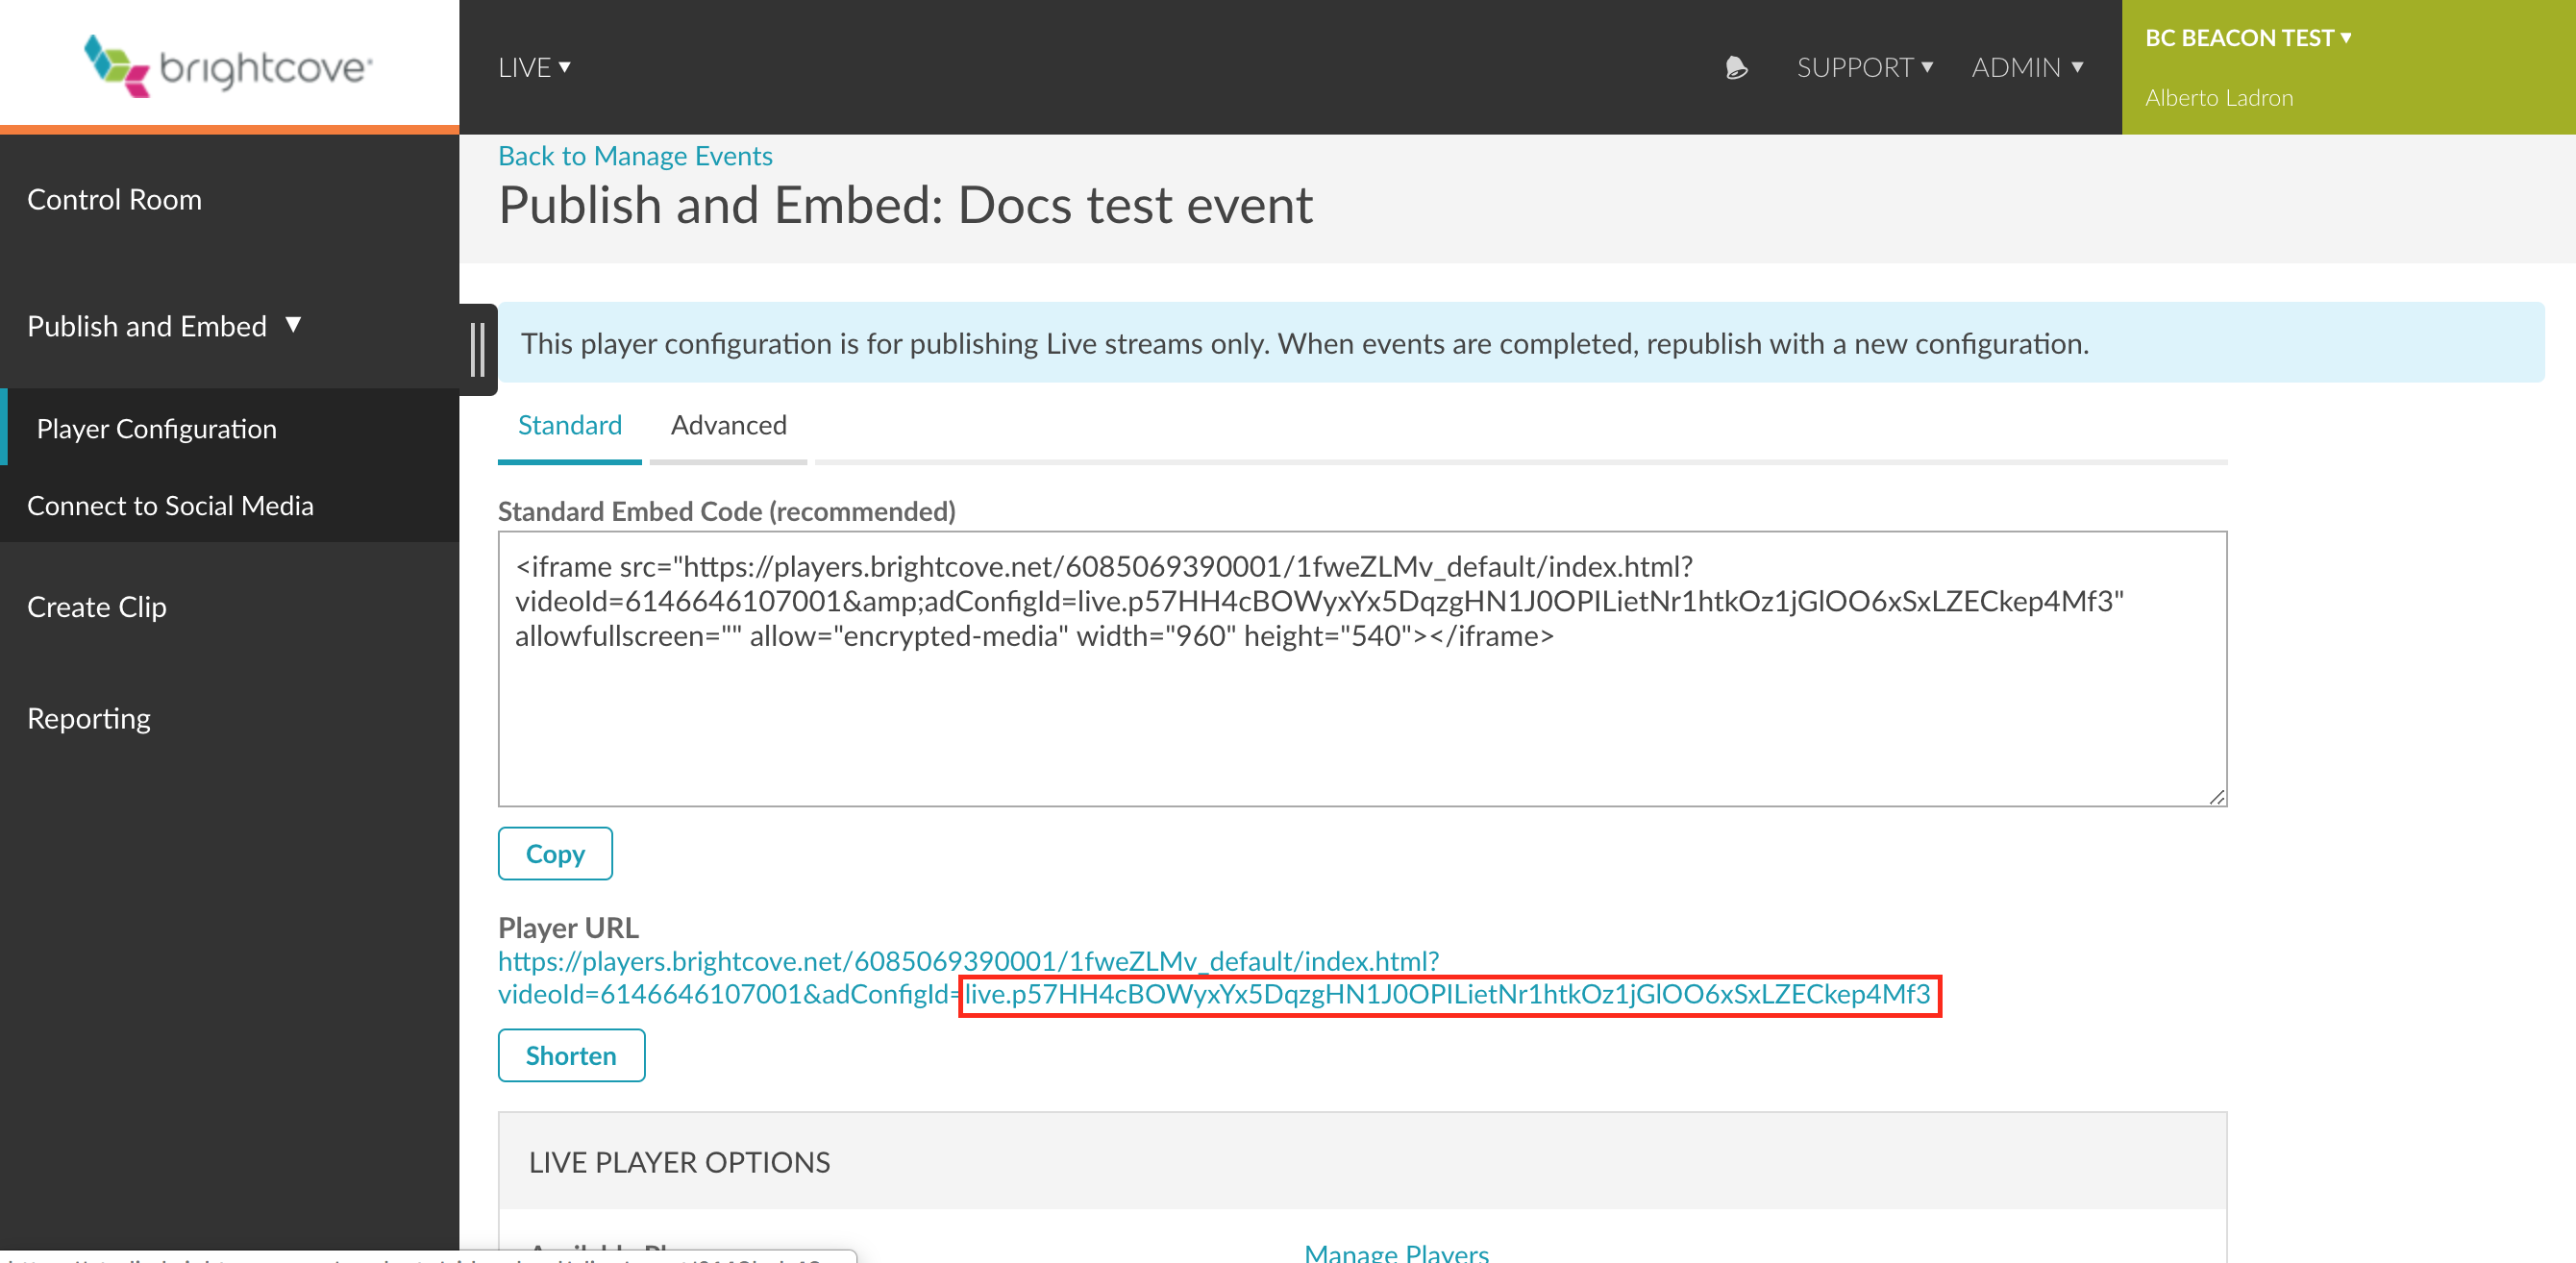
-
After selecting your Available Player and Ad Configuration, a new Player URL will be generated. Copy the selected part of the URL as shown in the image, starting from the word live. Example: live.xxxxxxx
- Log in to Beacon Classic.
- In Beacon Classic, in the upper menu, click the Advertisement tab.
-
Click the Add New Configuration button.

-
Check to be sure you are seeing the
New Advertisement form.
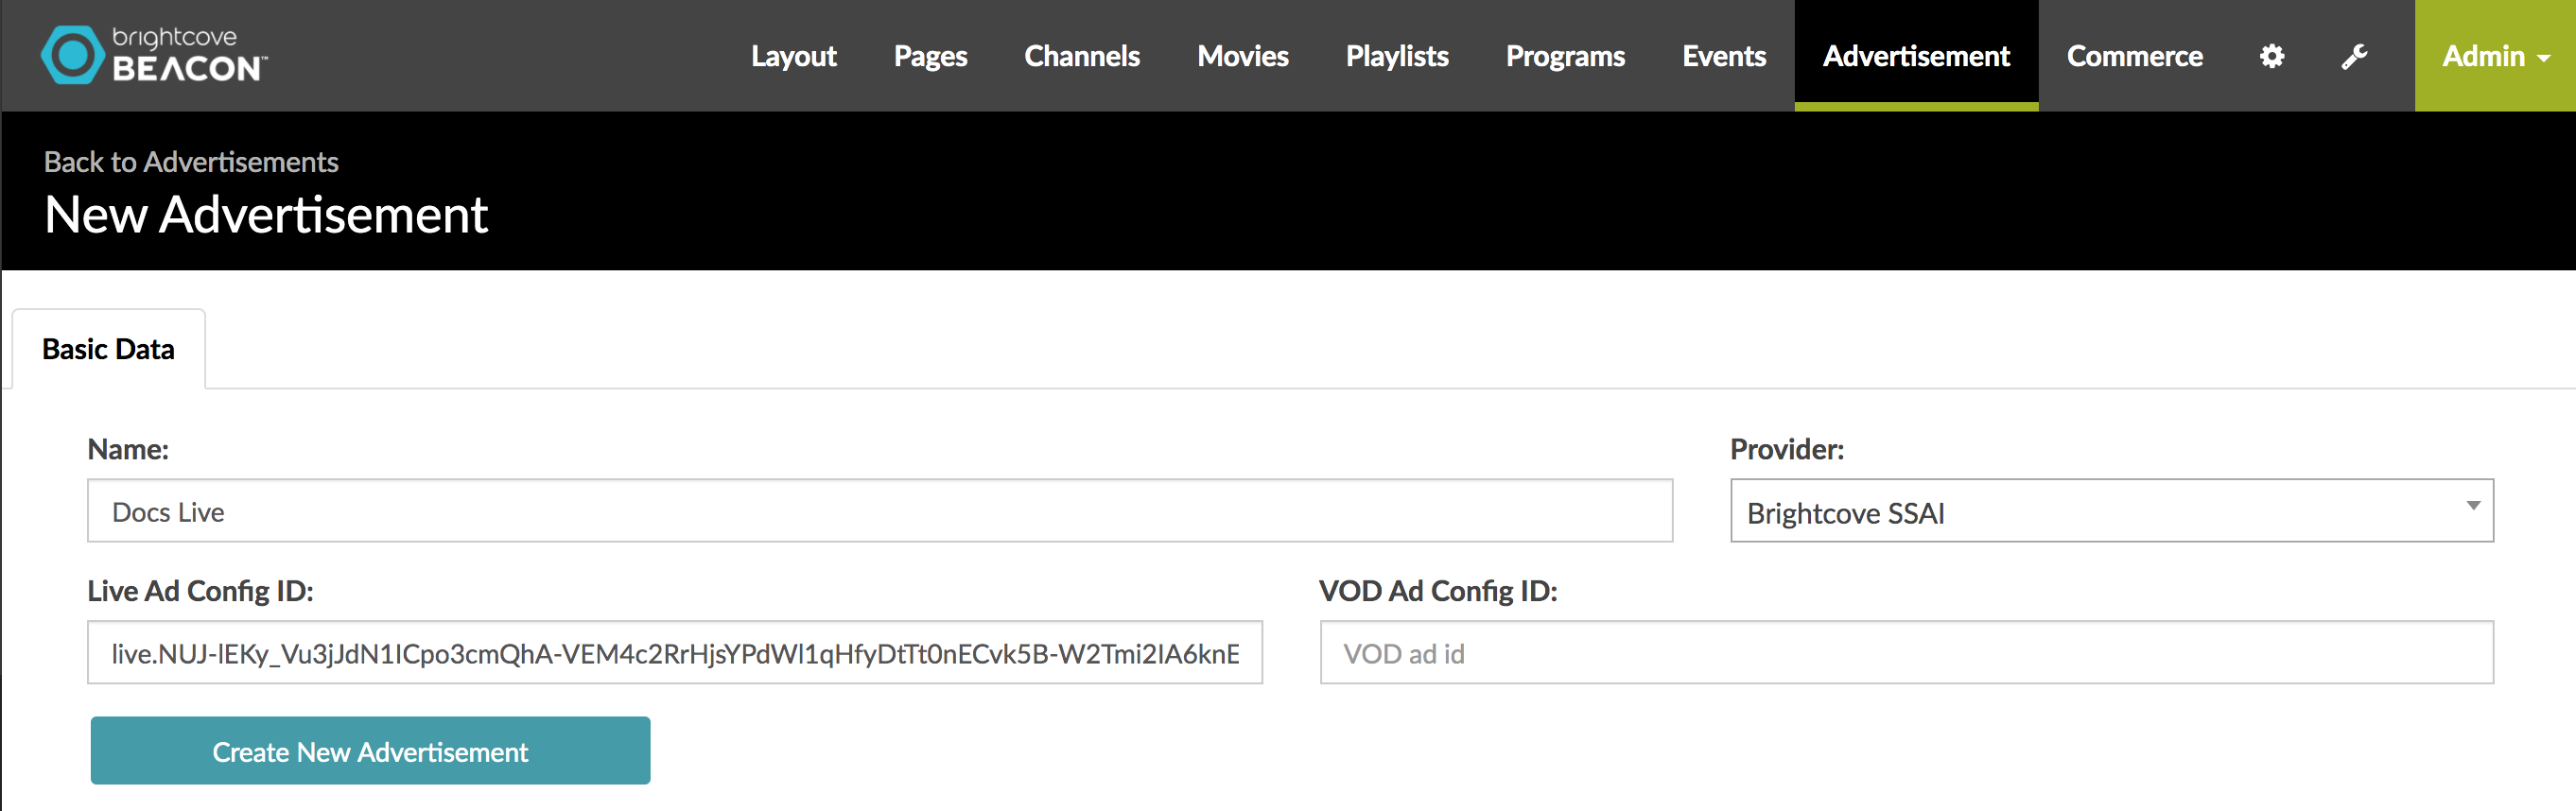
- Give your new advertisement configuration a Name.
- In the Live Ad Config ID:, paste the Player URL ID you just copied from the Live Platform, for example: live.xxxxx.
- From the Provider menu select Brightcove SSAI.
- Click in the Create New Advertisement button.
- Click on the upper menu Events tab and create or select your Live event. For more information in how to create a Brightcove Beacon Live Event, please see the Streaming a Live Event document.
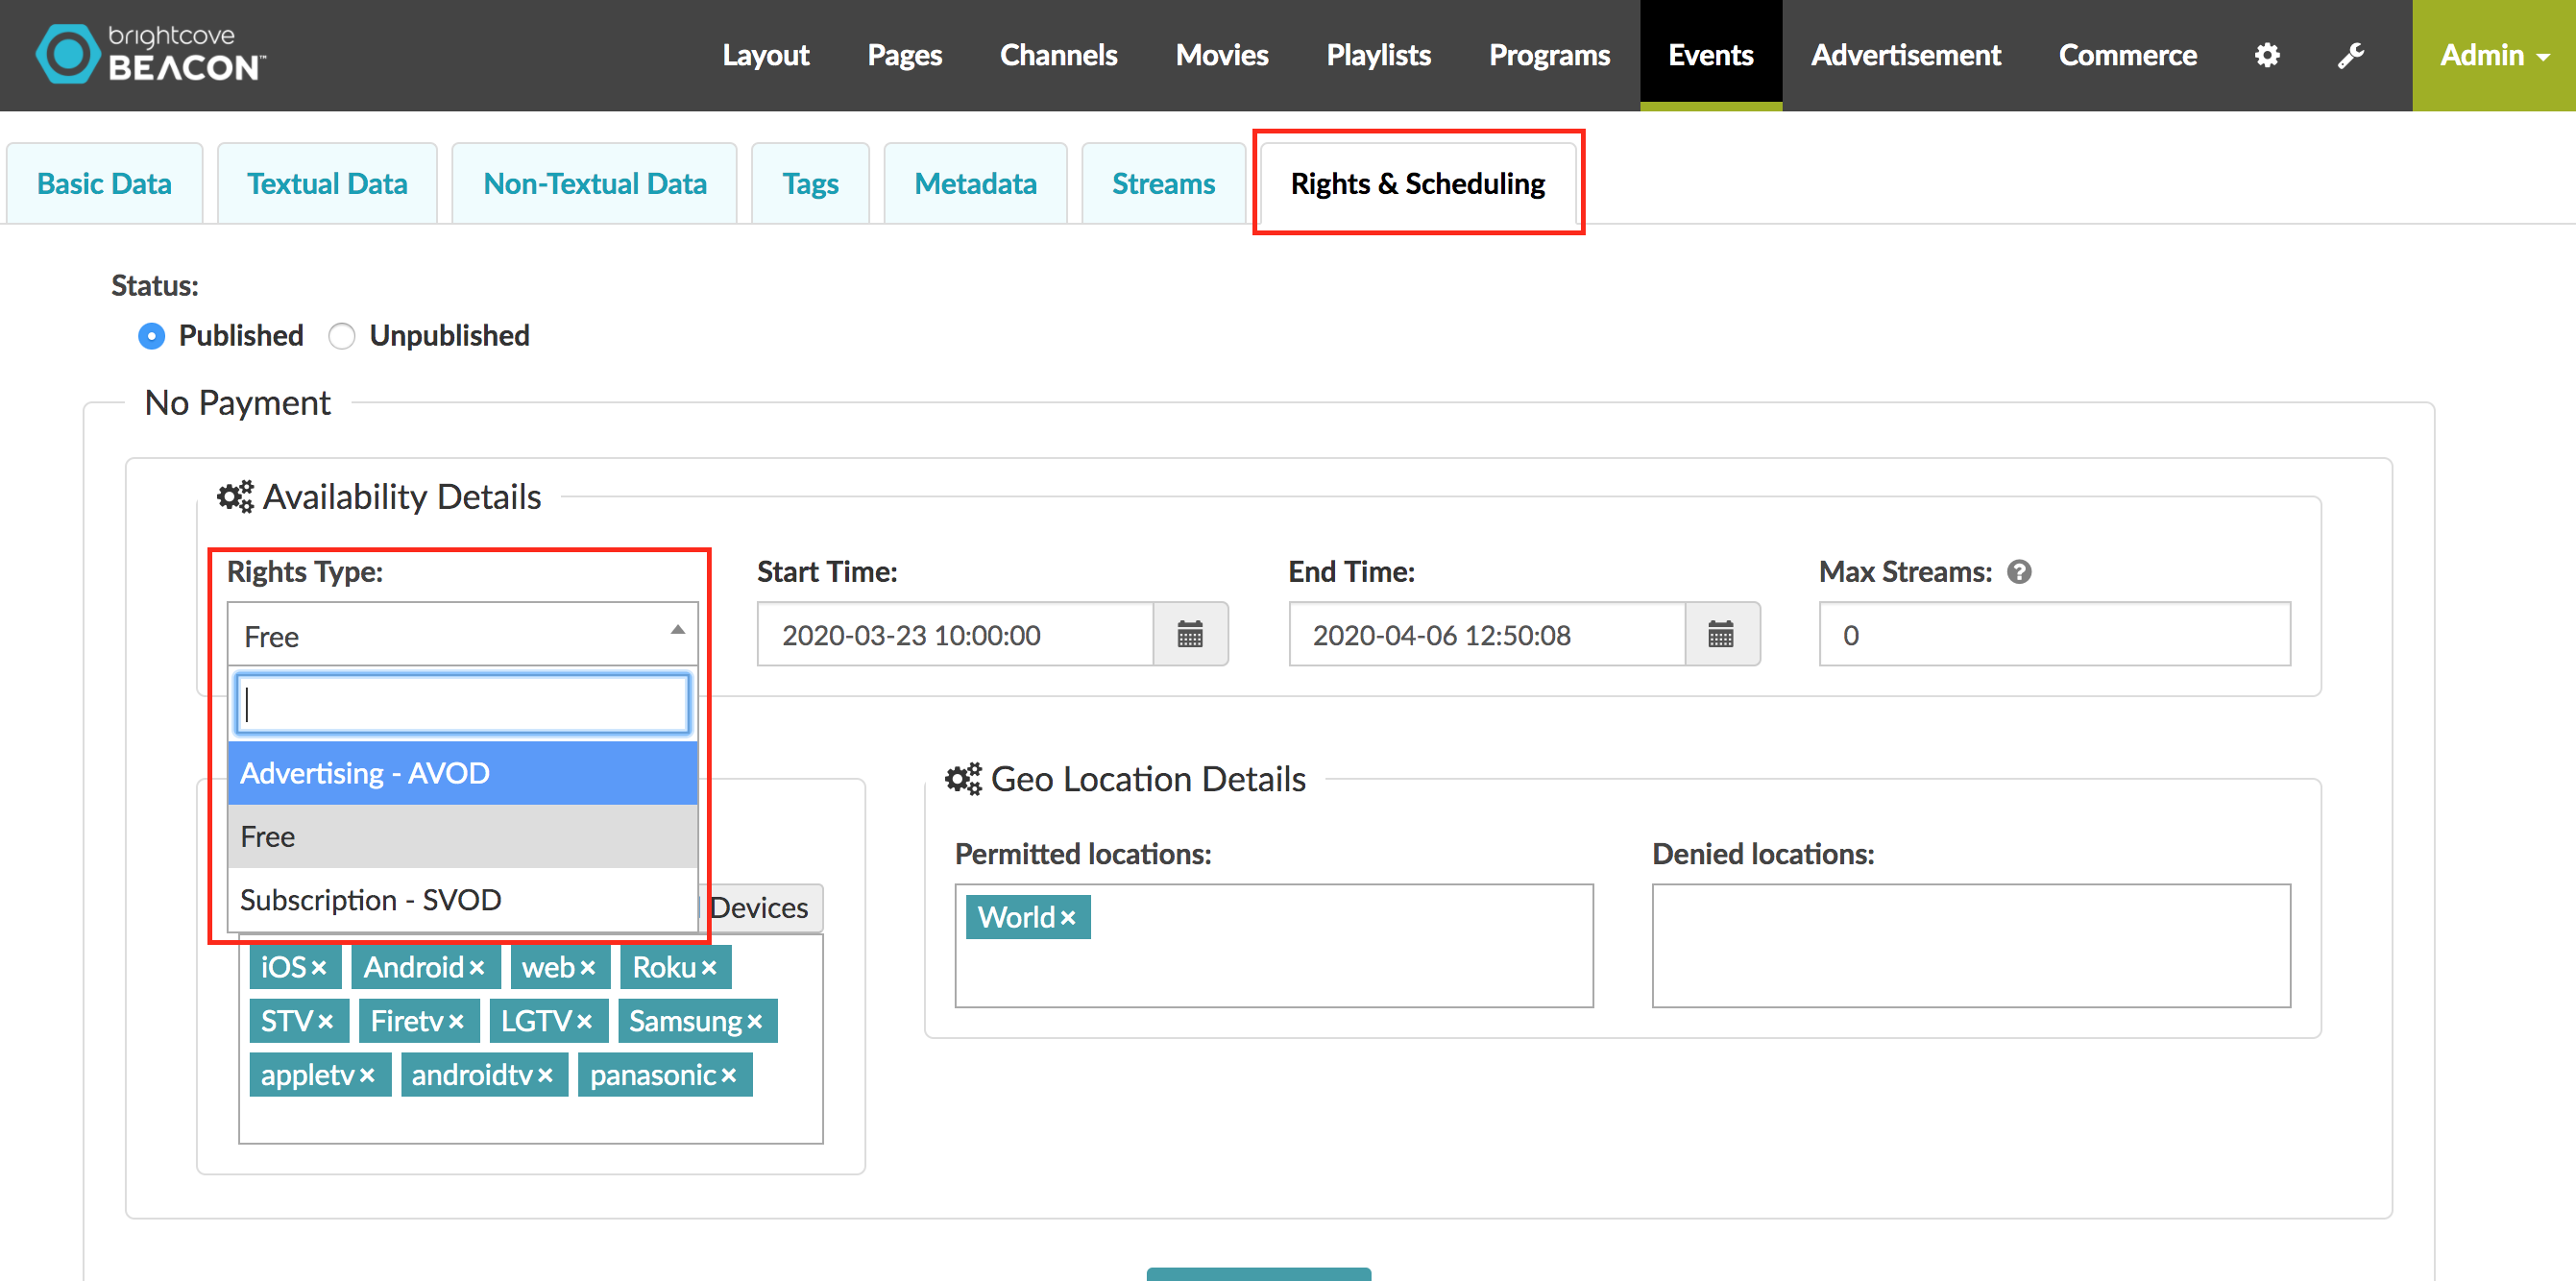
- In you Brightcove Beacon Live Event click the Rights & Scheduling tab.
-
In the Rights Type dropdown menu, select Advertising - AVOD.
-
In the Advertisement Configuration bottom menu, select your previously created advertisement configuration.

- Click the Update Event button.
-
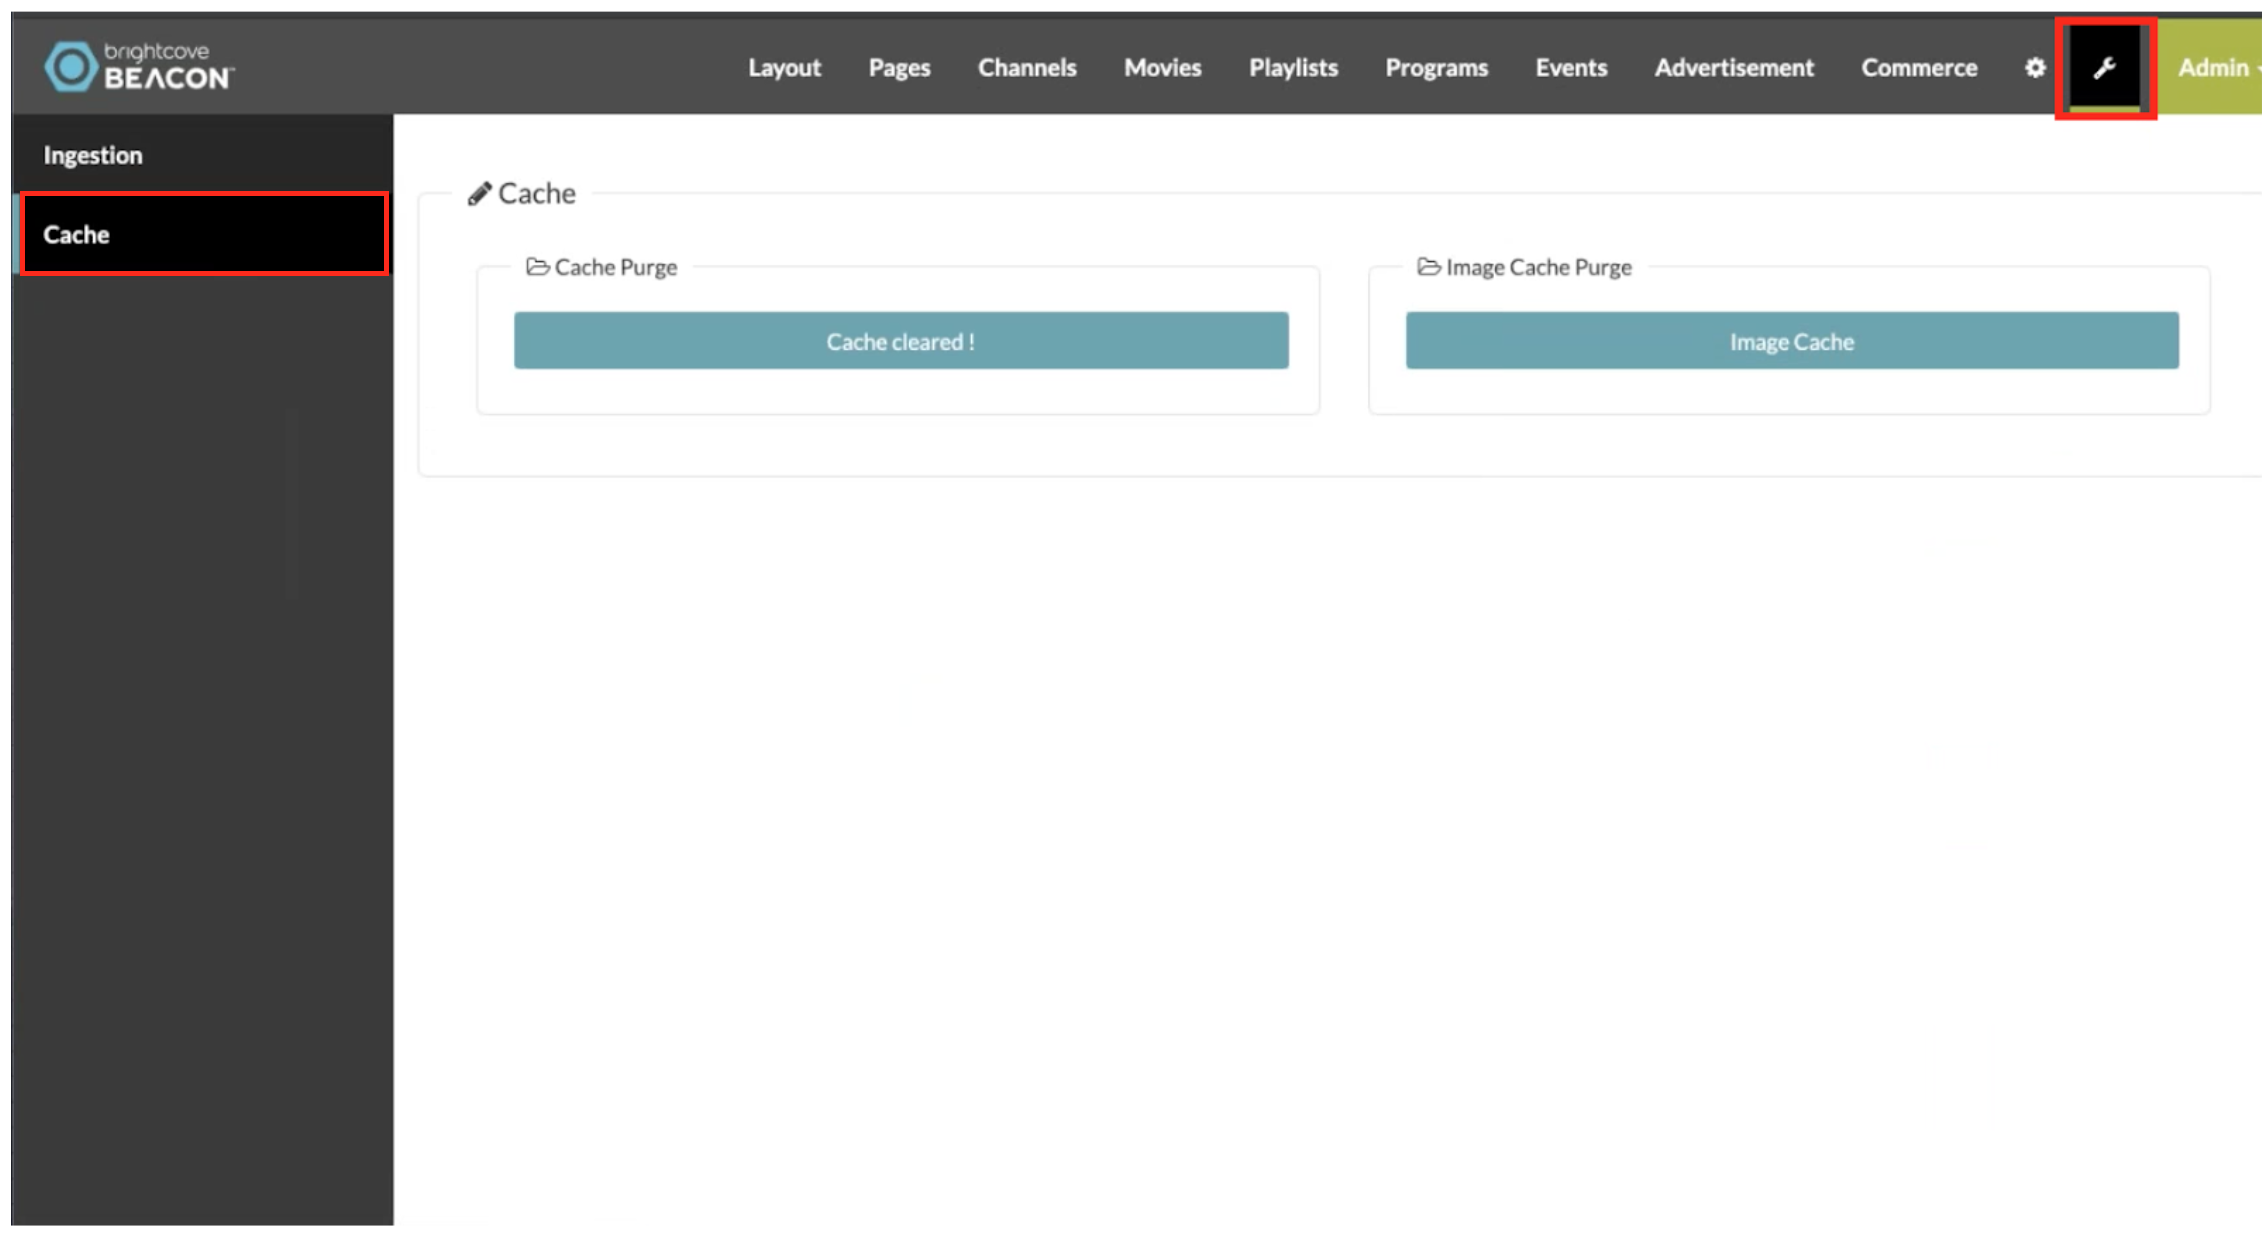
Click on the Tools (wrench) button in the upper right of the screen. Then clear the cache.
-
Open your Brightcove Beacon App and select your event (the event names and pictures on the image are for example purposes only).
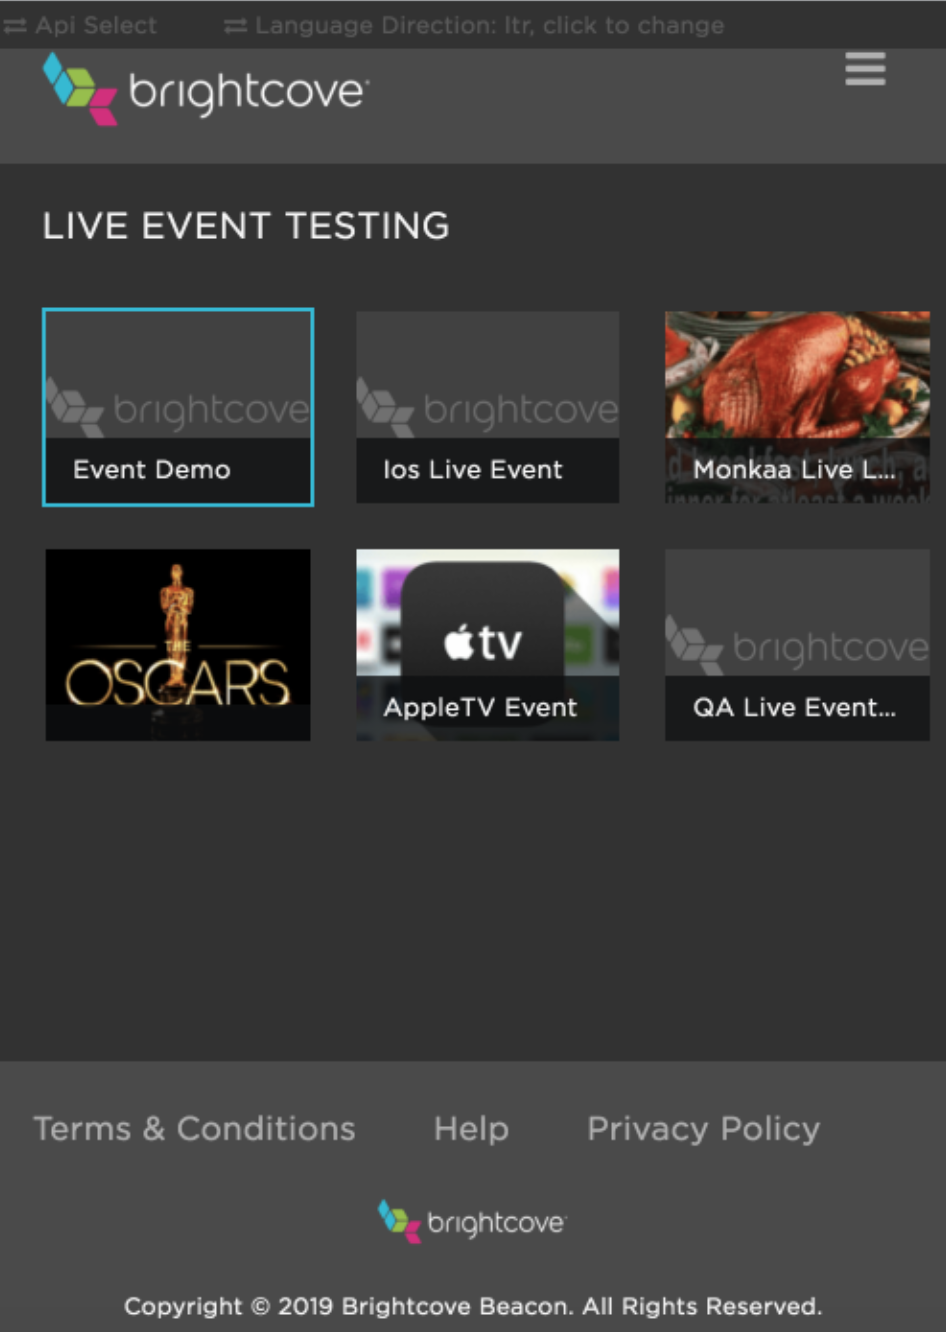
- In your Brightcove Beacon app, click on the Play button. You should now be able to see your Live event streaming, with ads inserted by SSAI from Video Cloud.
Once your event ends, you can save all or part of it as a clip that becomes a video asset in Video Cloud or a playable stream that can be shown in Brightcove Beacon. The Ads of the Live event will not be saved, but the cue points from where the ads were transmitted will be registered so that you can add new ads in a later VOD of your recorded Live event.
For more information on how to create a clip, please see the Creating a Clip from your Live event section from the Streaming a Live Event document.